Master Bathroom Remodel in Highlands Ranch — Walk-In Shower & Garden Tub
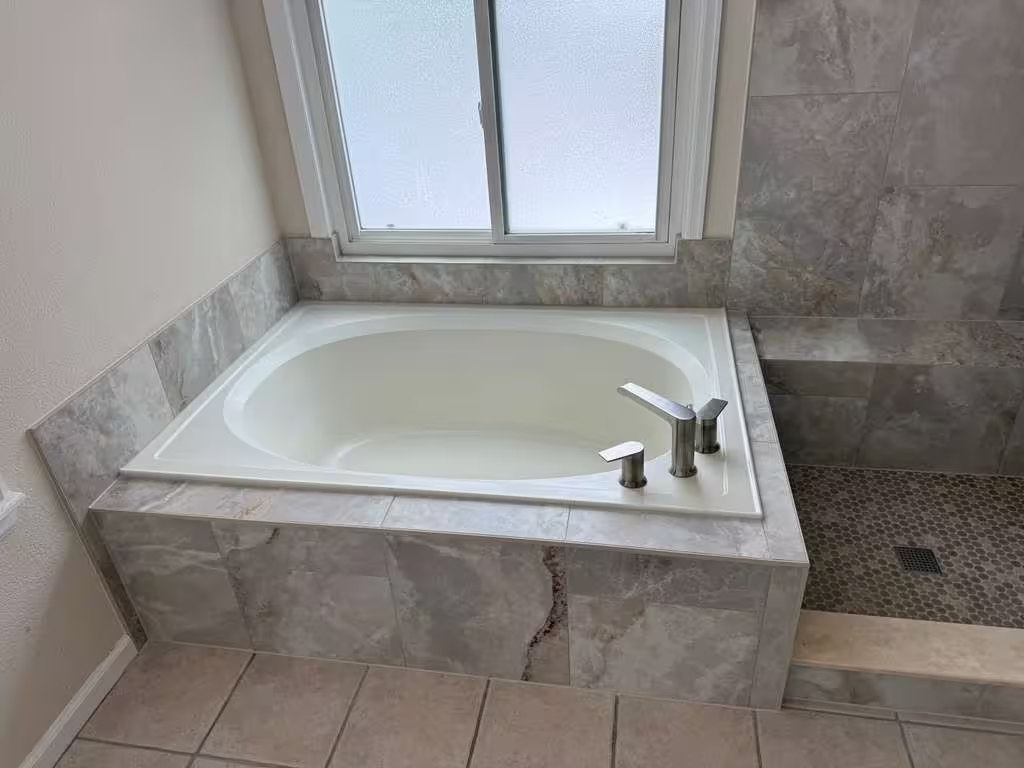
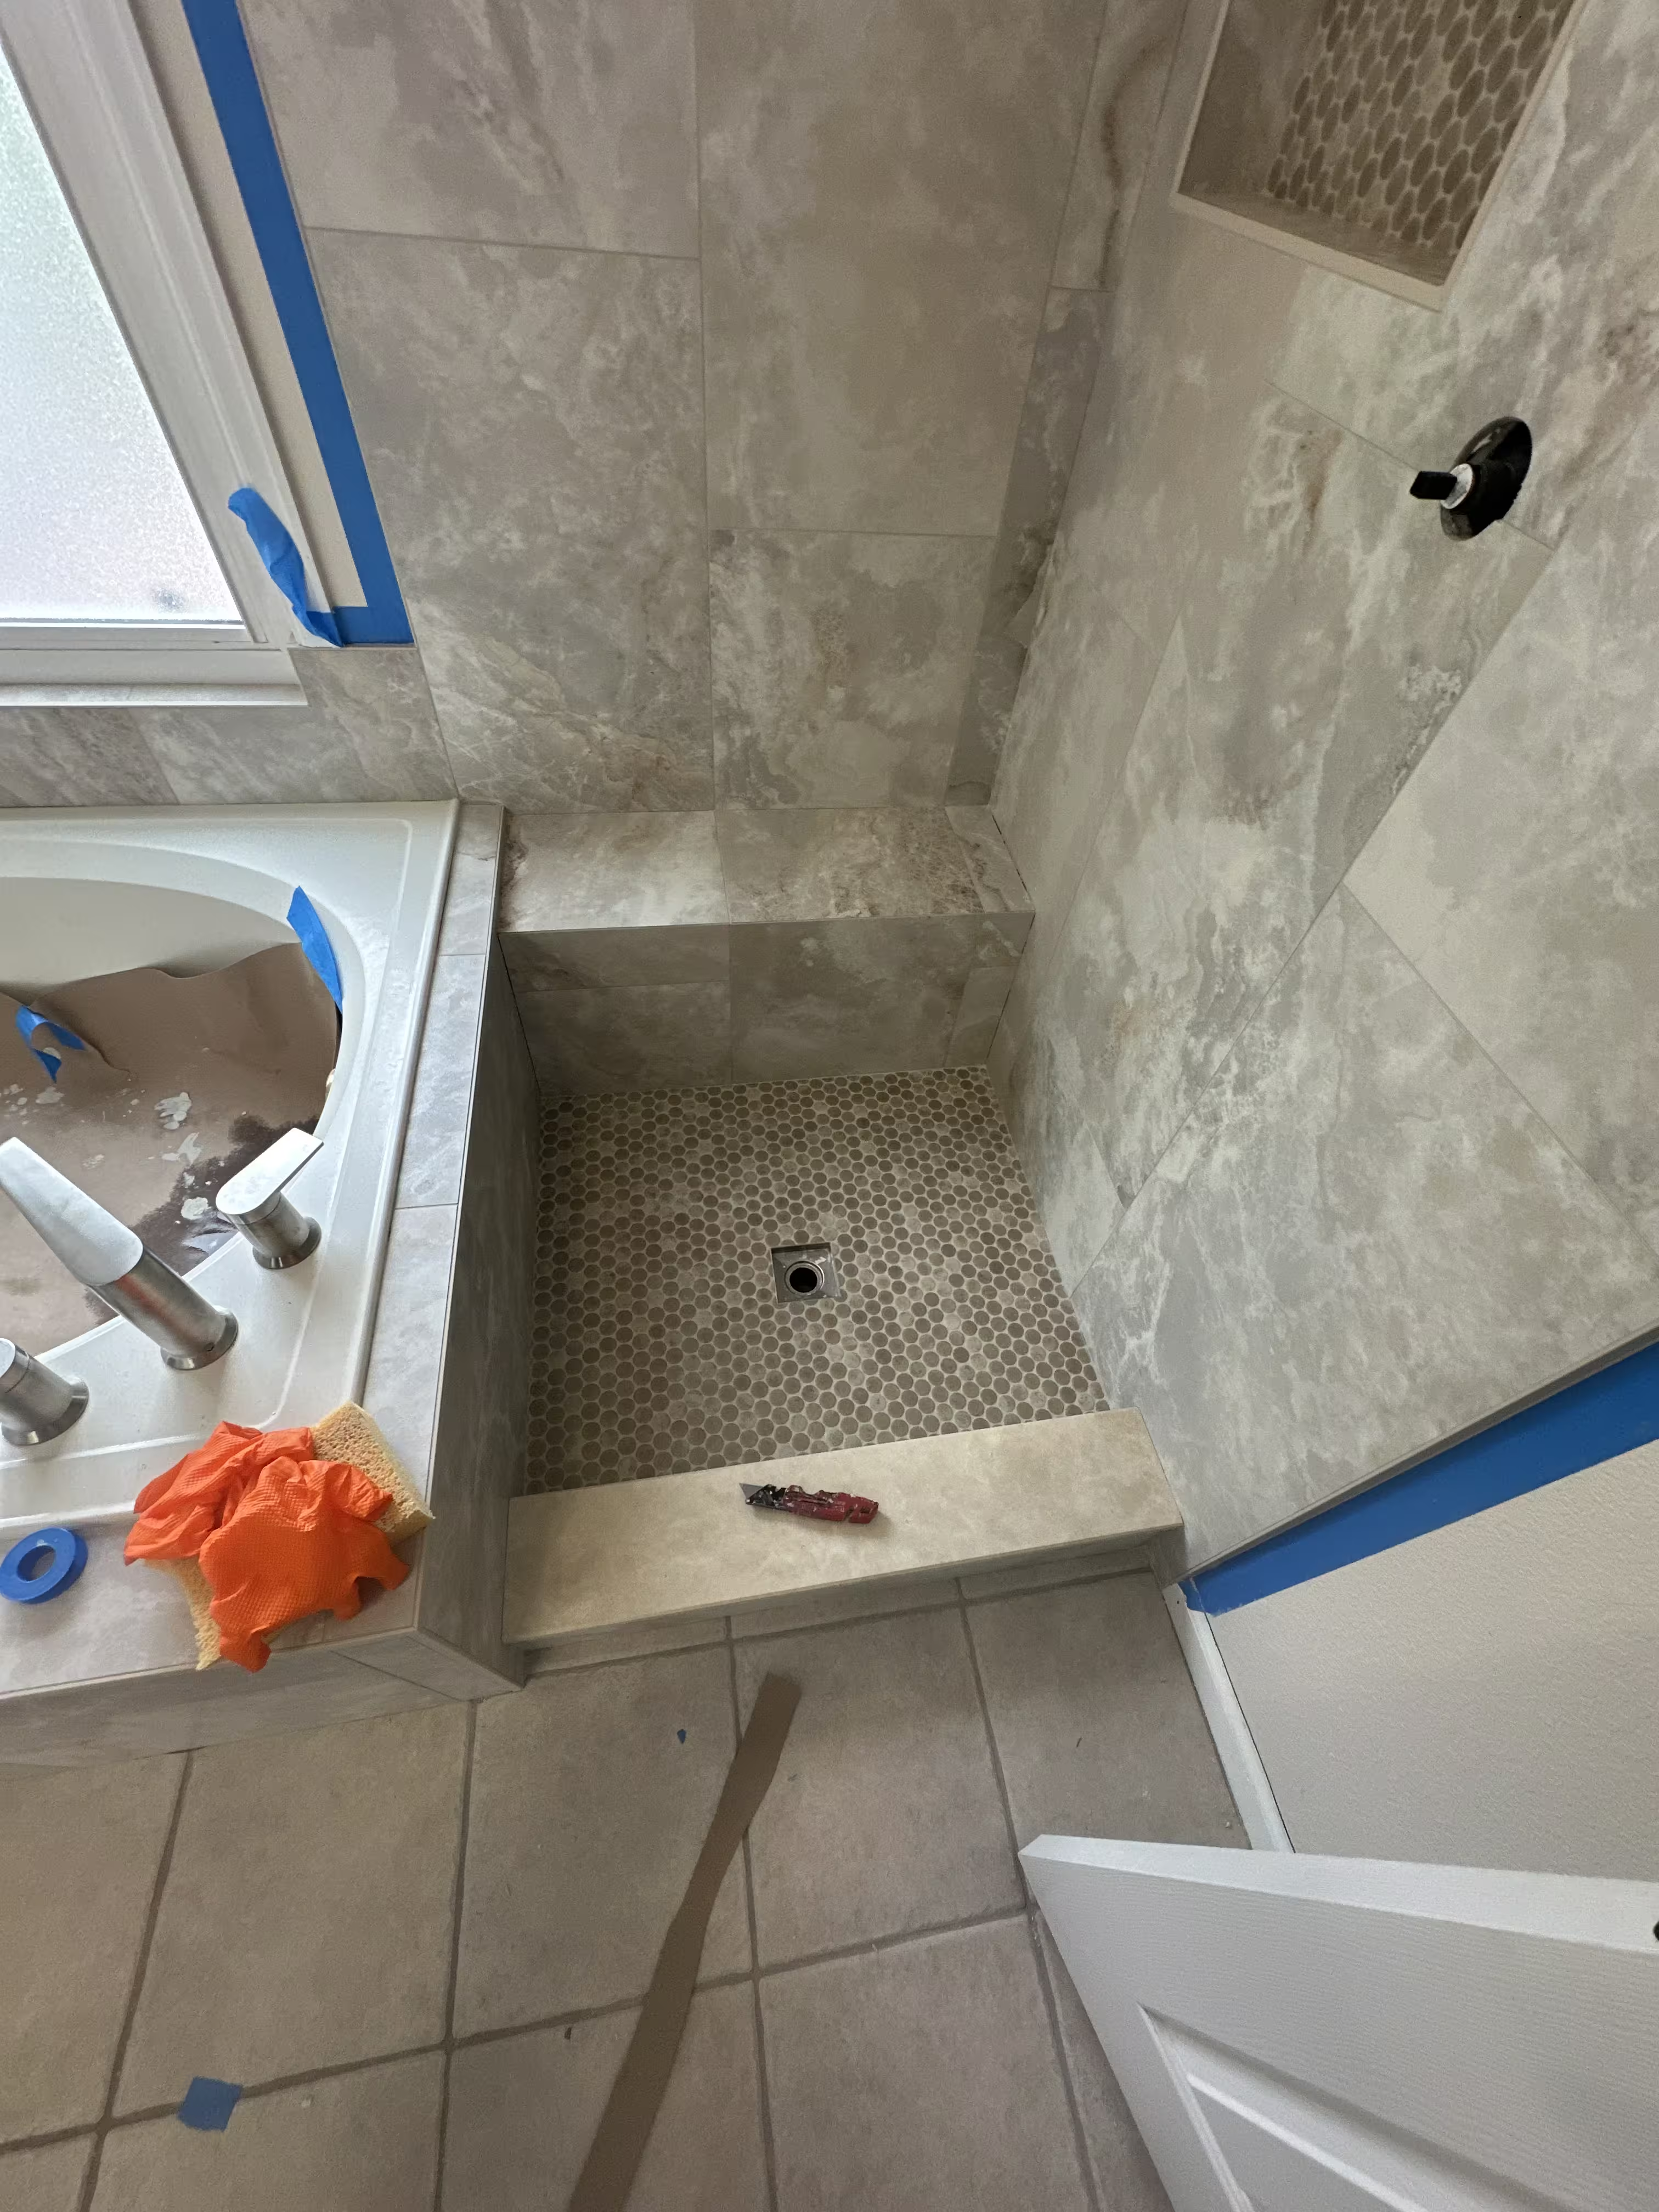
A complete master bathroom remodel in Highlands Ranch: the dated shower and tub were rebuilt as a marble-look walk-in shower with bench and niche, a garden tub set beneath the window, and new floor tile — one palette across the whole room.
Project Overview
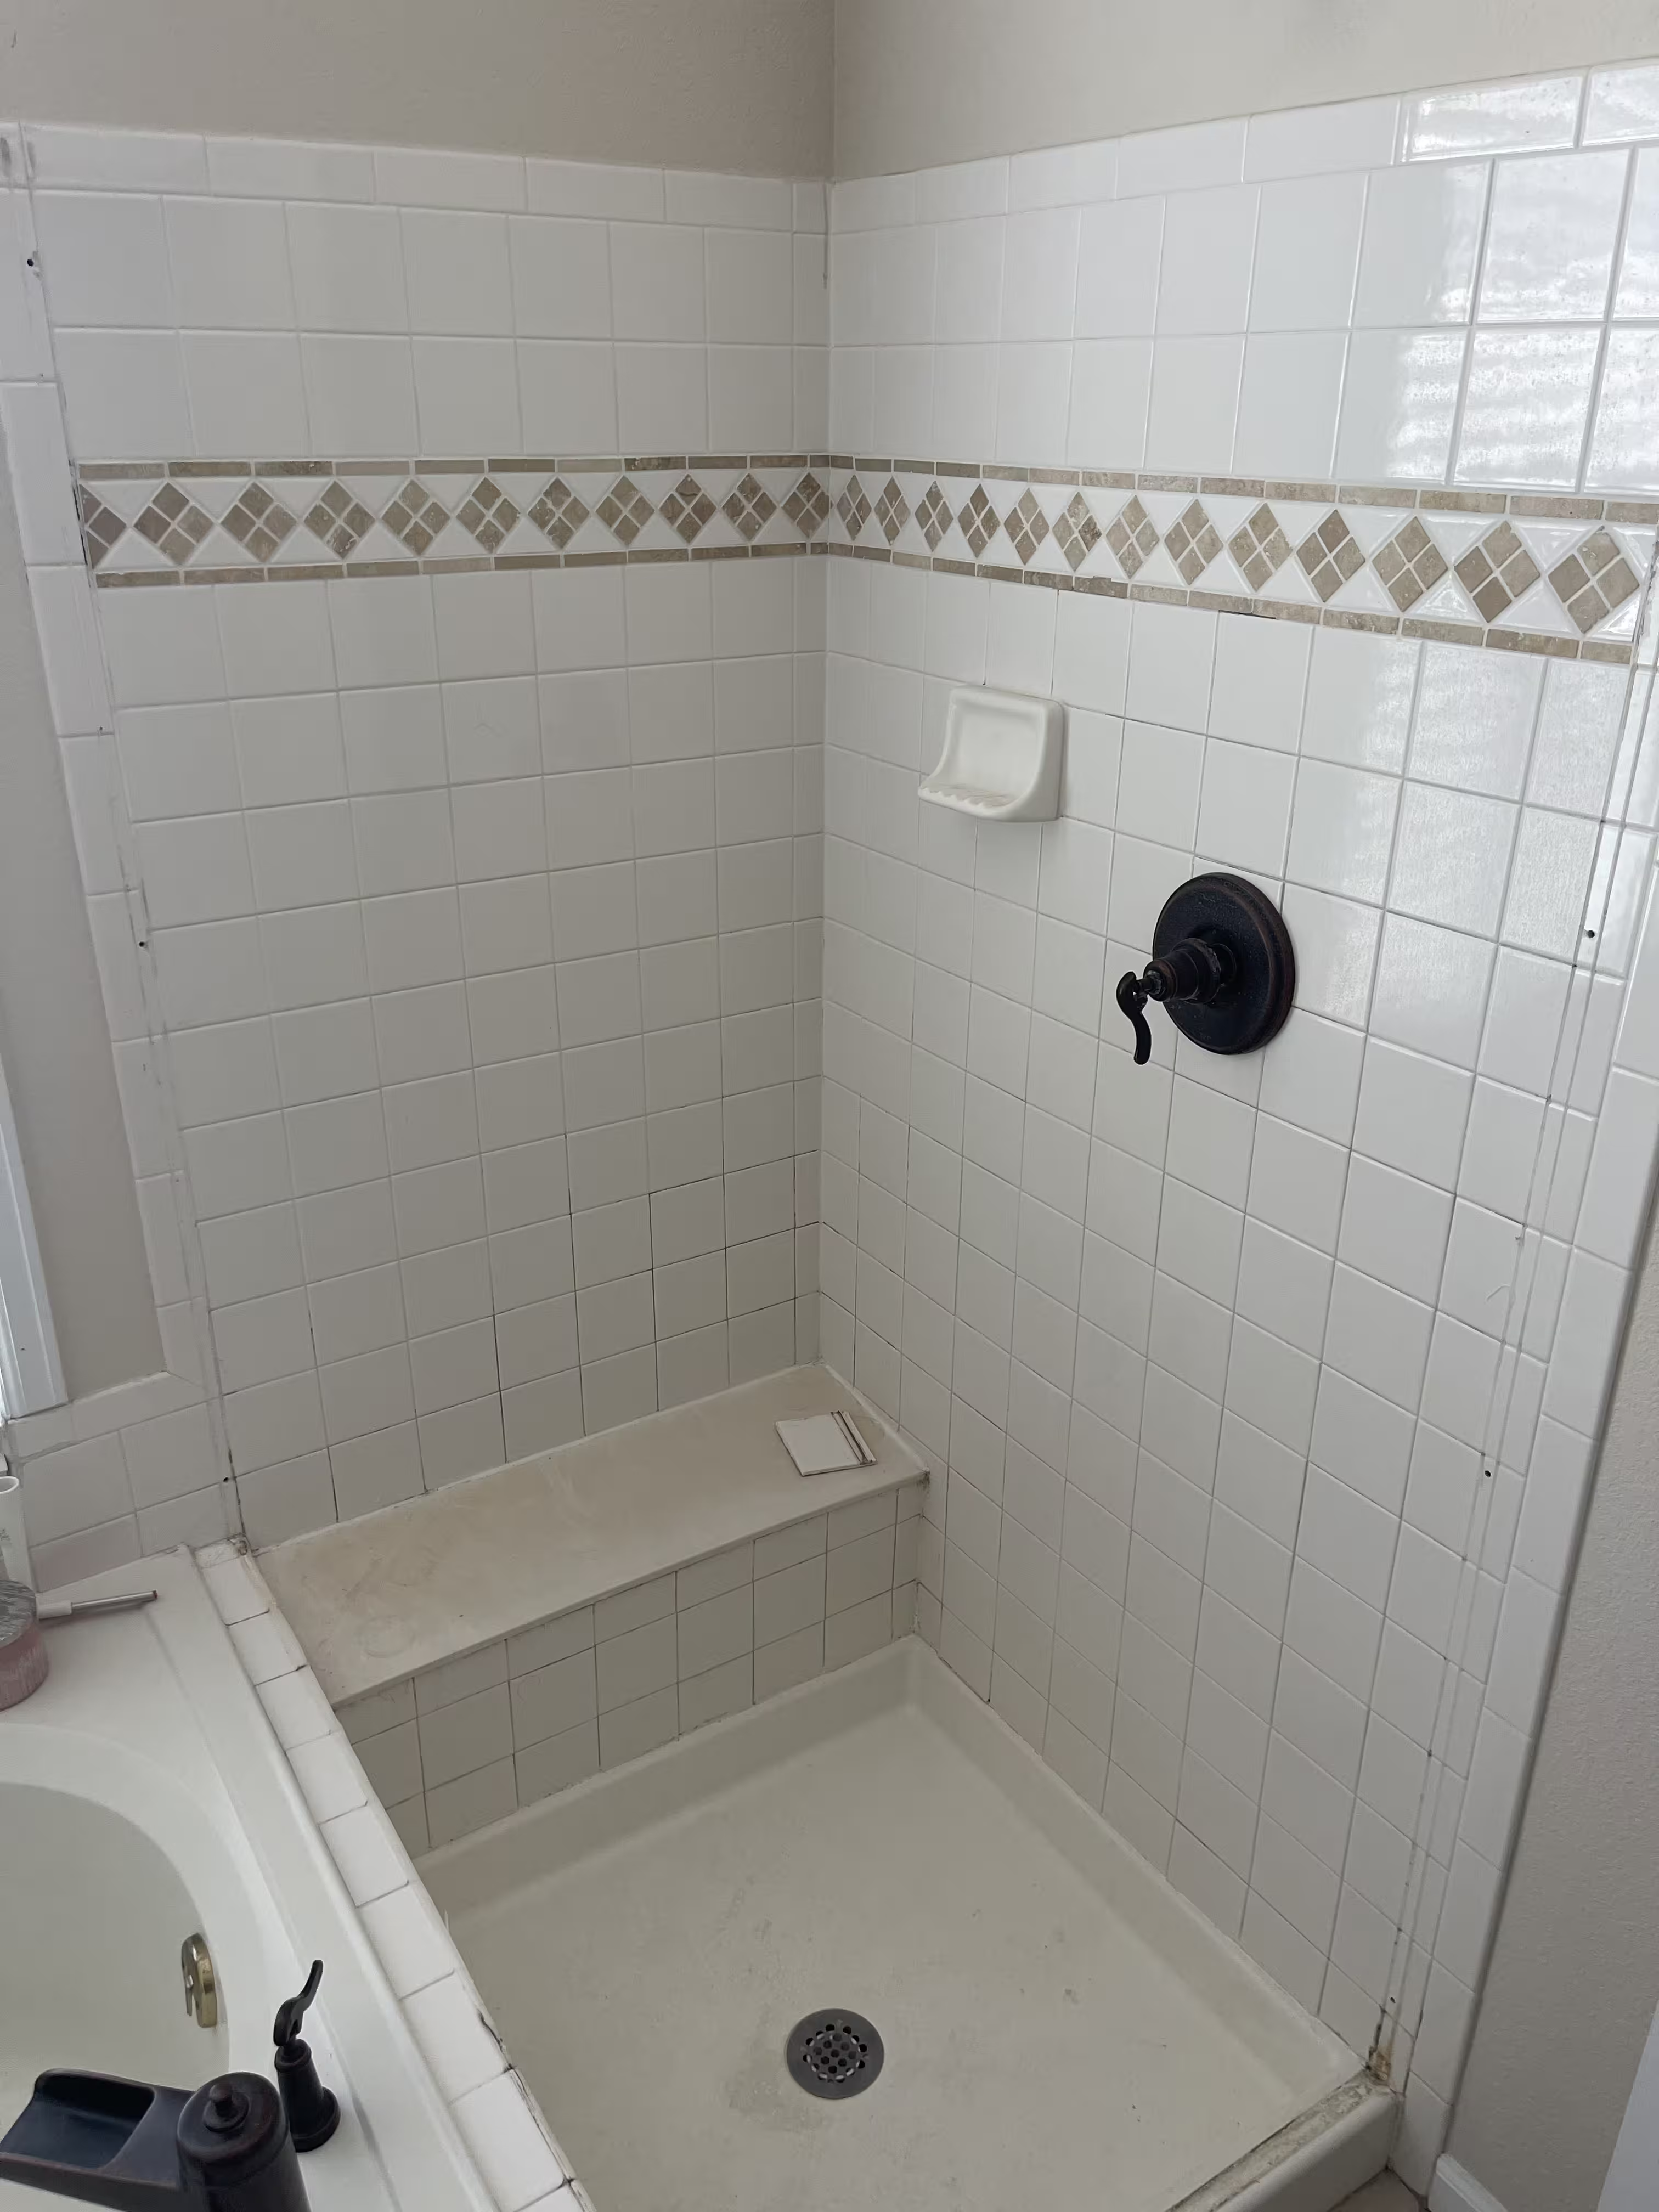
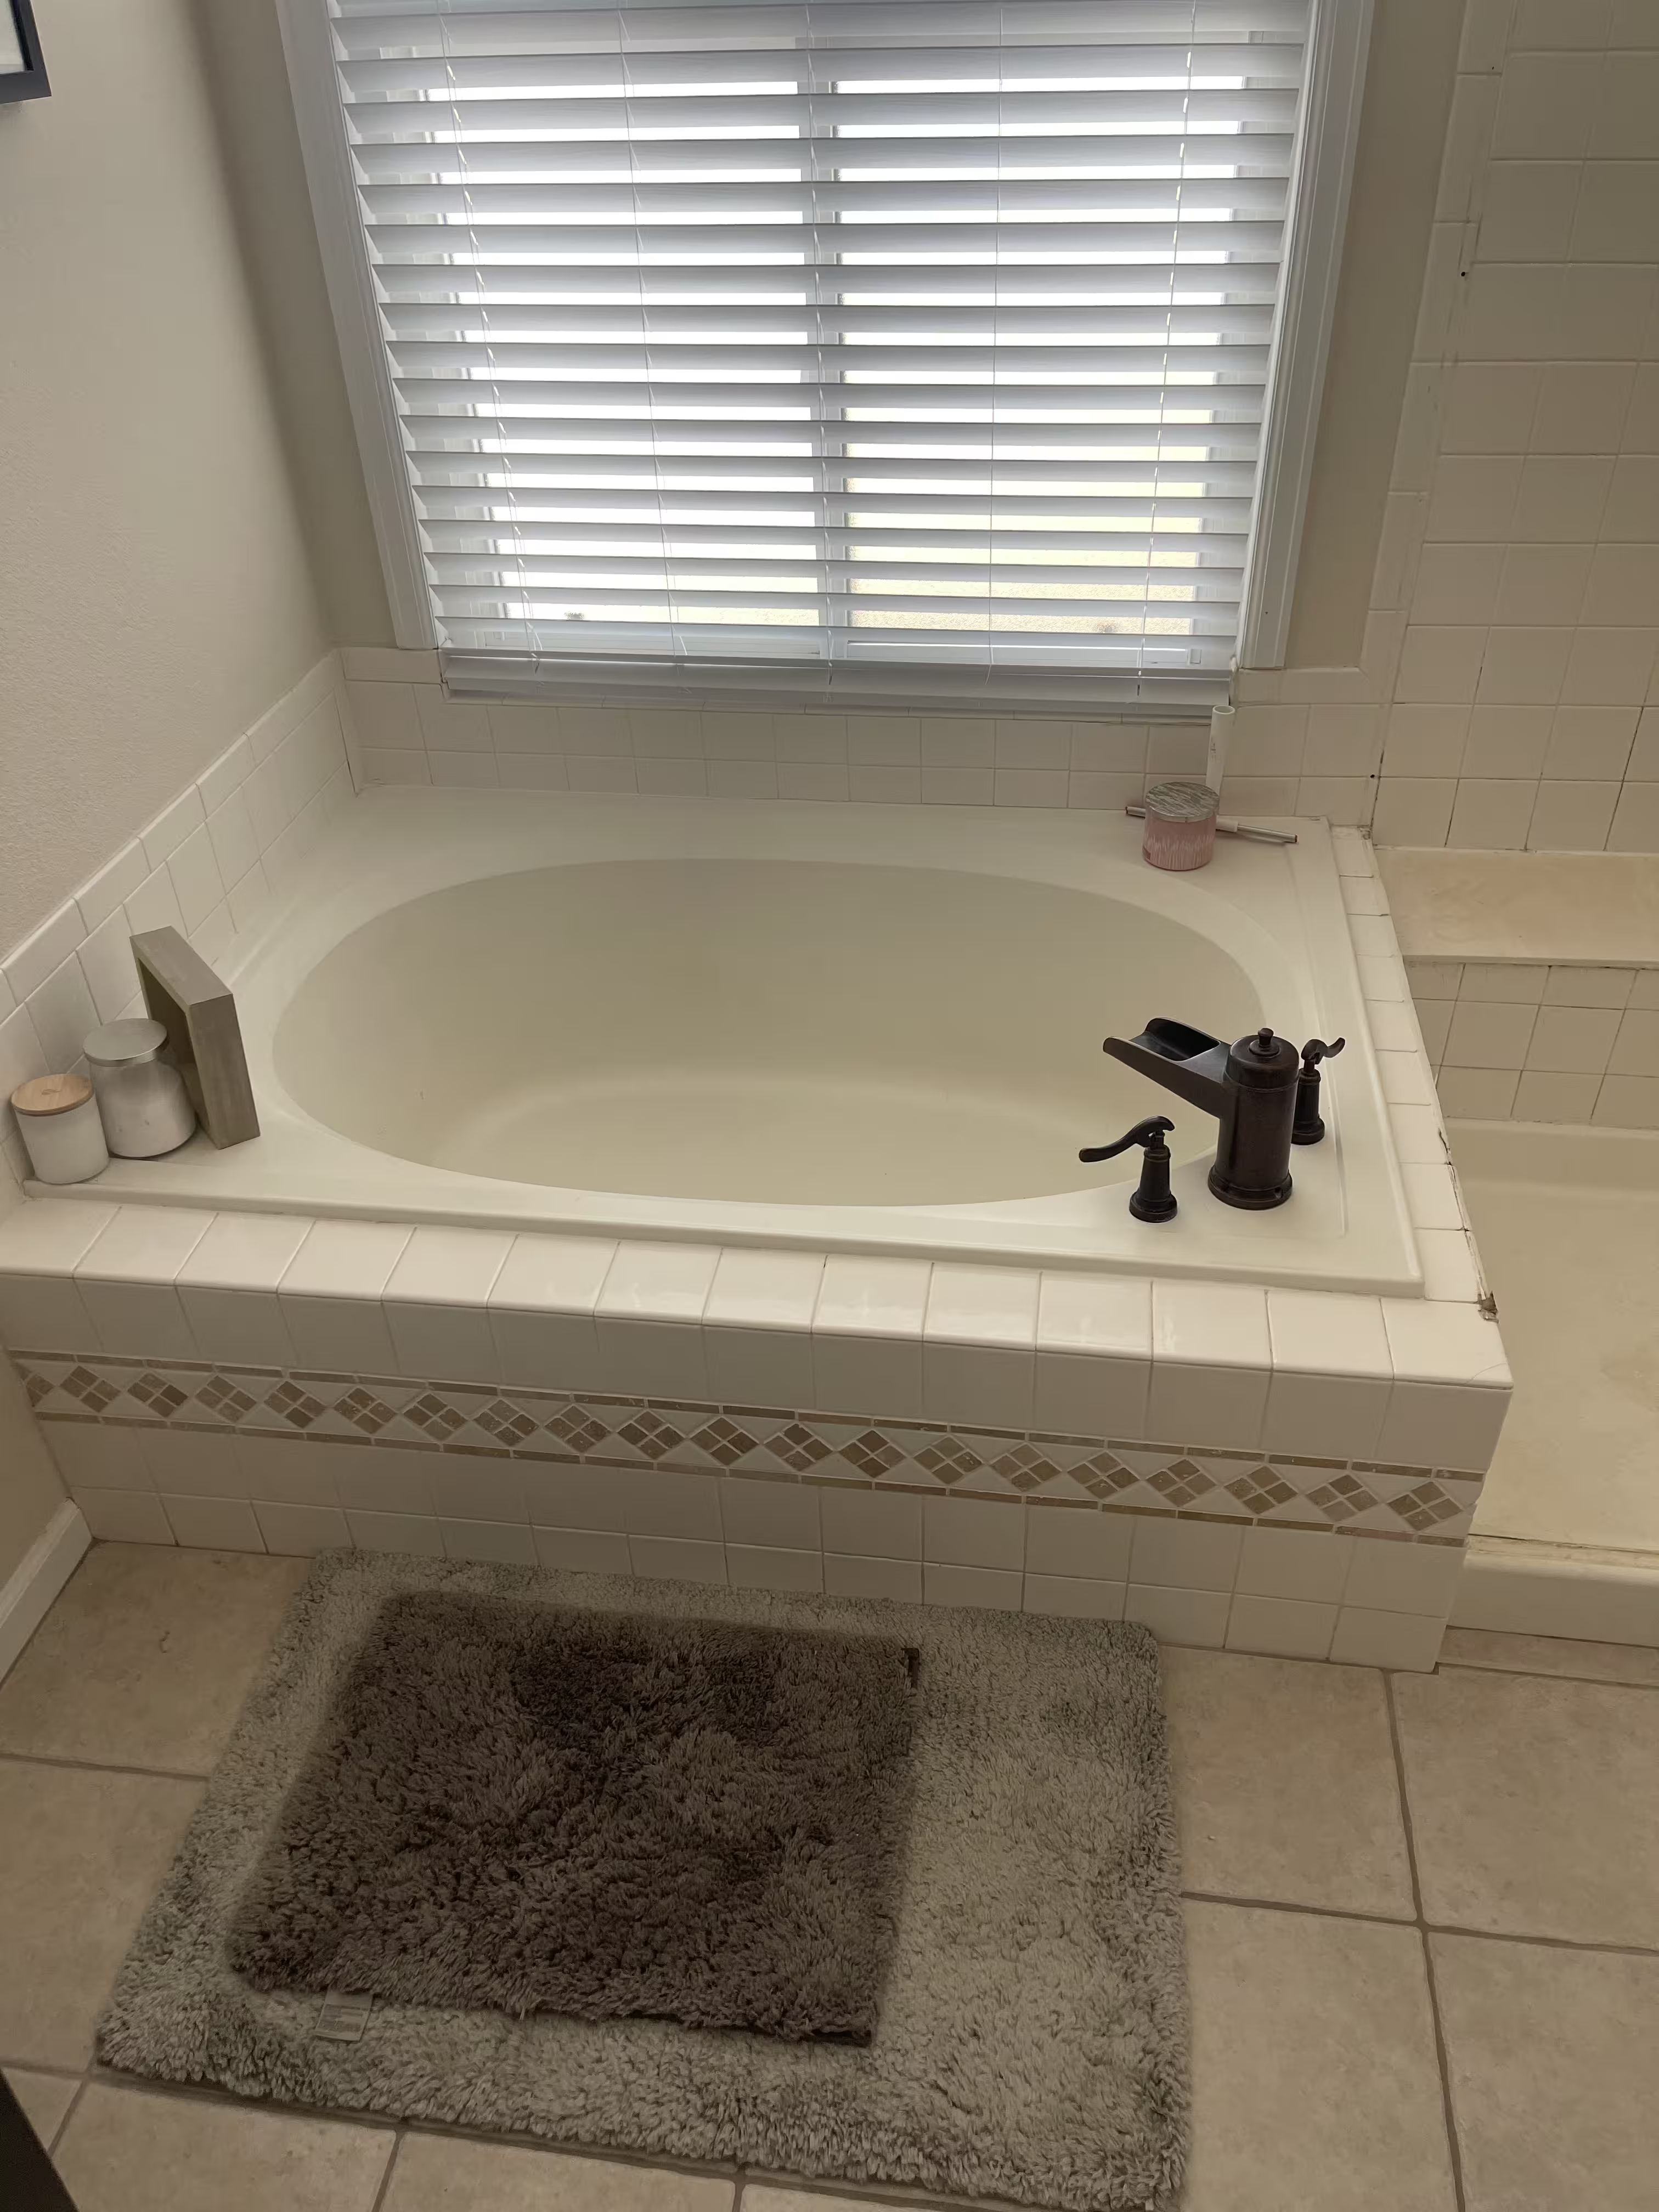
This master bathroom remodel in Highlands Ranch started with good bones and dated surfaces. The room already had the layout most homeowners ask us for — a separate shower stall and a garden tub positioned by the window — but every finish was original to the house: small white 4x4 tile with a tan diamond accent band, an aging drop-in tub, and oil-rubbed bronze fixtures that had seen better days. The owners did not want to move walls. They wanted the same footprint rebuilt properly, with modern tile and waterproofing behind it.
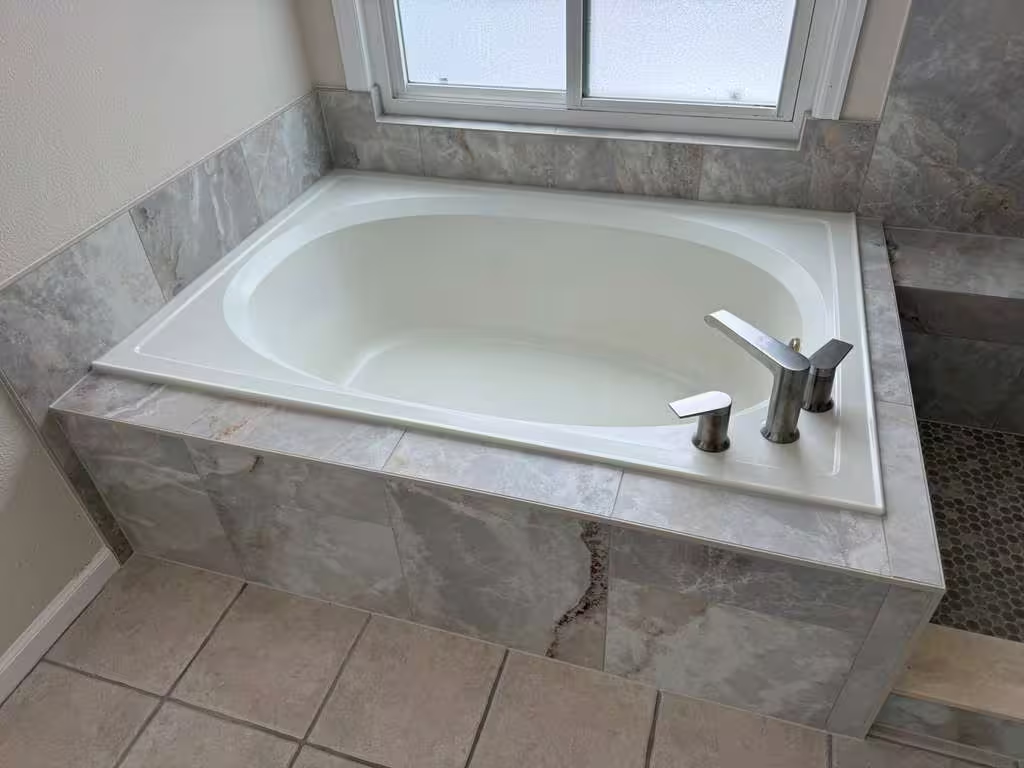
That is what separates a master bath from a hall bath project: there are two wet areas instead of one, and they sit side by side, so they have to be designed and built as a single composition. We rebuilt the shower from the drain up — mortar-bed pan, cement board, framed bench and storage niche, large-format marble-look porcelain walls, and a penny-round mosaic floor. The shower construction follows the same methods we use across our shower remodeling in Highlands Ranch work, then extends outward: the new garden tub was set beneath the window, and its deck and apron were tiled in the same marble-look porcelain so the tub and shower read as one continuous installation.
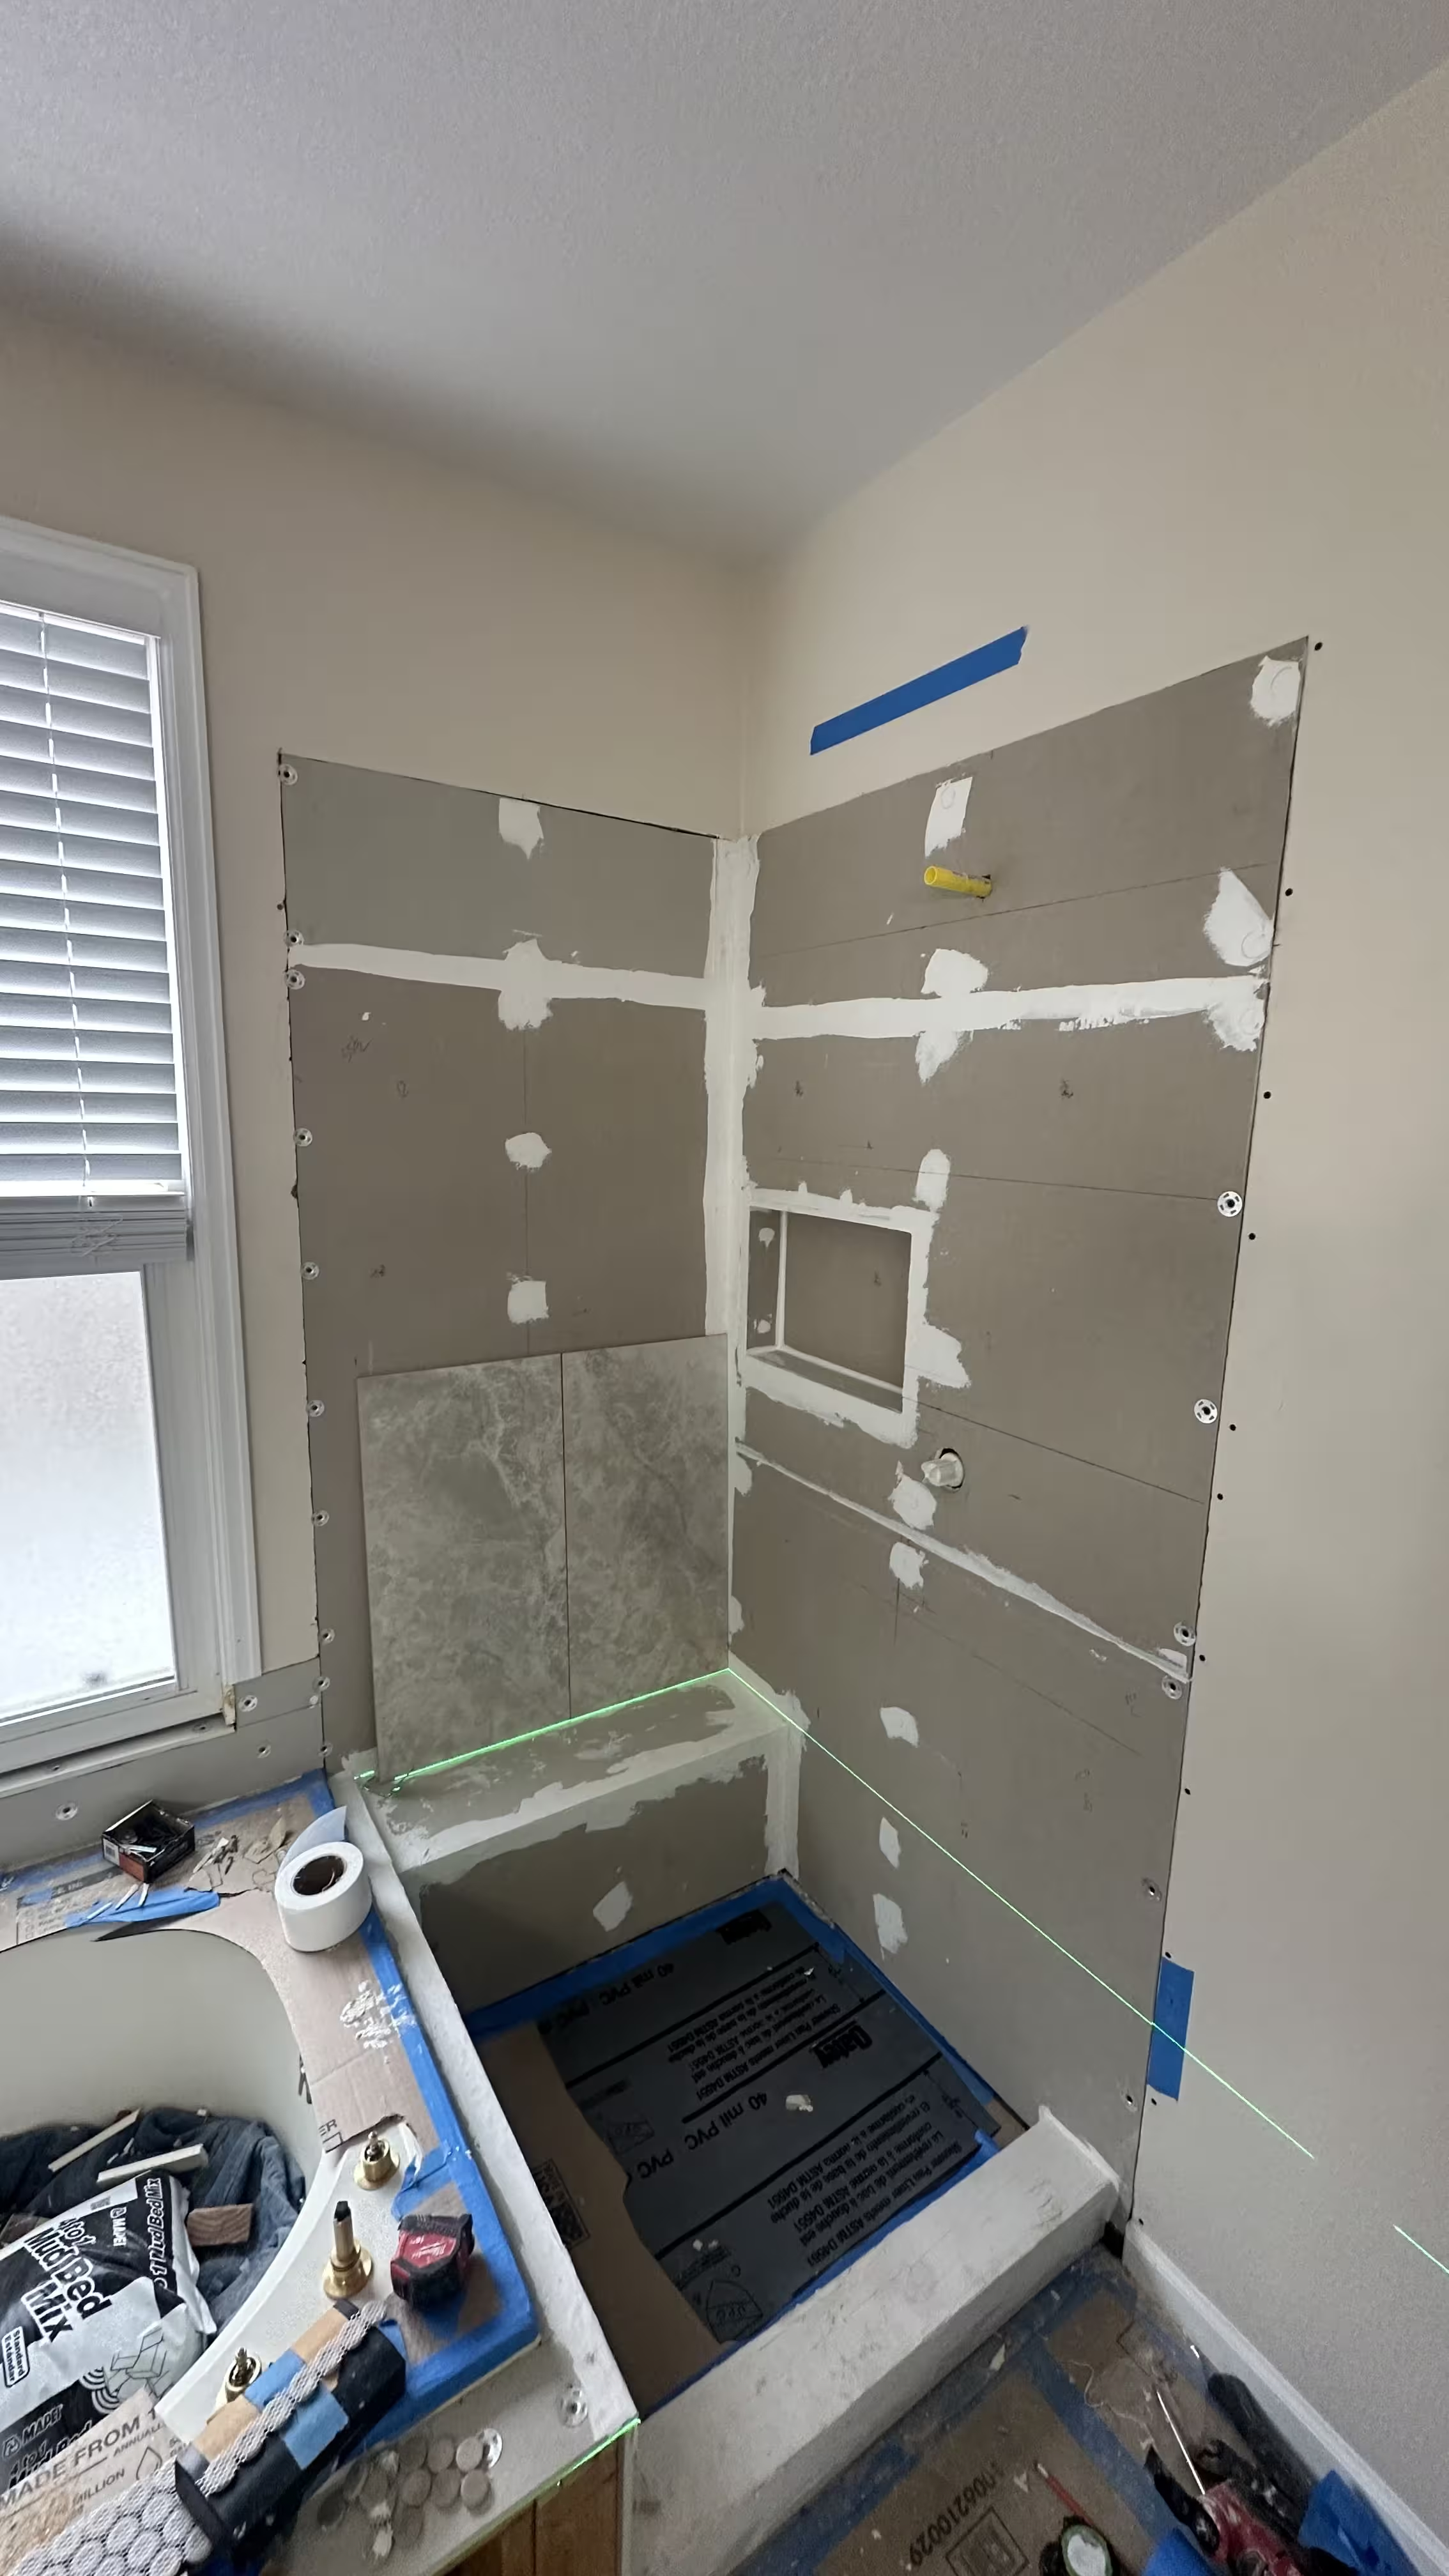
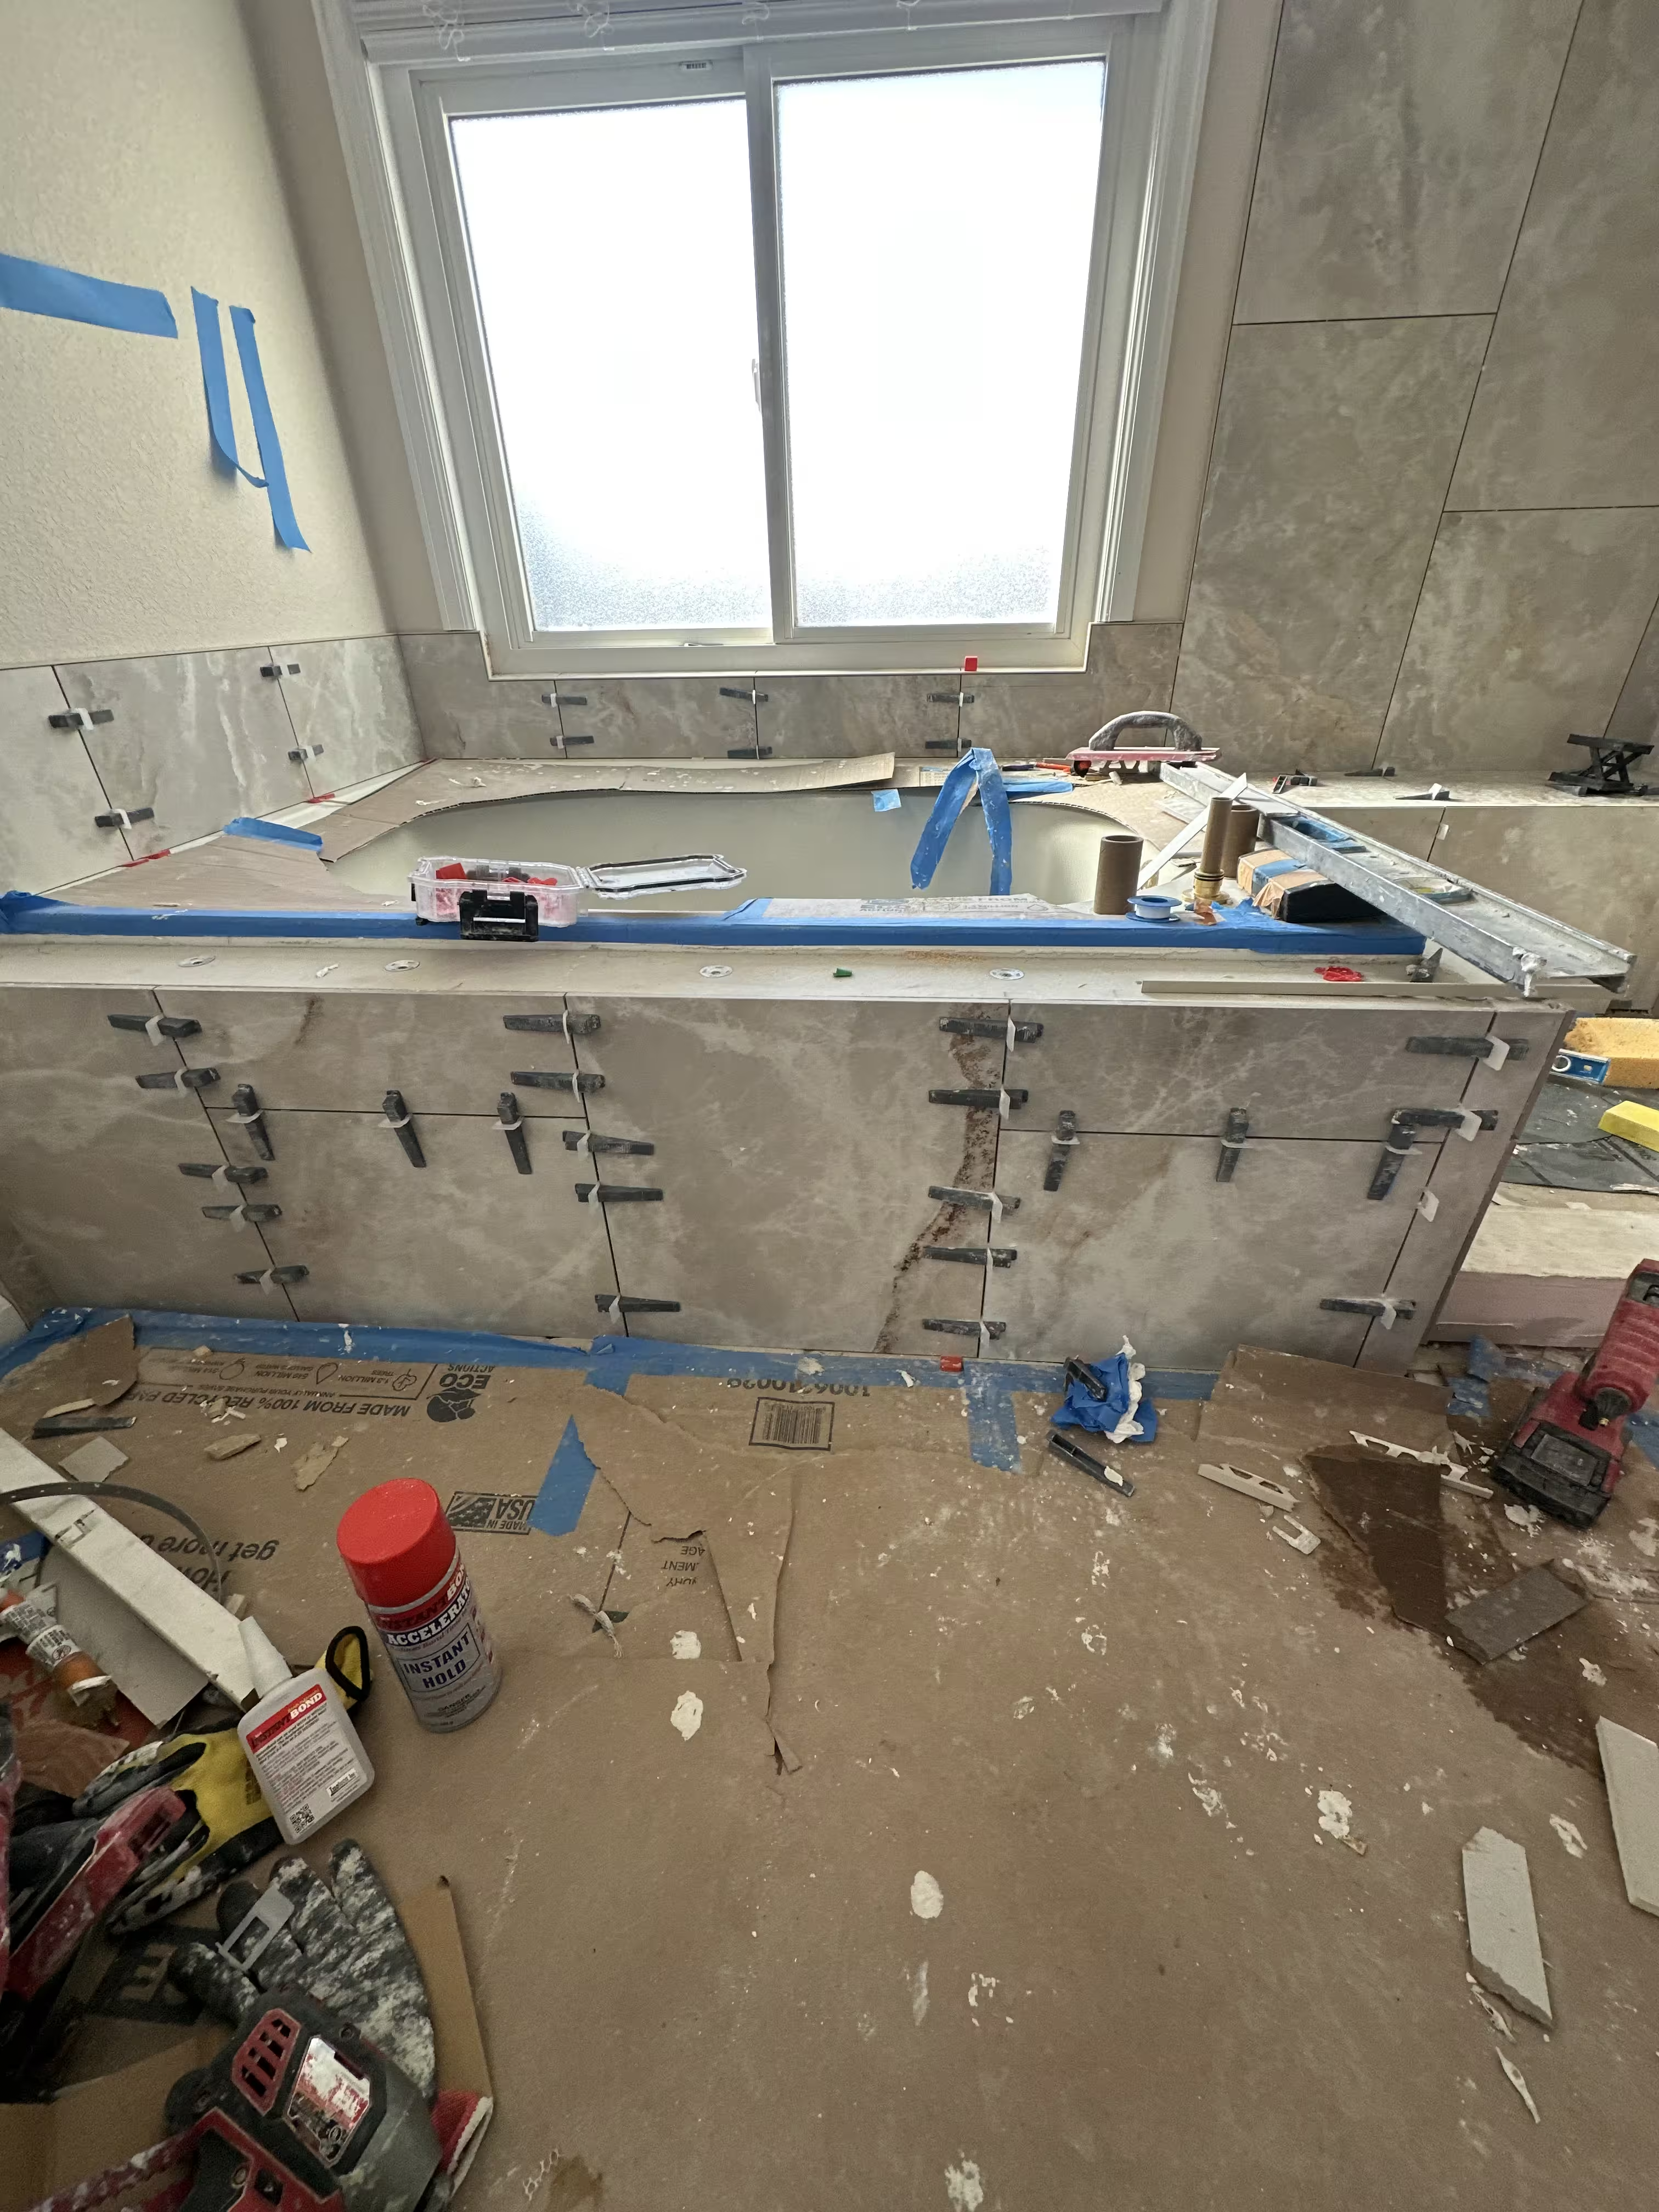
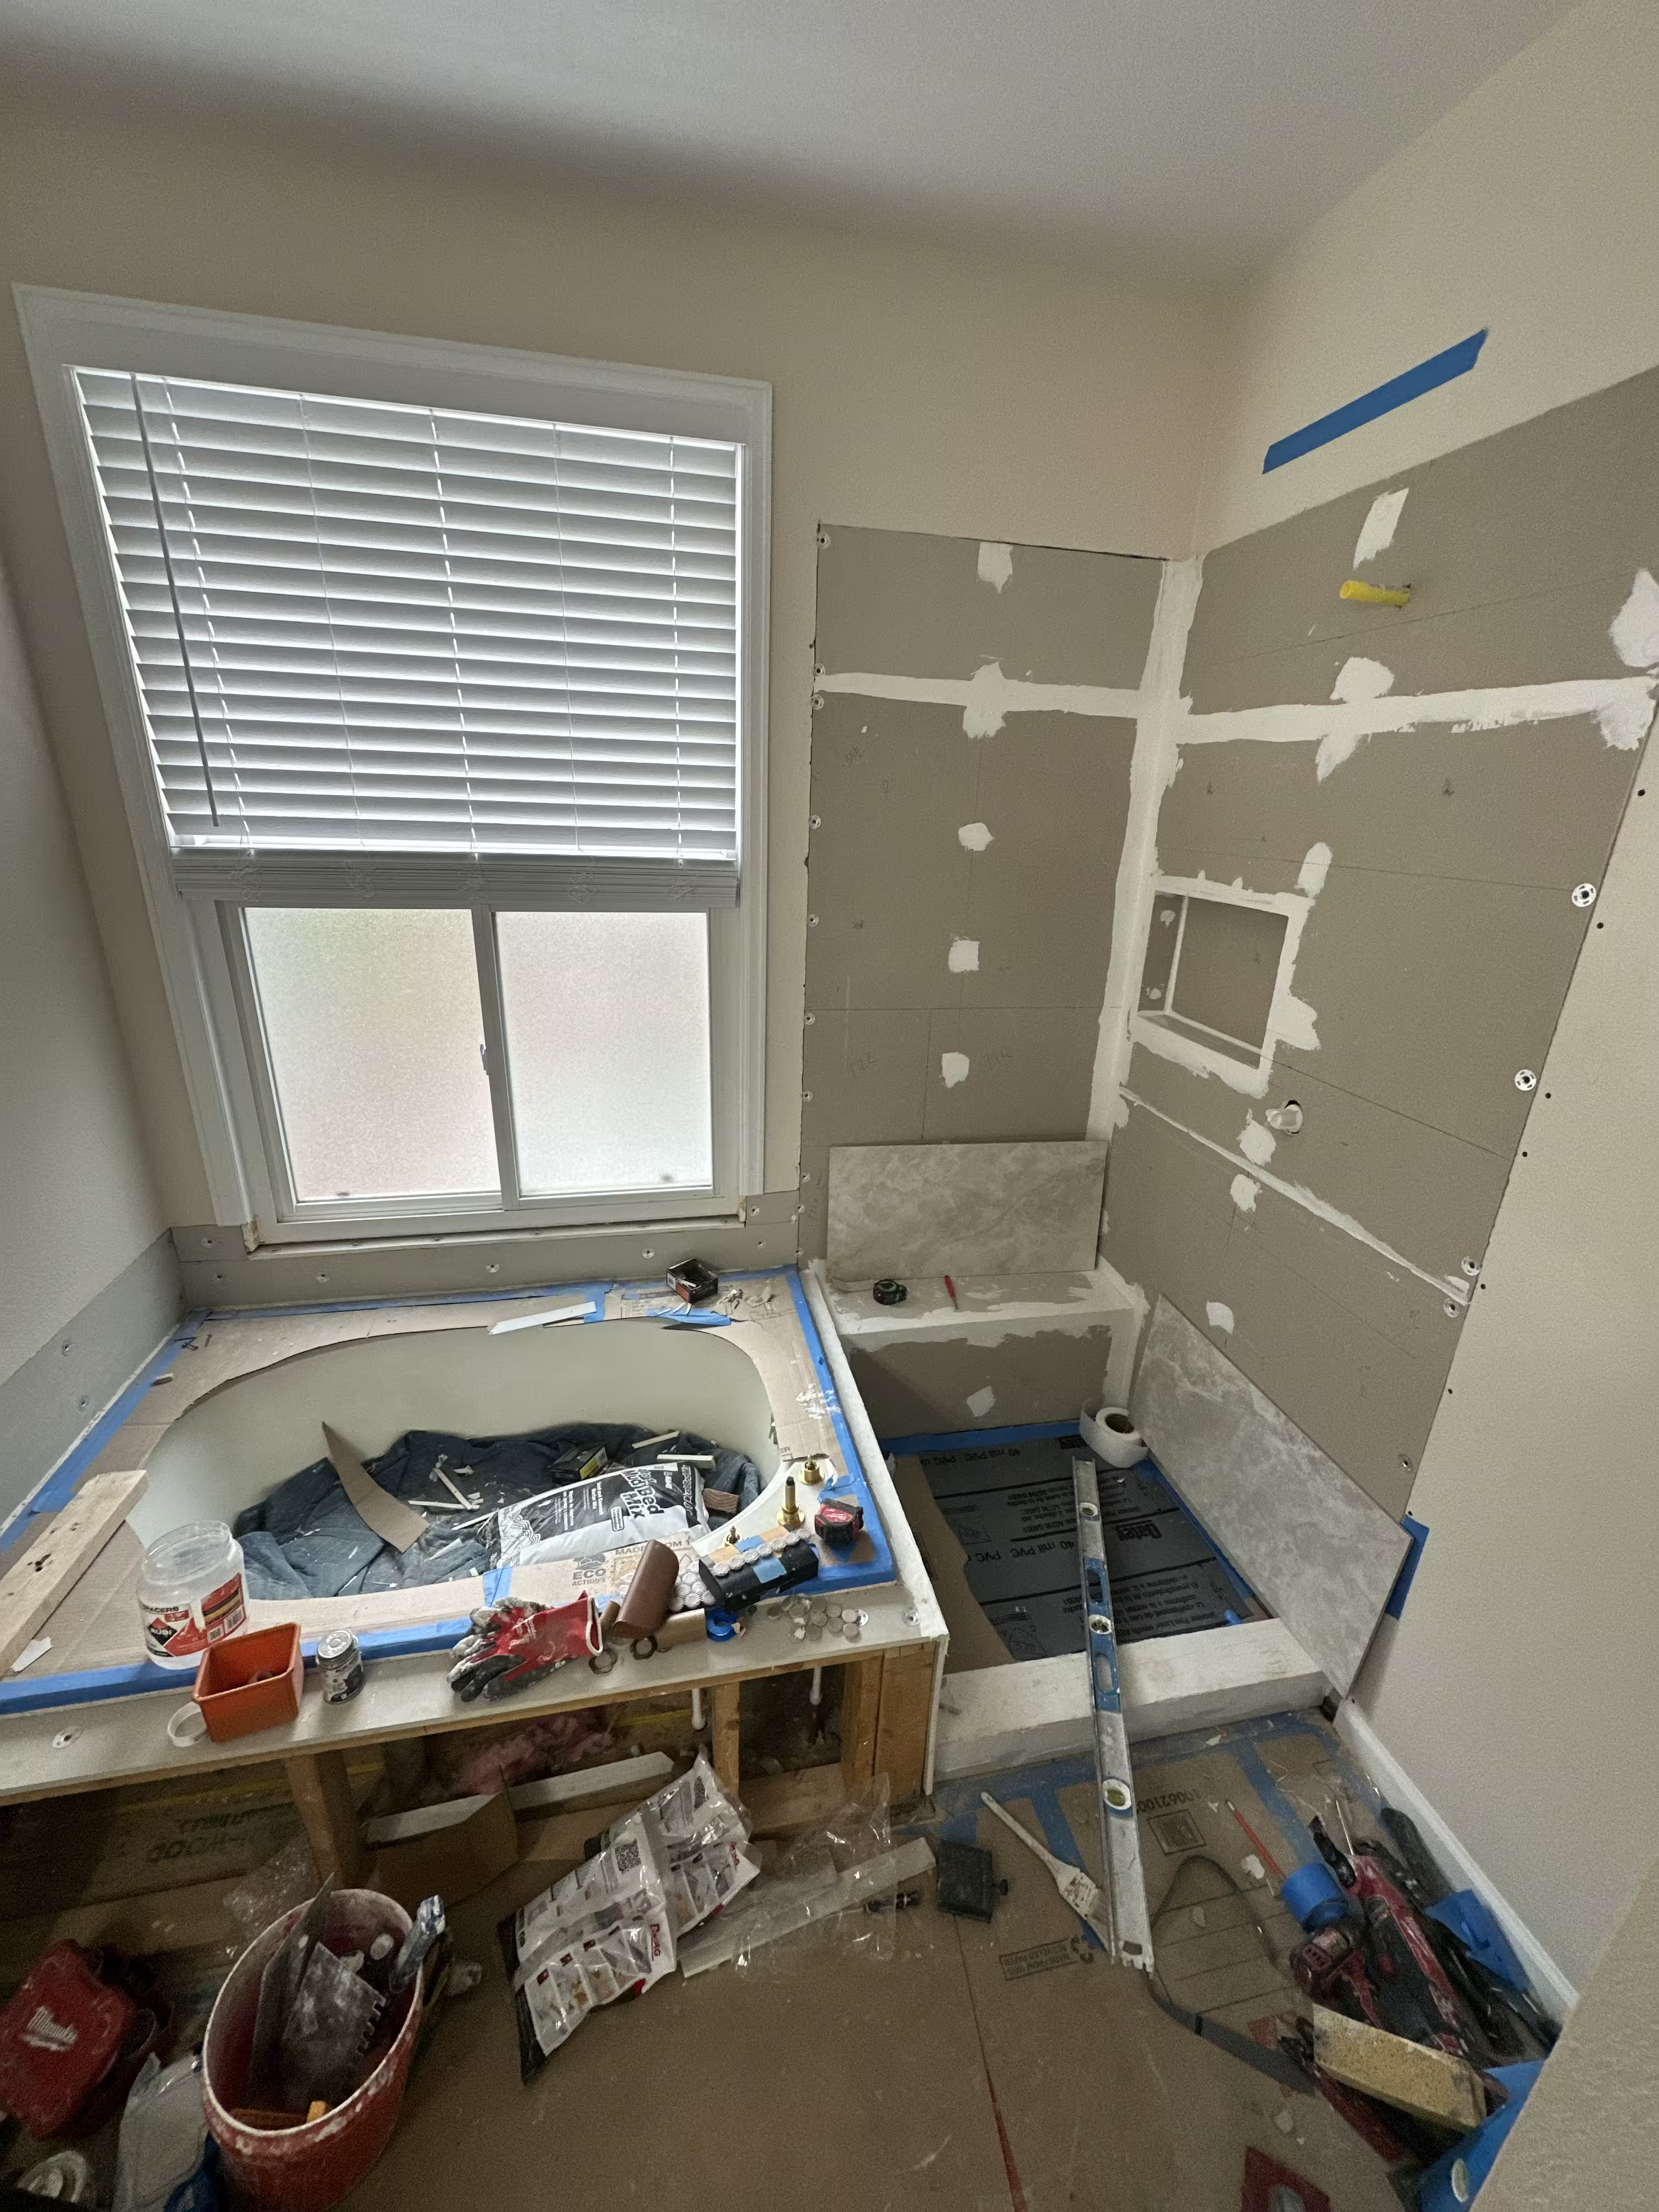
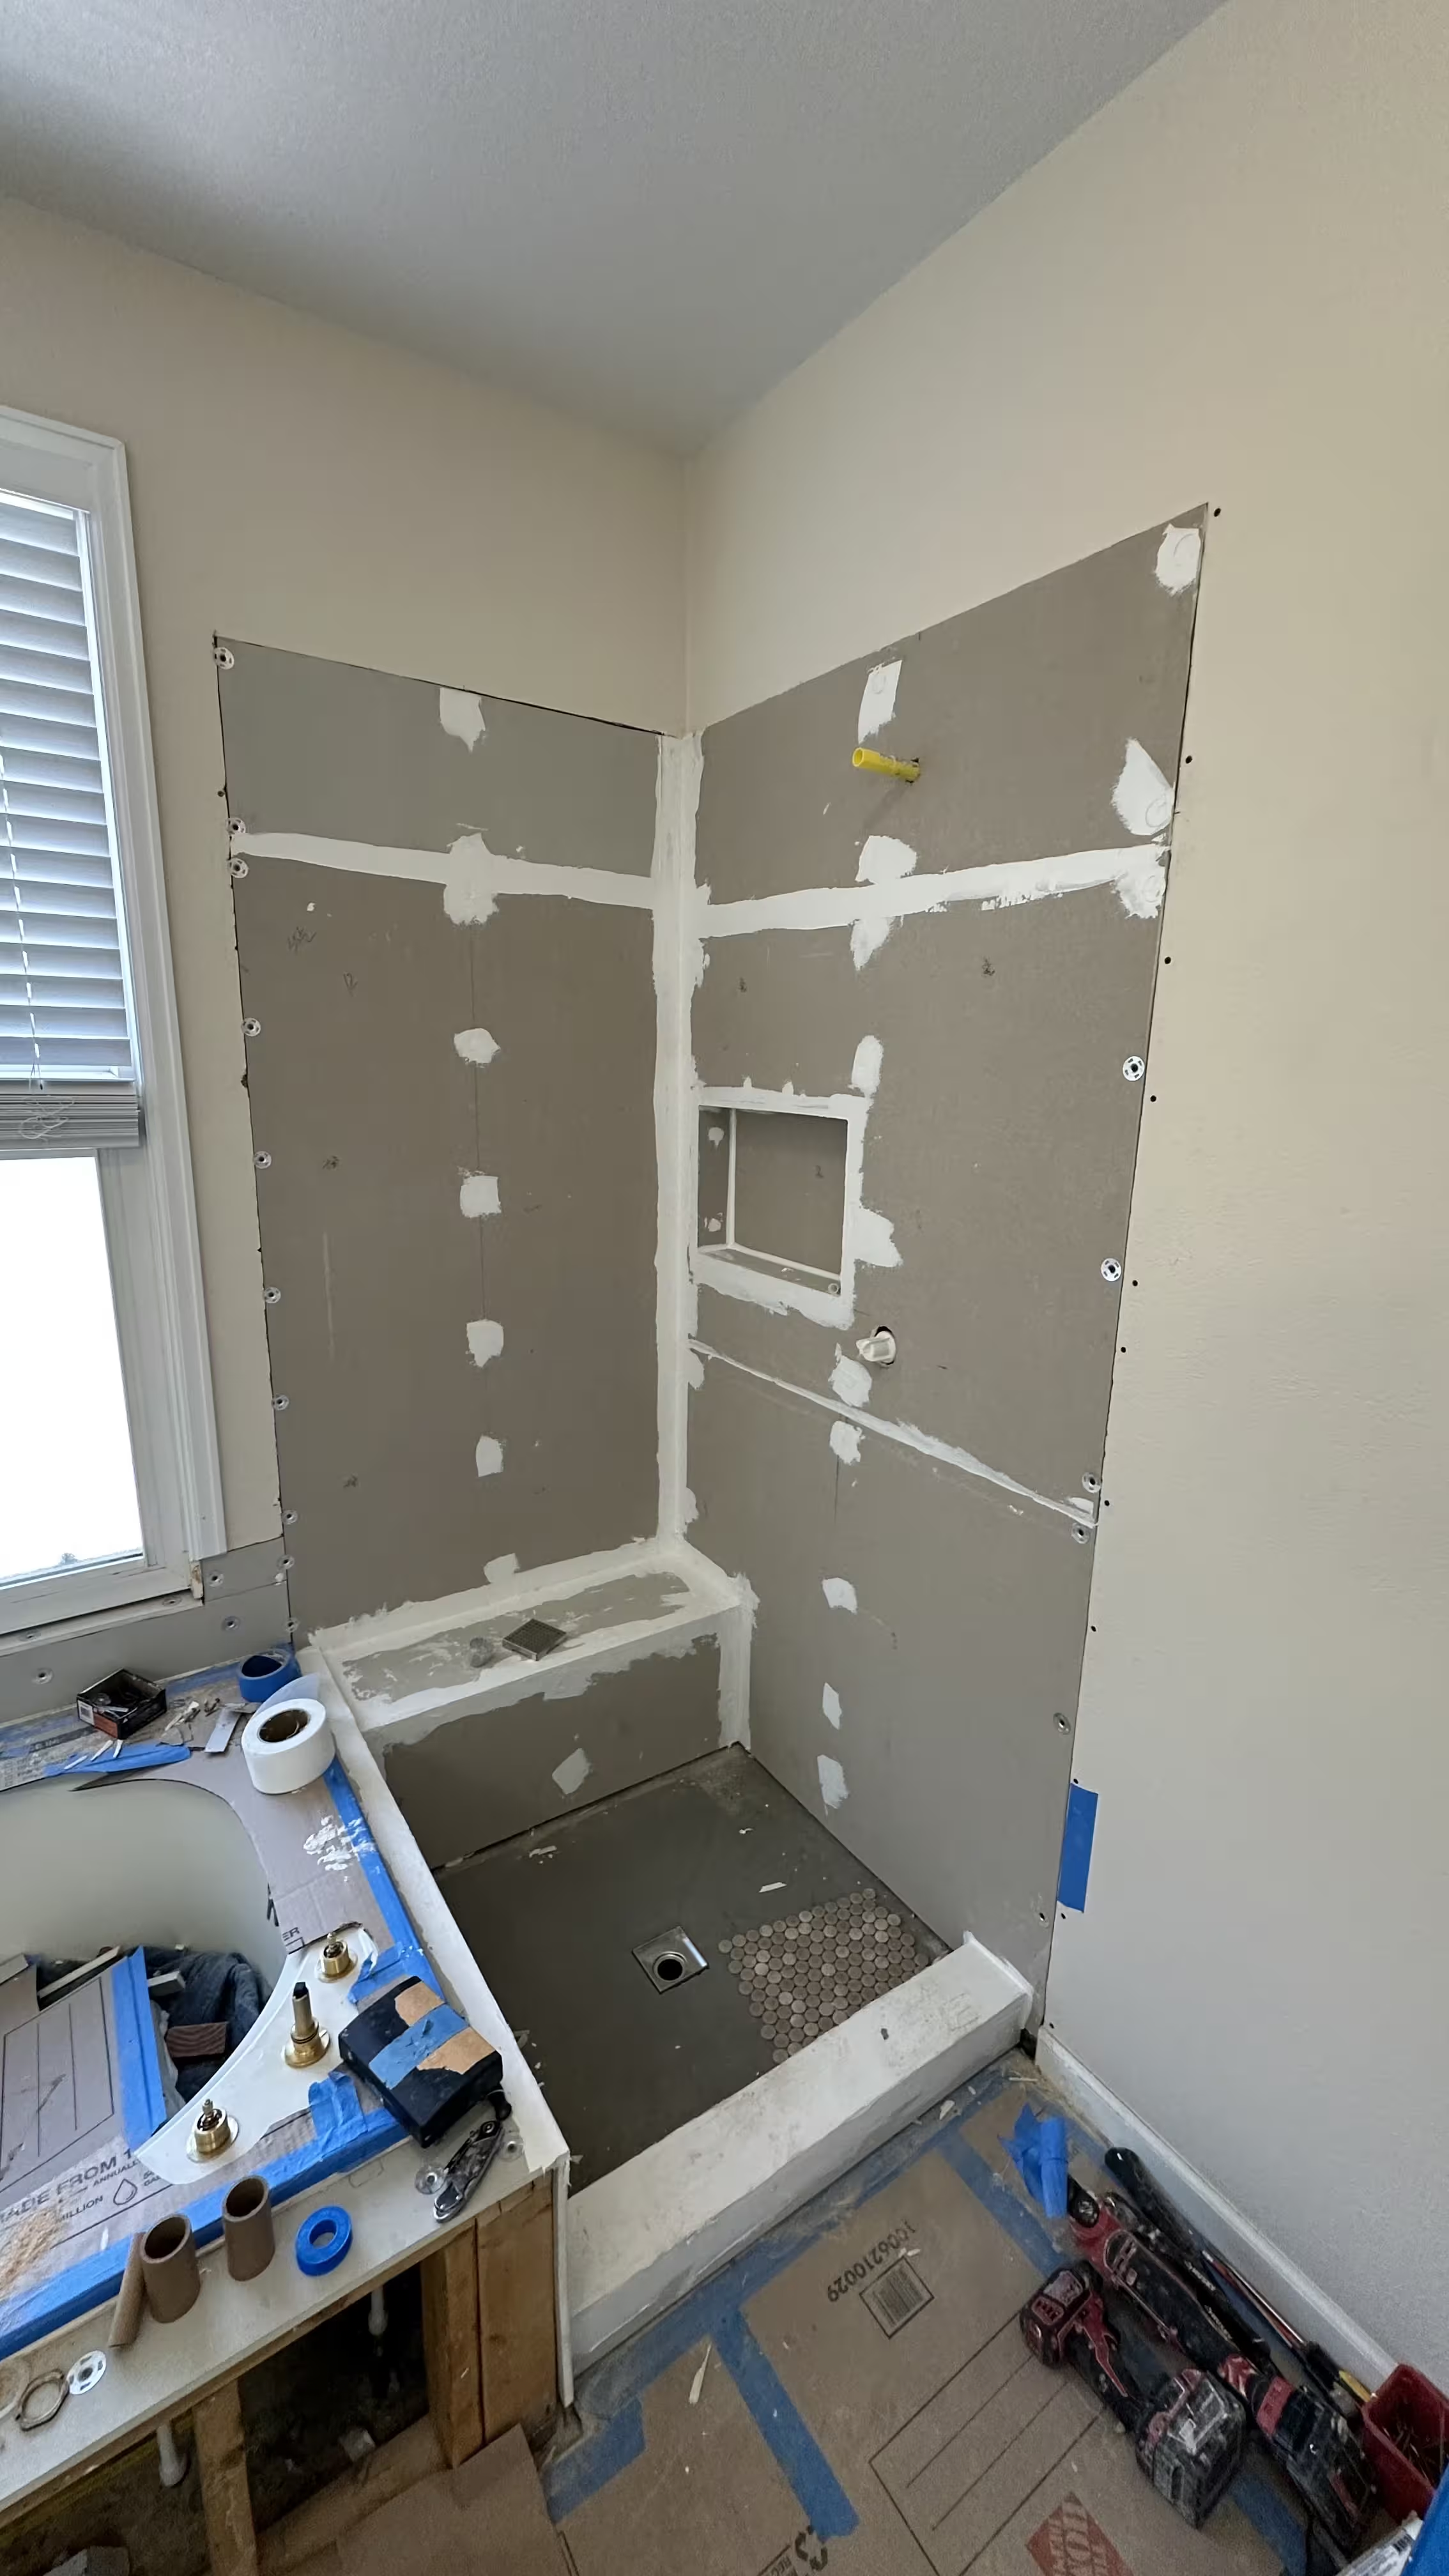
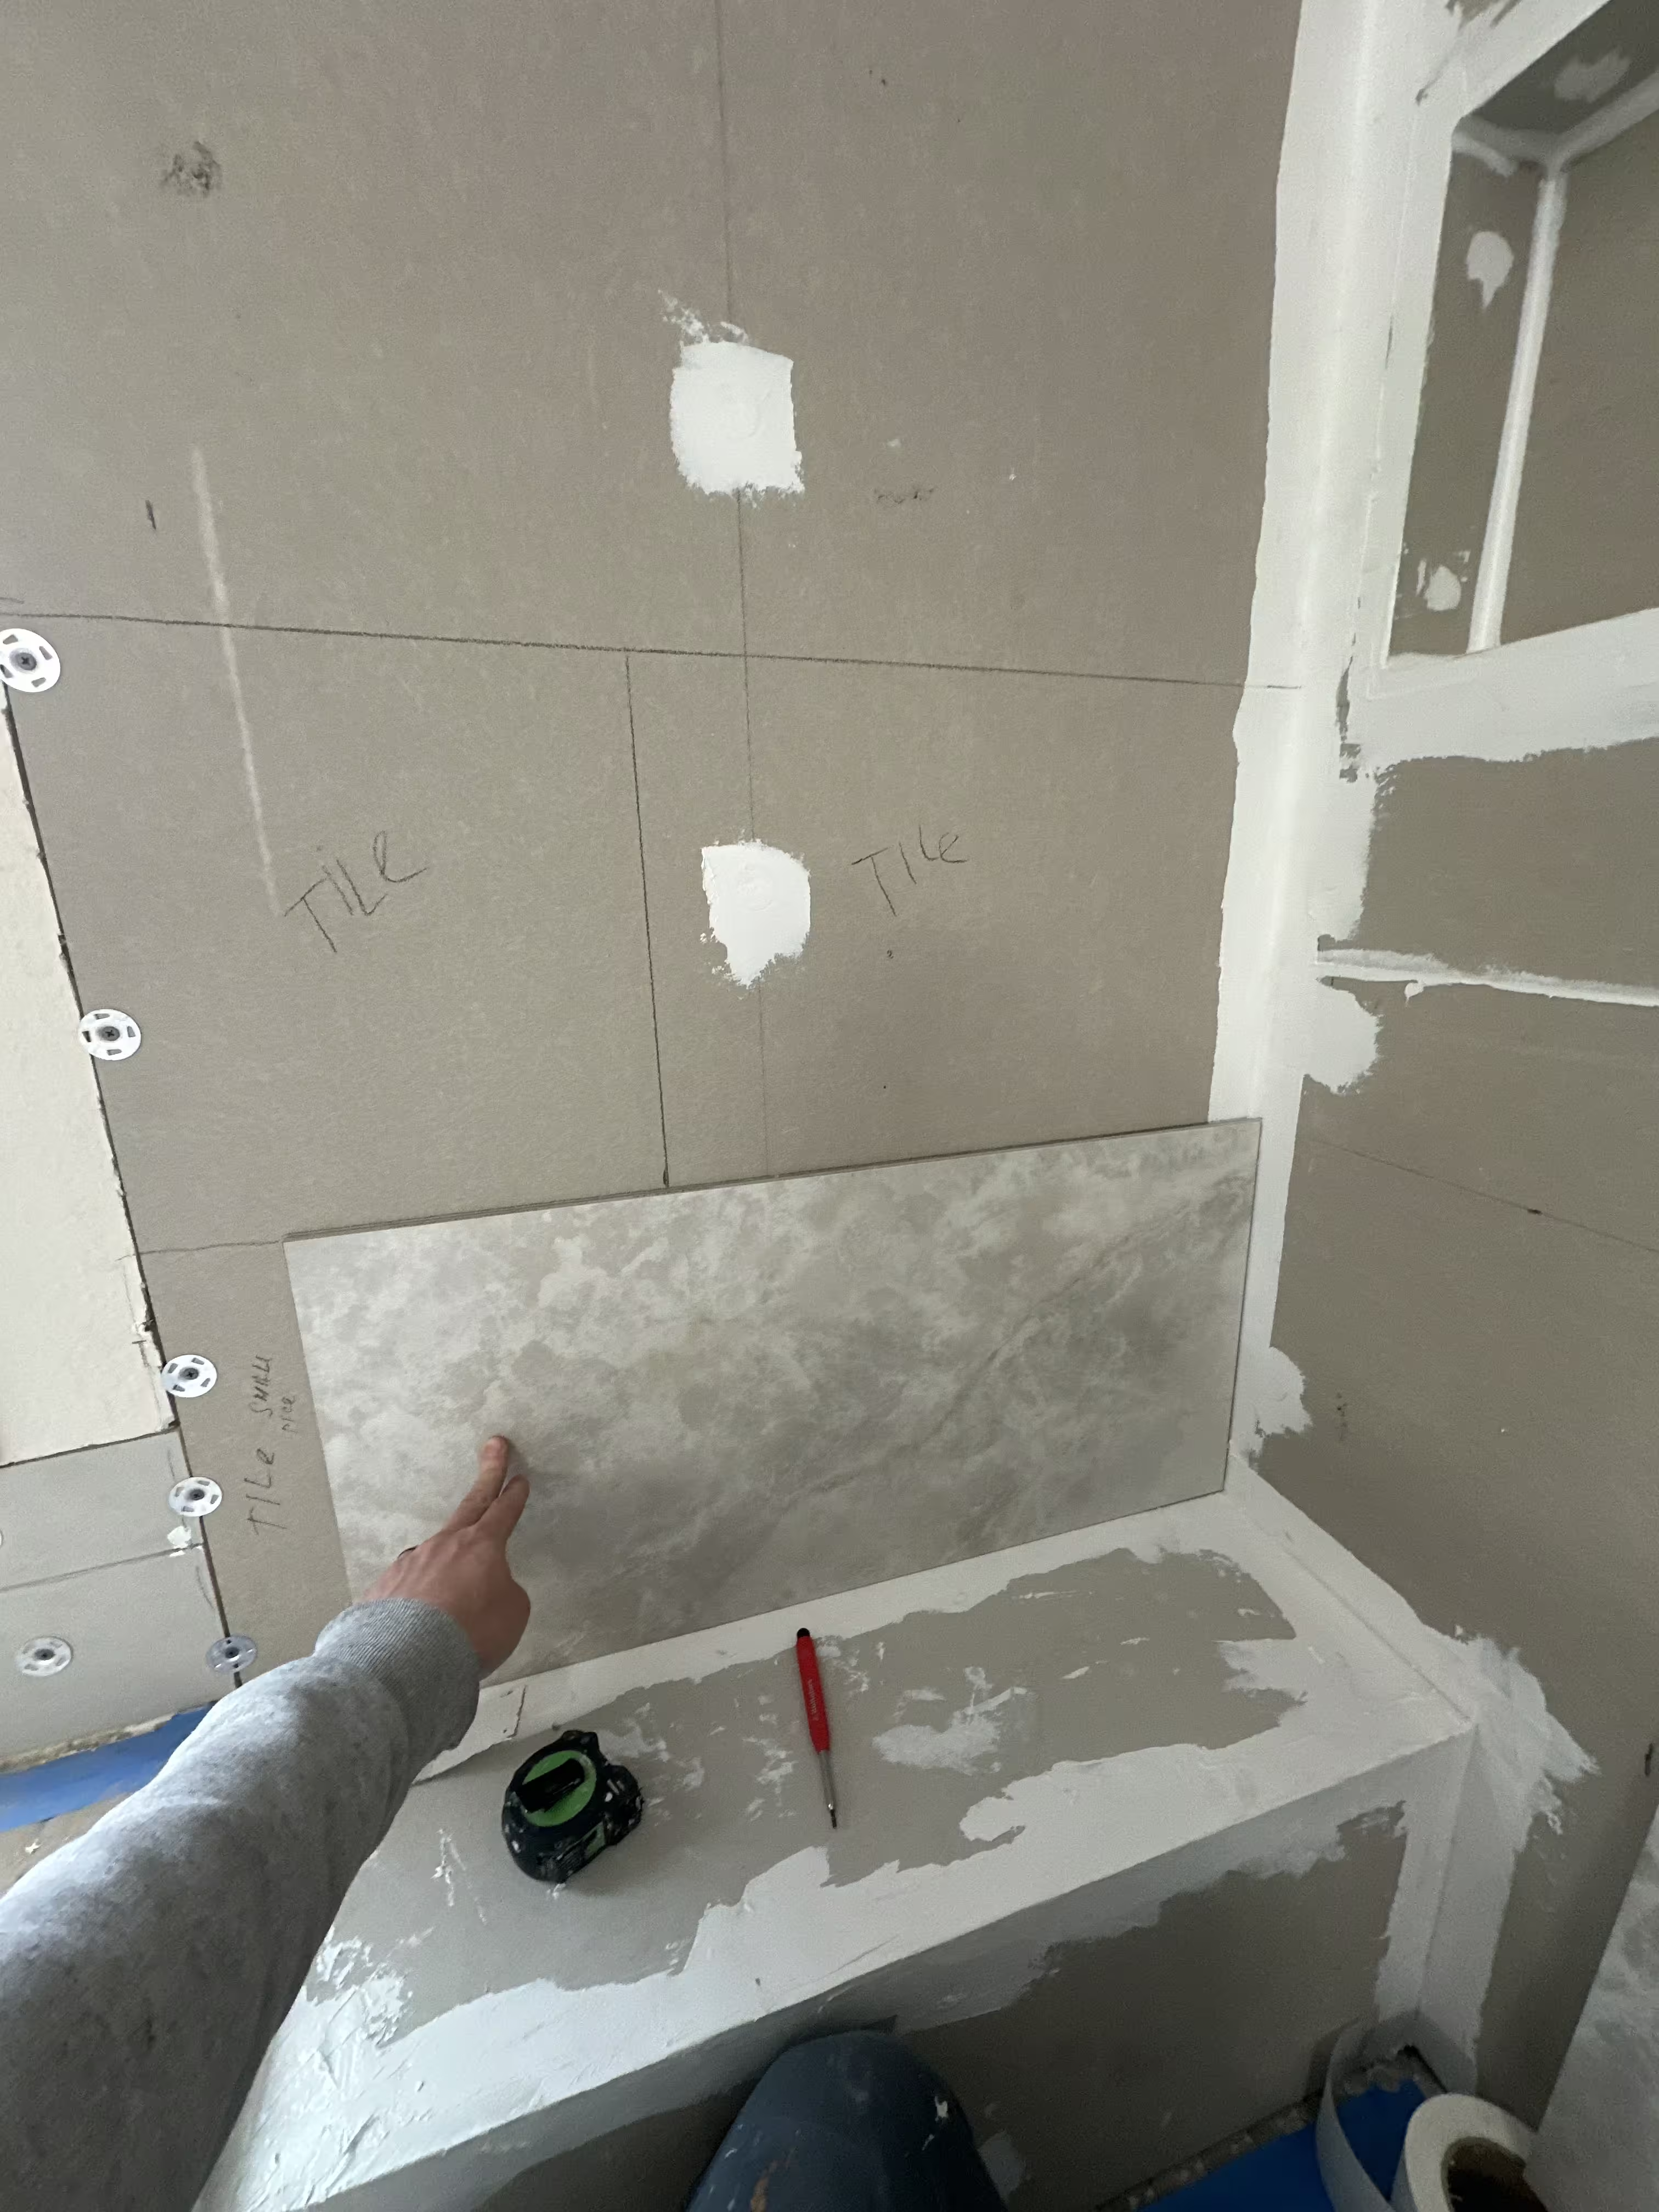
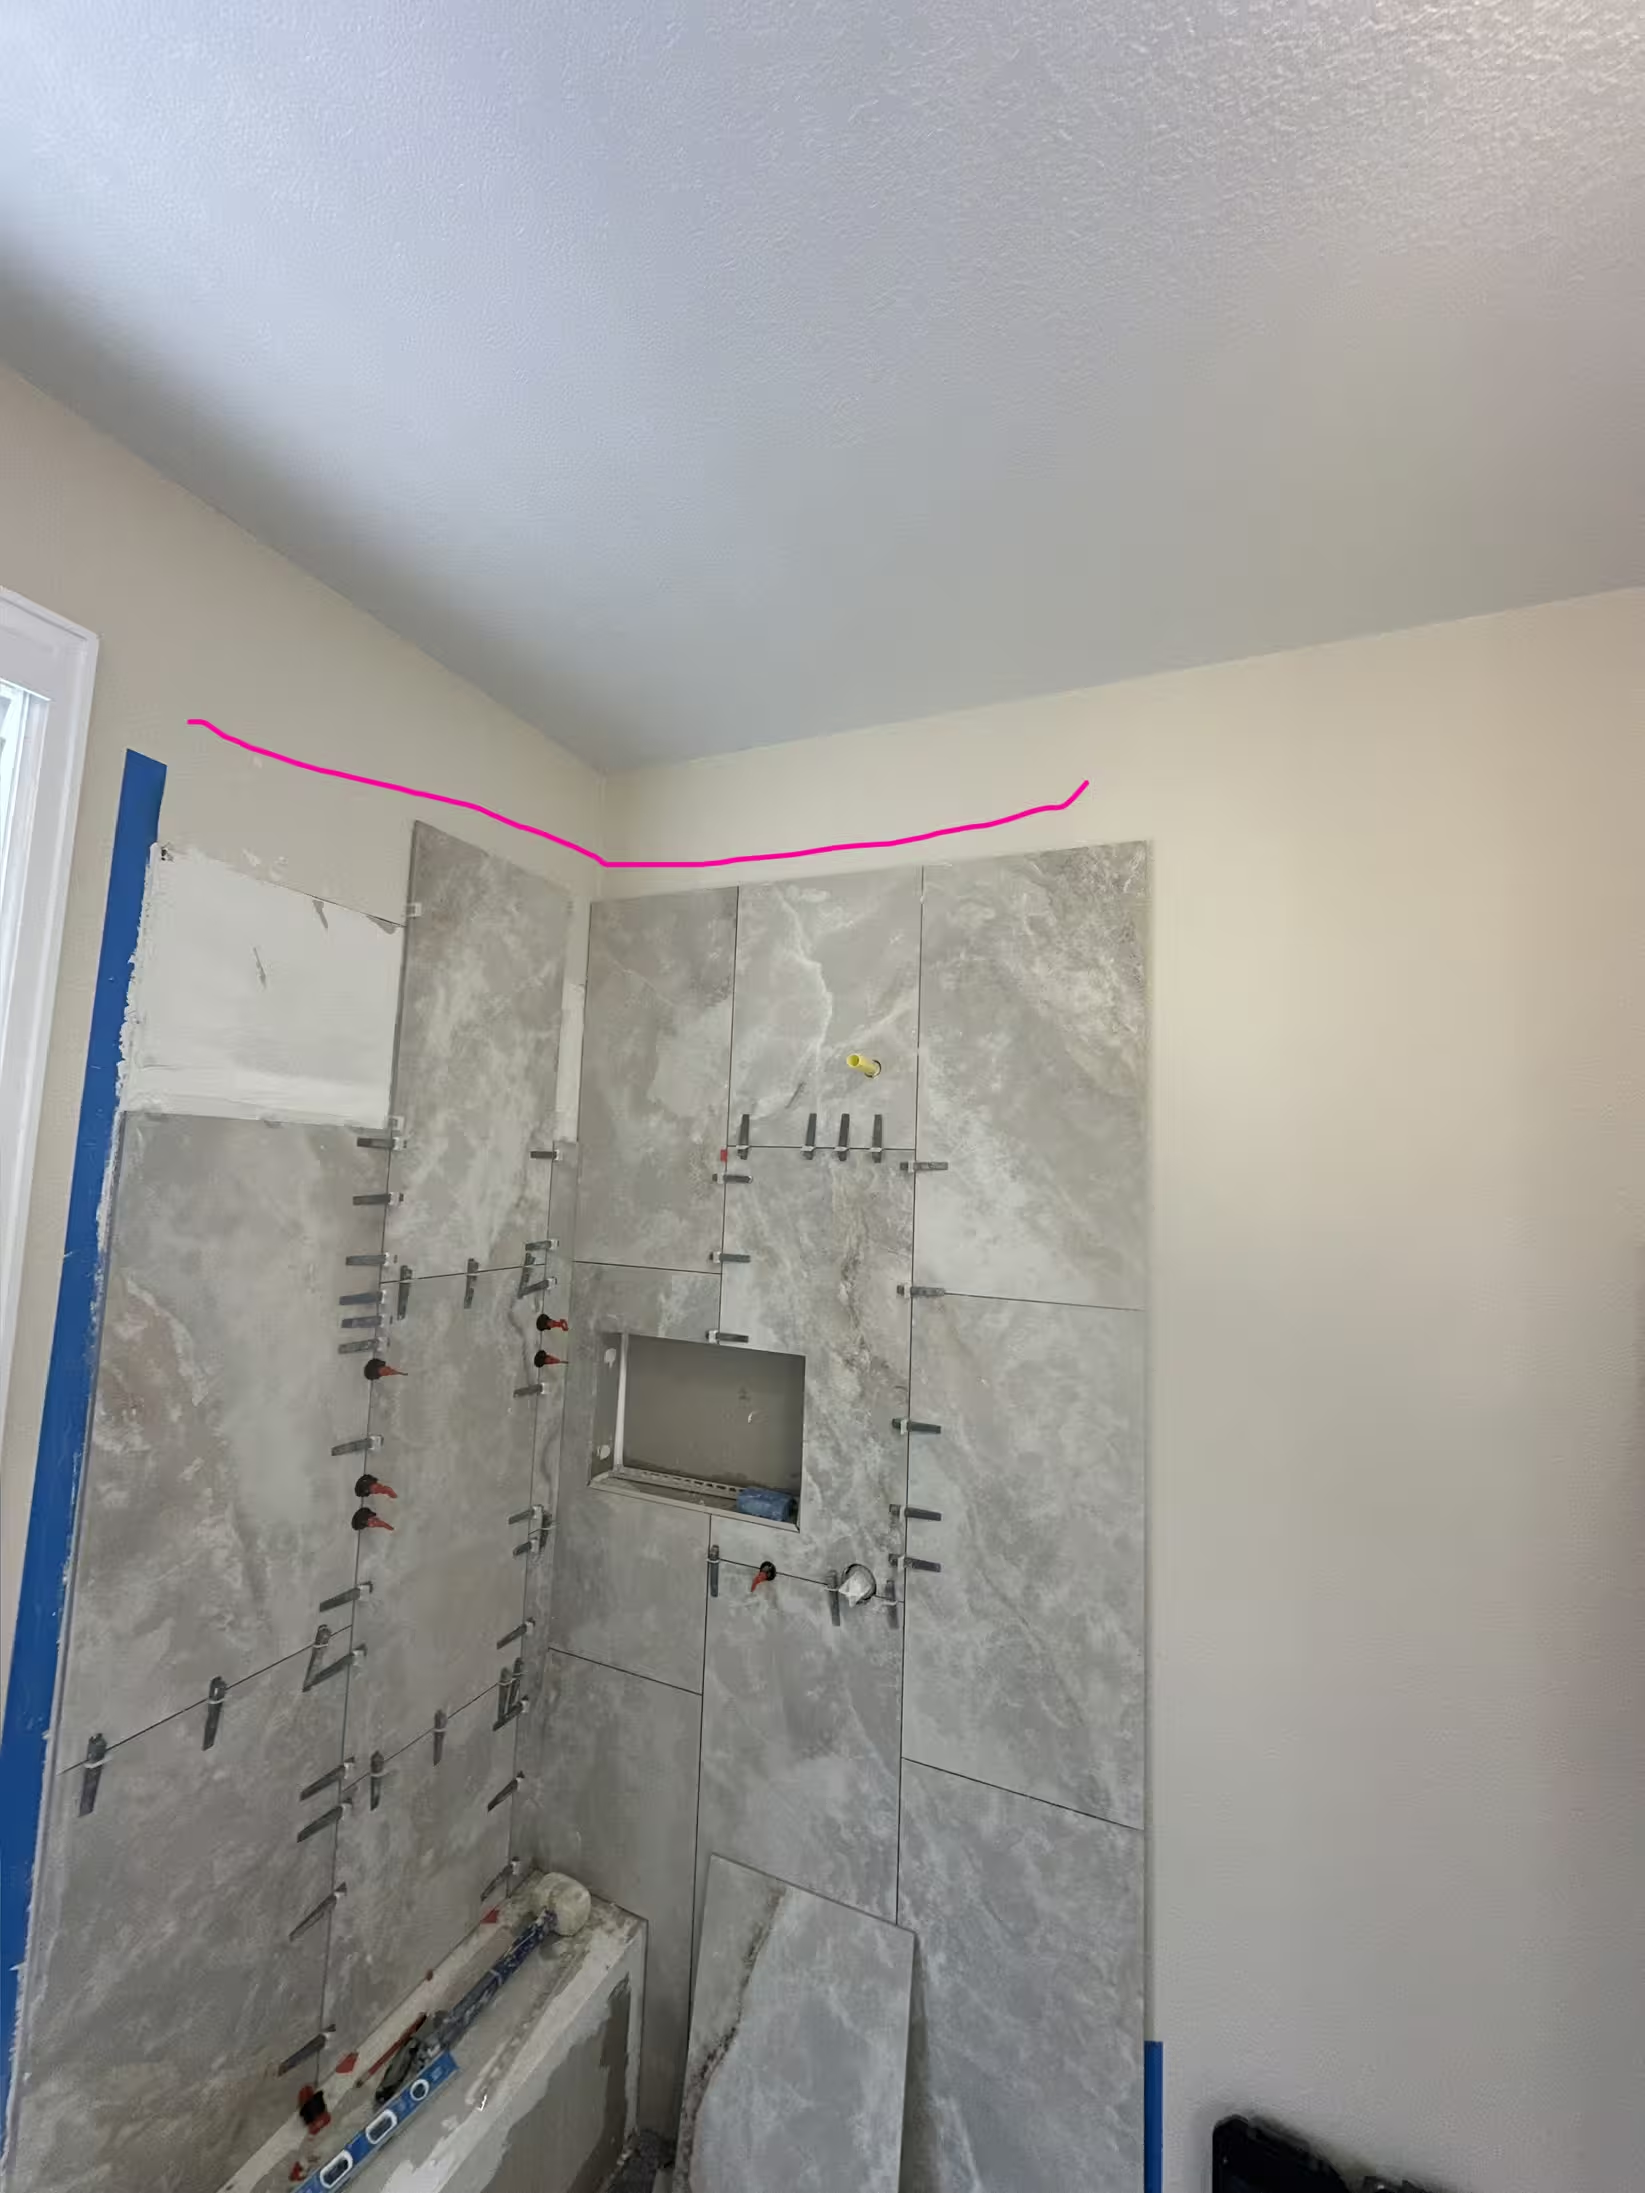
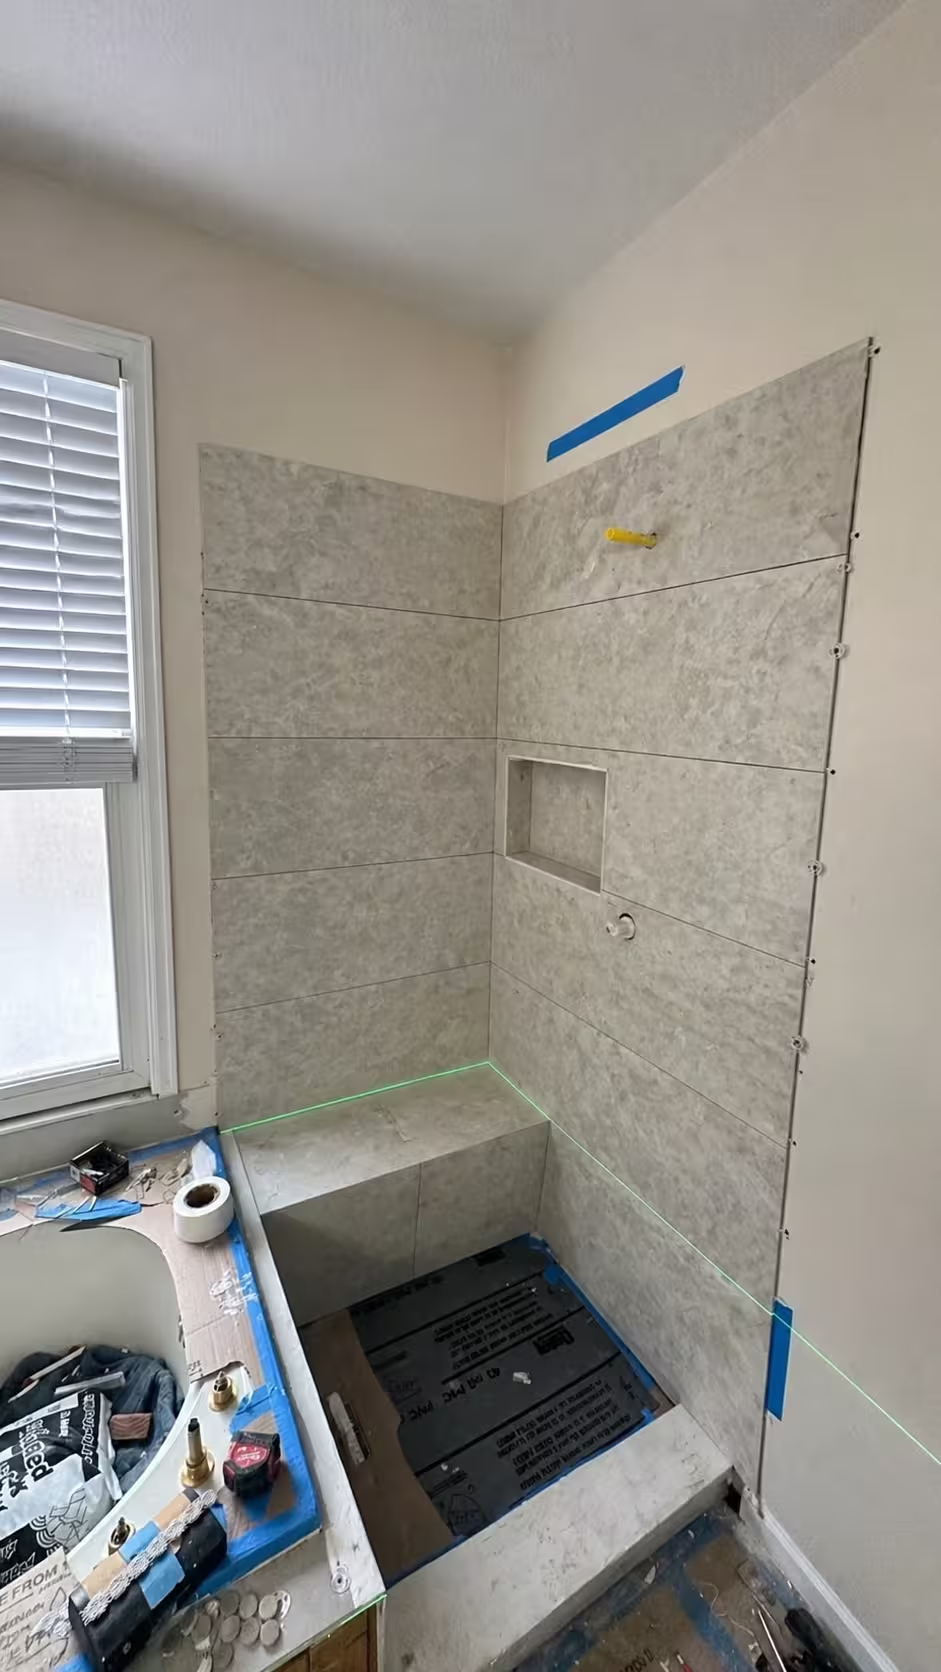
The 47 photos from this project tell the whole story in order — demolition, the sloped mud bed and drain, backer board and niche framing, layout lines, wall tile climbing course by course, the tub deck cut with a laser line, and finally the finished room. We have included the key stages in the gallery below so you can see exactly what a rebuild like this involves before the pretty pictures at the end.
Project Details
Location
Highlands Ranch, CO
Project Type
Master Bathroom Remodel
Layout
Walk-in shower + garden tub by the window
Approach
Staged rebuild, home stayed livable
Scope of Work
- Demolition of dated shower & tub surround
- Mortar-bed shower pan with pre-slope
- Cement backer board & waterproofing prep
- Marble-look porcelain shower walls
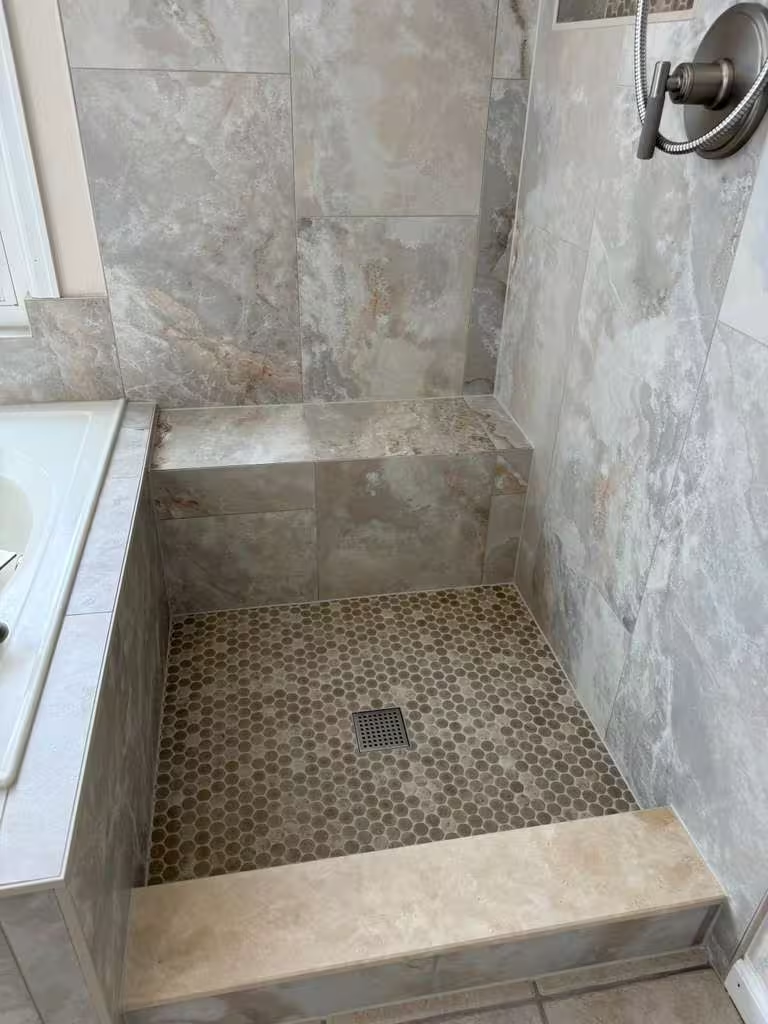
- Built-in tiled bench & penny-lined niche
- Penny-round mosaic shower floor
- Garden tub set beneath the window
- Tiled tub deck & apron
- New bathroom floor tile
The Challenge
Rebuilding two wet areas at once doubles the coordination. The shower needed a full tear-out to the studs — old pan, old bench, dated tile, everything — while the tub area next to it needed a new drop-in tub, a rebuilt deck, and a tiled apron that would meet the window trim cleanly. Because the tub sits directly beside the shower entry, every layout decision in one space showed up in the other: the divider knee wall, the threshold step, and the grout lines all had to align across both.
The second challenge was livability. This is a family home, and the owners stayed in it for the duration, so the work had to be staged: demolition and the mortar pan first, then backer board and waterproofing, then tile in planned sections, with the new tub set early and kept under protective wrap until the final walkthrough. Keeping a finished tub undamaged through weeks of tile work around it takes discipline — it is one of the quiet skills a master bathroom remodel demands.
Our Solution
Two wet areas rebuilt as one installation, from the drain up
Demolition, Shower Pan & Waterproofing Prep
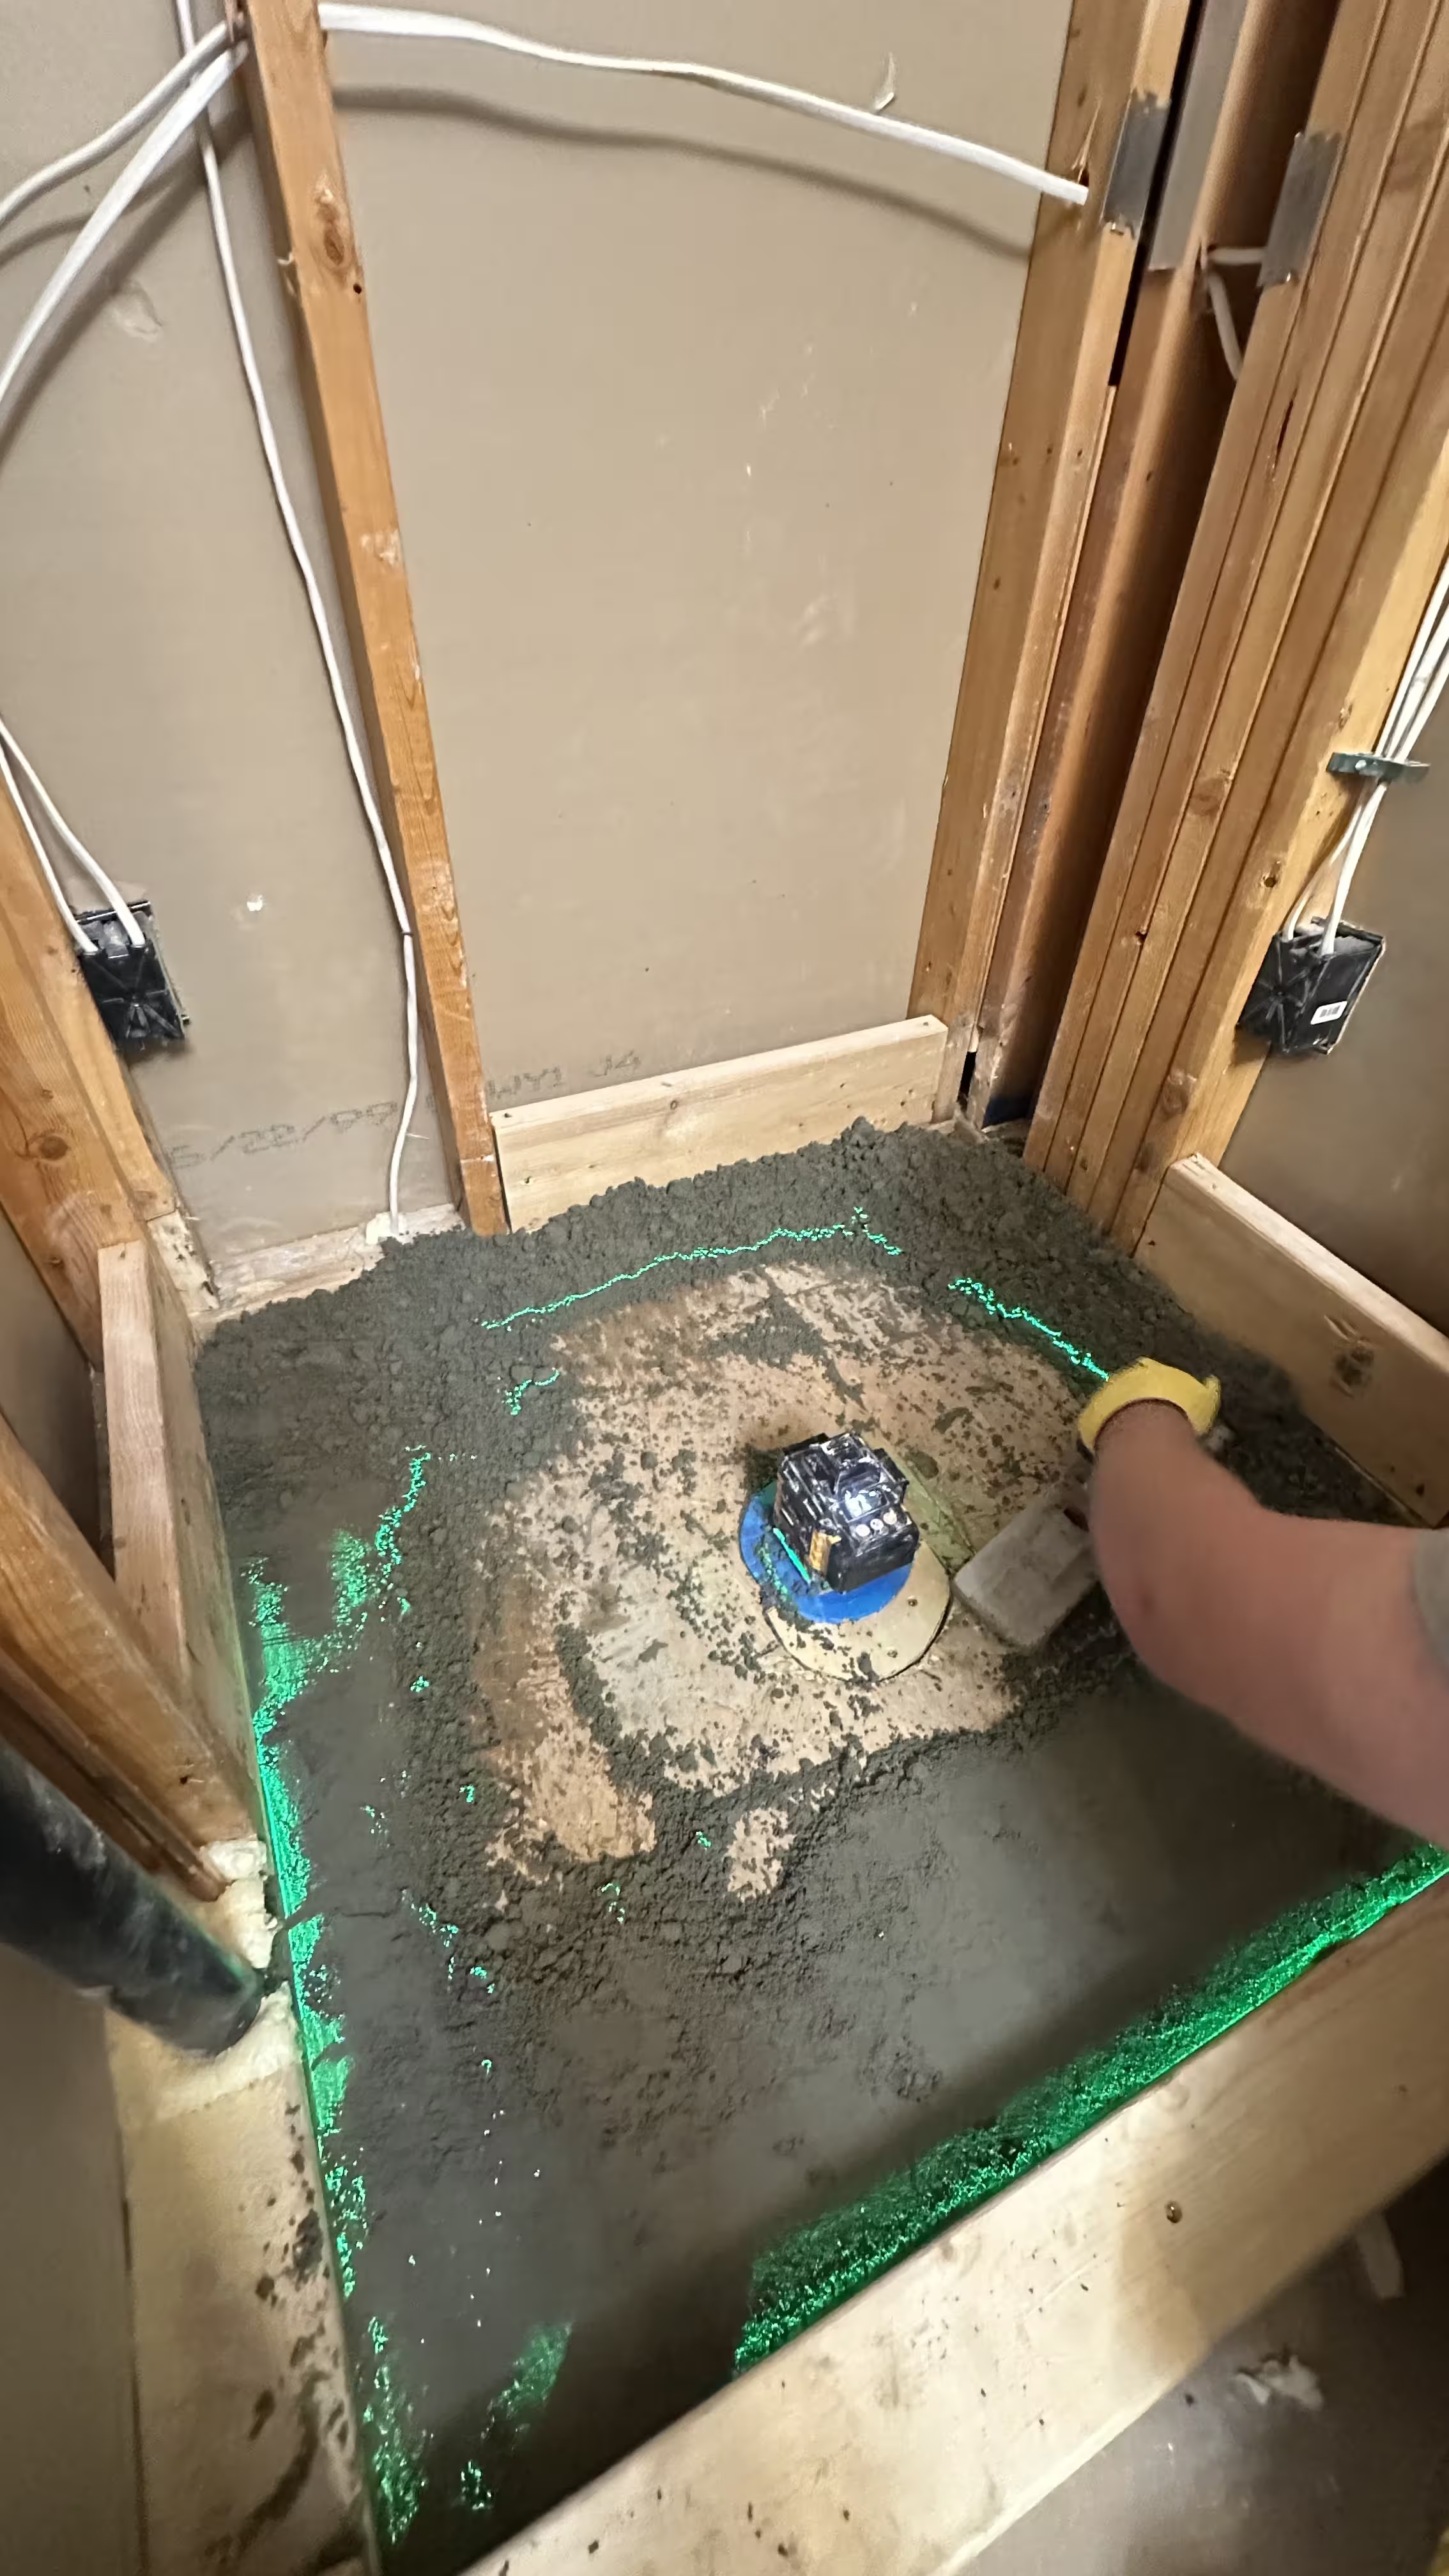
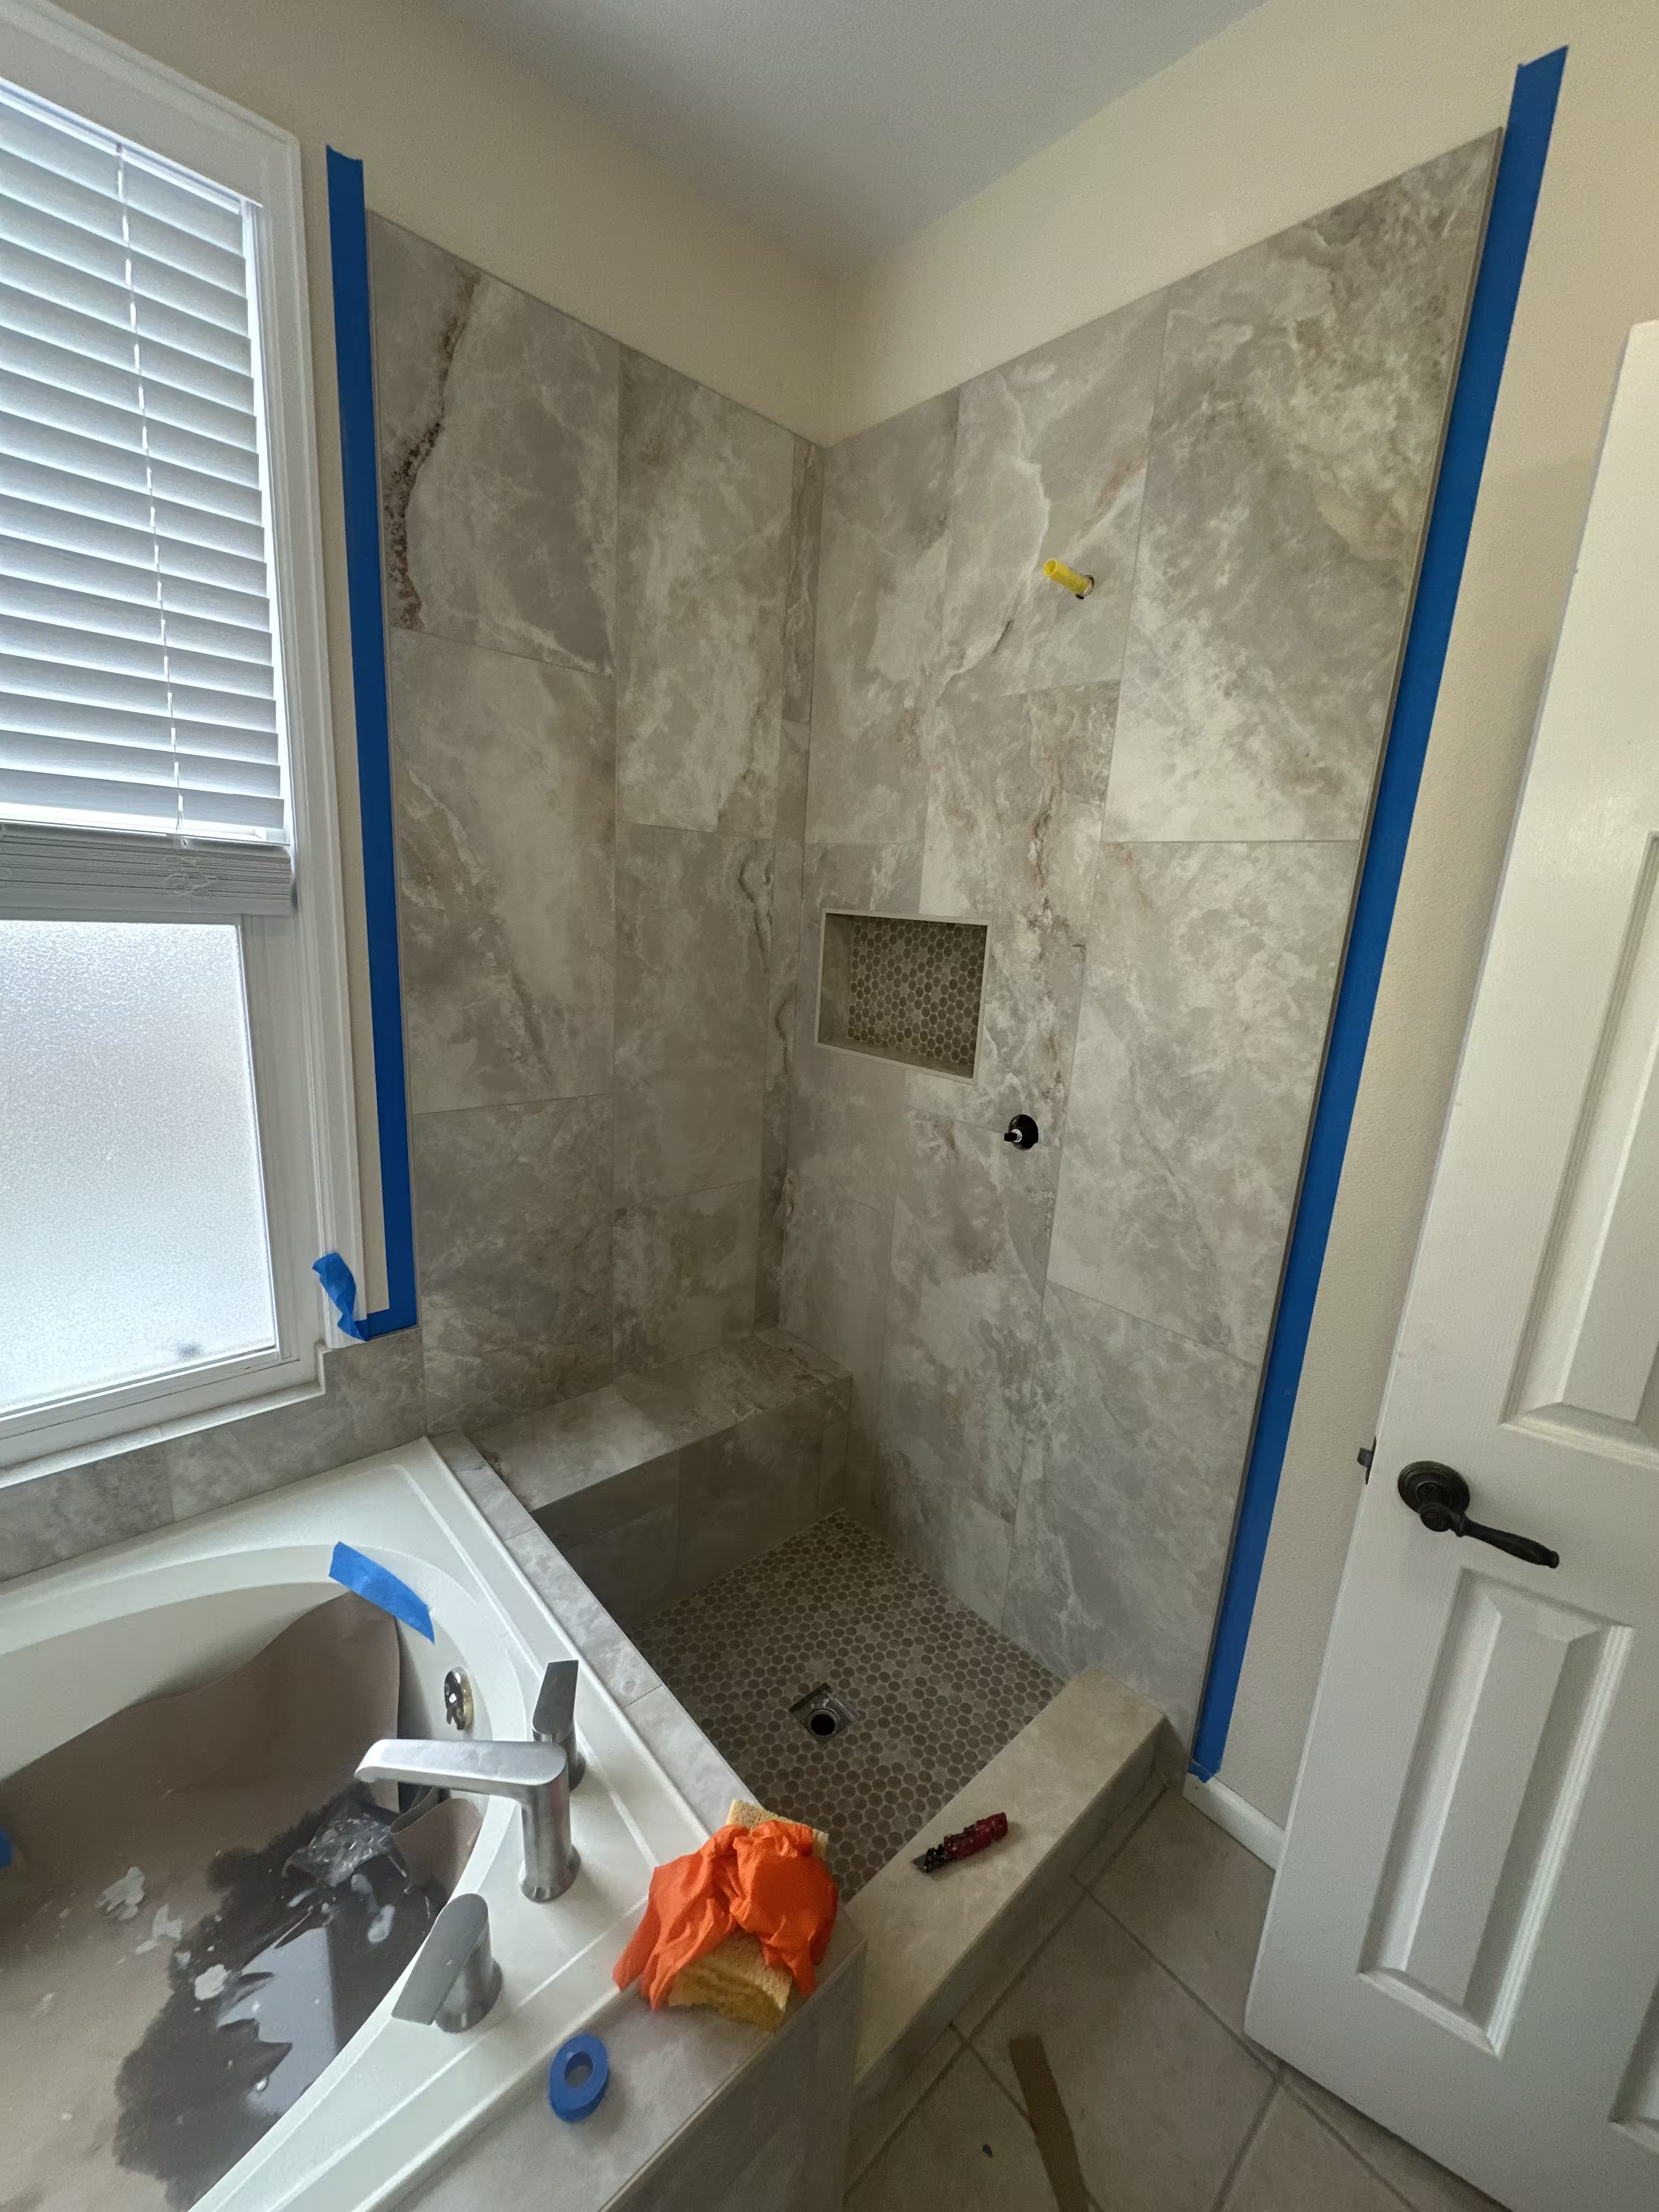
We stripped the old shower and tub surround back to the framing and started the rebuild where every shower should start: at the drain. A new drain assembly was bedded in a sloped mortar pre-pan so water is directed to the drain beneath the tile layer, not just on top of it. Cement backer board then went up across the shower walls and the bench, and the storage niche was framed out between the studs.
The new garden tub was set beneath the window at this stage, connected, and immediately wrapped in protective paper. Setting the tub early let us build the deck and apron around it precisely — but it also meant protecting it through every remaining day of construction.
Walk-In Shower: Layout, Walls, Bench & Niche
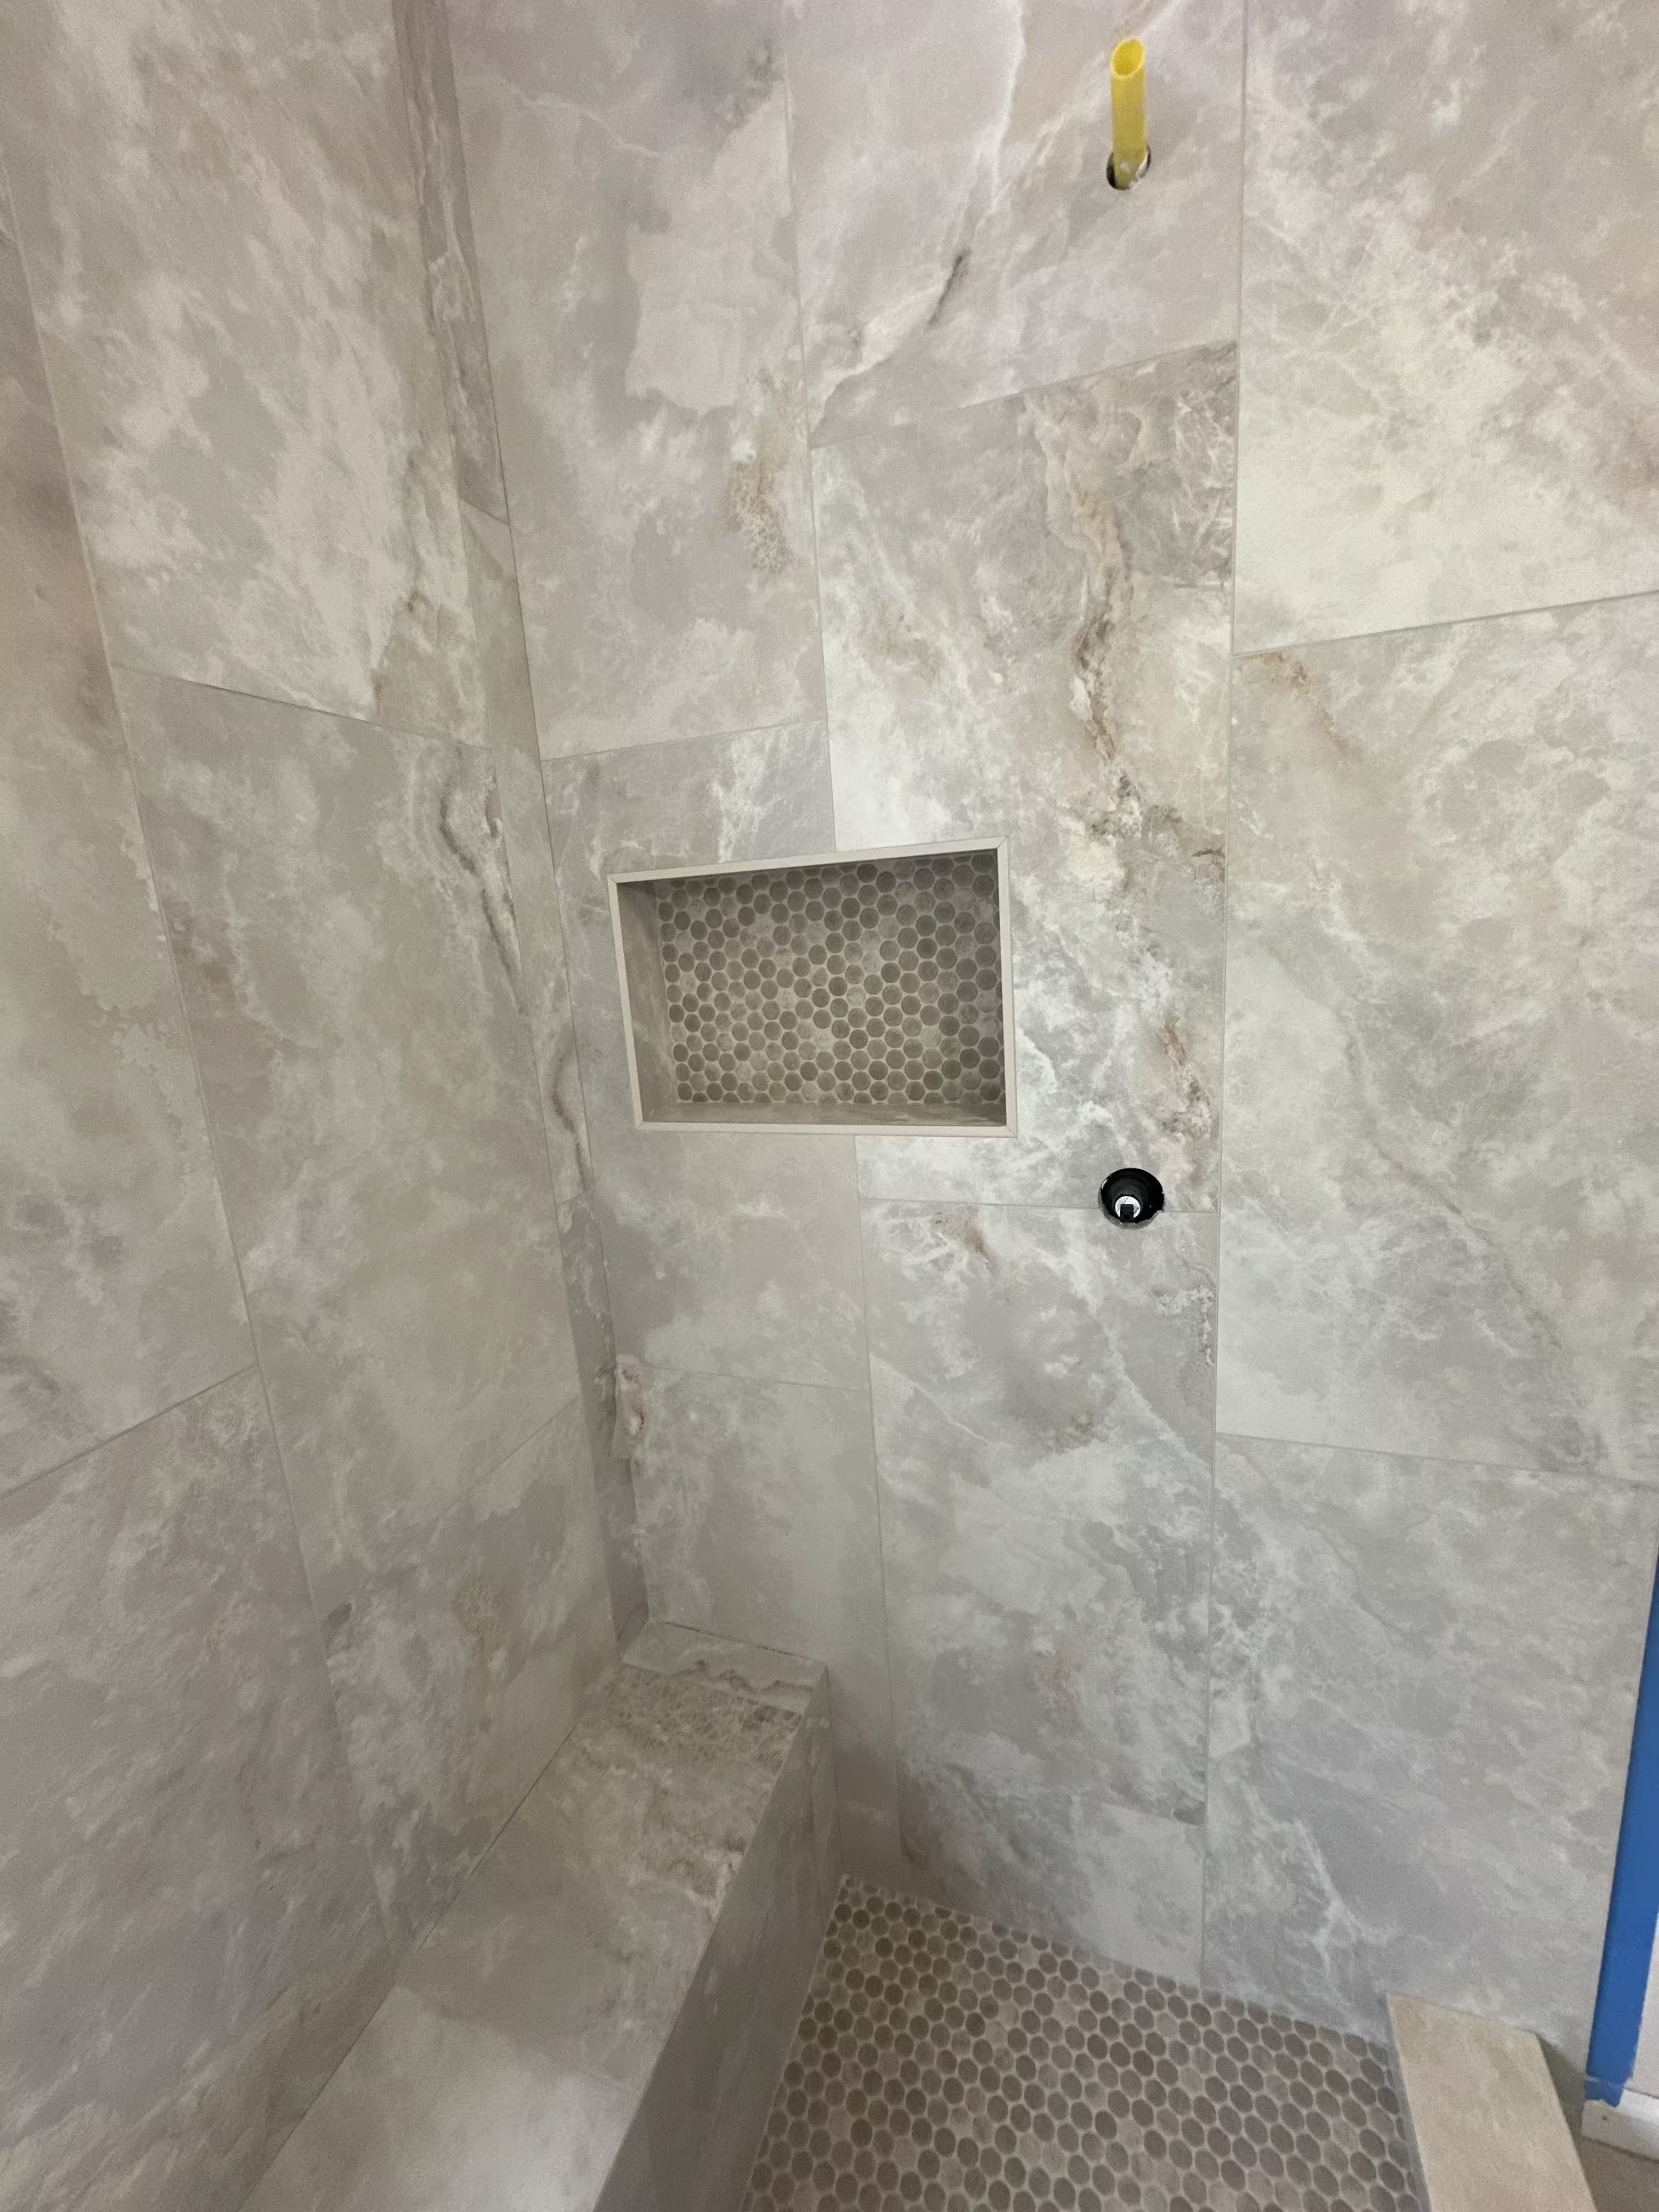
Large-format marble-look porcelain is unforgiving of sloppy layout, so before a single tile was set we marked the walls — pencil notes and chalk lines mapping every course, every cut around the niche, and the final row at the ceiling. Tile then went up in full courses on leveling clips and spacers, keeping the veining aligned and the joints flat across the bench, the niche, and the window wall.
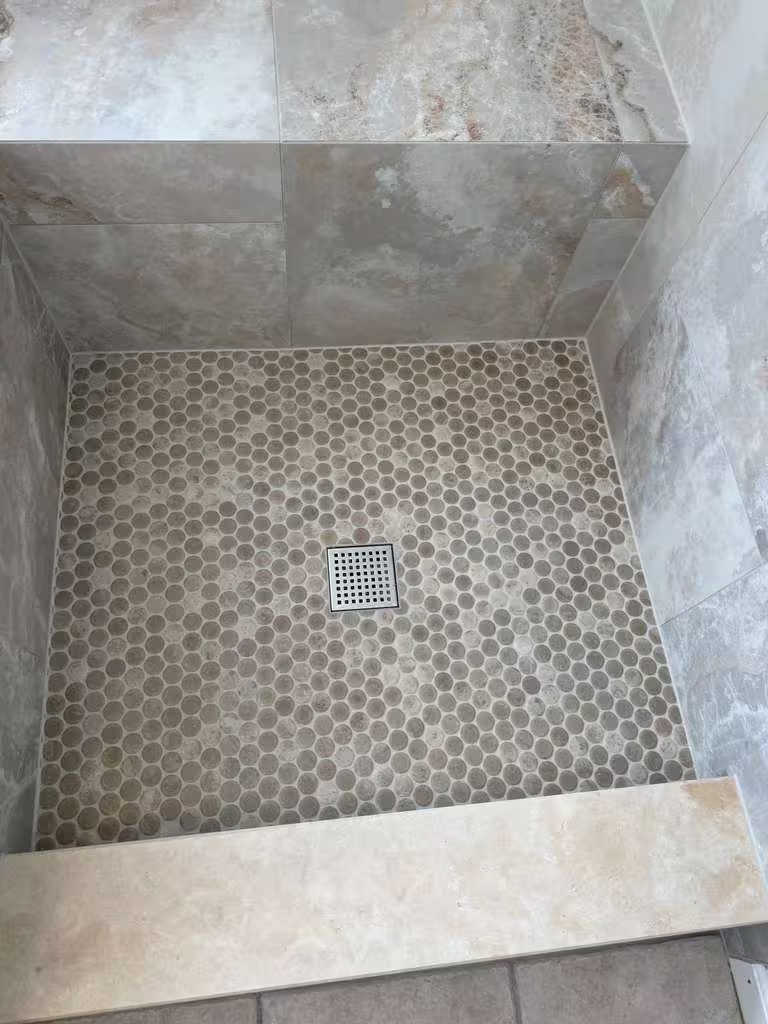
The pan floor and the niche interior were finished in penny-round mosaic. On the floor, the small rounds conform to the pan's slope and add traction; in the niche, the same mosaic turns a storage box into the shower's focal point. A handheld sprayer on the tiled wall completed the shower side.
Garden Tub Deck, Apron & Floor — One Palette
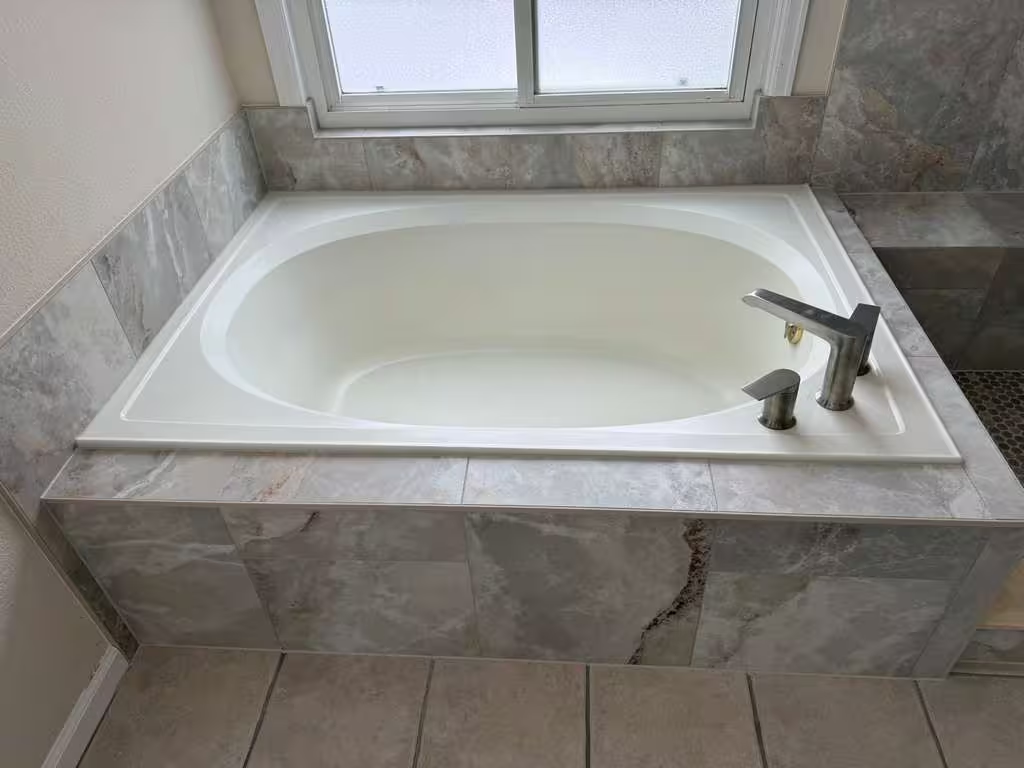
The tub deck and apron were laid out with a laser line so the full and cut pieces landed symmetrically under the window, then set course by course on leveling clips in the same marble-look porcelain as the shower. Where the apron meets the window trim, the tile was cut to a tight, sealed corner — the detail that decides whether a tub-by-the-window design ages well.
New beige floor tile finished the room, and every change of plane — tub rim to deck, wall corners, threshold to floor — was caulked rather than grouted so the joints can move without cracking. Chrome fixtures on the tub and shower replaced the old bronze, brightening the whole palette.
Project Gallery
From demolition to finished master bath — the build in order
Technical Standards
Two wet areas, one set of installation standards behind both
- ANSI A108.01 substrate preparation & general requirements
- ANSI A108.02 installation & workmanship standards
- TCNA movement joint requirements for every tile installation
- ASTM C920 elastomeric sealant at changes of plane
- Caulk (not grout) at tub rim, wall corners & floor transitions
- Large-format marble-look porcelain — shower walls, tub deck & apron
- Penny-round mosaic — shower floor & niche interior
- Mortar-bed shower pan with pre-slope & new drain assembly
- Cement backer board on shower walls, bench & tub deck
- Drop-in garden tub with chrome faucet & handheld sprayer
- Beige porcelain floor tile throughout the bathroom
The Results
The finished room does what a good master bath should: the shower and the tub feel like two halves of one design instead of two separate projects. The marble-look porcelain runs from the shower walls across the divider knee wall and onto the tub deck without a change in material, the penny mosaic repeats from the shower floor into the niche, and the chrome fixtures tie both wet areas together.
Underneath the finishes, the parts you cannot see are the point. The pan drains through a sloped mortar bed, the walls sit on cement board, the joints that move are caulked, and the tub survived weeks of construction around it without a scratch. The owners kept the garden tub they wanted, gained a walk-in shower with a real bench and storage, and never had to move out while we built it.
What Highlands Ranch Clients Say
Melissa R.
Highlands Ranch
“We wanted to keep our garden tub by the window and still get a real tiled shower, and that is exactly what we got. The marble-look tile flows across the shower, the tub deck, and the little divider wall like it was always meant to be there. The penny tile in the niche is my favorite detail.”
Dave & Susan K.
Highlands Ranch
“The crew staged the work so we could live in the house the whole time, which we appreciated with kids at home. Demo was quick, everything stayed covered and clean, and the finished shower bench and floor are perfect. The caulk lines around the tub are the straightest we have ever seen.”
Frequently Asked Questions
Common questions about master bath remodels with a tub and a separate tiled shower
A master bathroom with a separate tiled shower and a tub deck takes longer than a single tub-shower combo because there are two wet areas to waterproof and tile. Most projects at this scope run several weeks from demolition to final caulk, depending on tile format, cure times between stages, and fixture lead times. We sequence the work in defined stages so the schedule stays predictable from day one.
There is no single right answer. A tub-plus-shower layout suits households where people actually bathe, and many buyers in family-oriented areas still expect a tub in the master. A single large shower suits people who never use the tub and want easier access. We priced and planned this project around the owners' preference to keep both, and either direction can be built to the same standard.
The biggest factors are how many wet areas you rebuild and what goes into each one. A mortar-bed shower pan, a framed bench and niche, a tiled tub deck and apron, and new floor tile each add labor and material. Tile format matters too — large-format porcelain and mosaic combinations take more layout and cutting time than a basic single-tile surround.
Yes, in most cases. This project was staged so the family kept using another bathroom while the master was under construction. We contain dust at the doorway, protect floors along the work path, and keep the tub and finished surfaces covered between stages. The noisy demolition and mortar-bed days come early, and the later tile and finish stages are much easier to live with.
It works well if the details are handled. Privacy usually comes from frosted glass or a window treatment rather than relocating the window. The joint where the tile deck meets the window trim needs a clean, sealed transition so splash water cannot reach the framing, and a window over a tub sees less direct spray than one inside a shower. On this project we cut the apron tile to meet the trim in a tight, caulked corner.
Small mosaics conform to the slope of a shower pan far better than large tile, so the floor drains correctly without lippage. The many grout joints also add traction underfoot. On this project the penny tile does double duty: it covers the sloped pan and lines the wall niche, which ties the floor and the storage detail together visually.
Because those surfaces move independently. TCNA guidance calls for a flexible sealant rather than grout at changes of plane — wall-to-wall corners, wall-to-floor joints, and tile-to-tub rims — and ASTM C920 is the specification for the elastomeric sealants used in those joints. Grout in a moving joint cracks; a proper caulk line flexes and keeps water out, which is why we finish every transition this way.
The core references are ANSI A108.01 and A108.02, which cover substrate preparation, general installation requirements, and workmanship for ceramic tile. TCNA also requires movement accommodation joints in every tile installation, because tile is a rigid surface layer over a structure that expands and contracts. Those requirements shaped the pan, the wall layout, and the sealant joints throughout this bathroom.
Related Services & Resources
Shower Remodeling Highlands Ranch
Custom tiled shower remodels in Highlands Ranch
Large-Format Tile Shower Remodel Highlands Ranch
A completed large-format tile shower project
Tile Installation Highlands Ranch
Professional tile installation in Highlands Ranch
Where to Browse Tile
Looking for marble-look porcelain, penny mosaics, or floor tile for your own project? Browse these retailers:
Get a Free Quote for Your Master Bathroom Remodel in Highlands Ranch
Tell us about your tub, shower, and floor plans and we'll provide a detailed estimate
Request a Free Quote
Planning a Master Bathroom Remodel in Highlands Ranch?
We rebuild master baths from the drain up — walk-in tile showers, tub decks, benches, niches, and floors — throughout Highlands Ranch and the south Denver metro area.