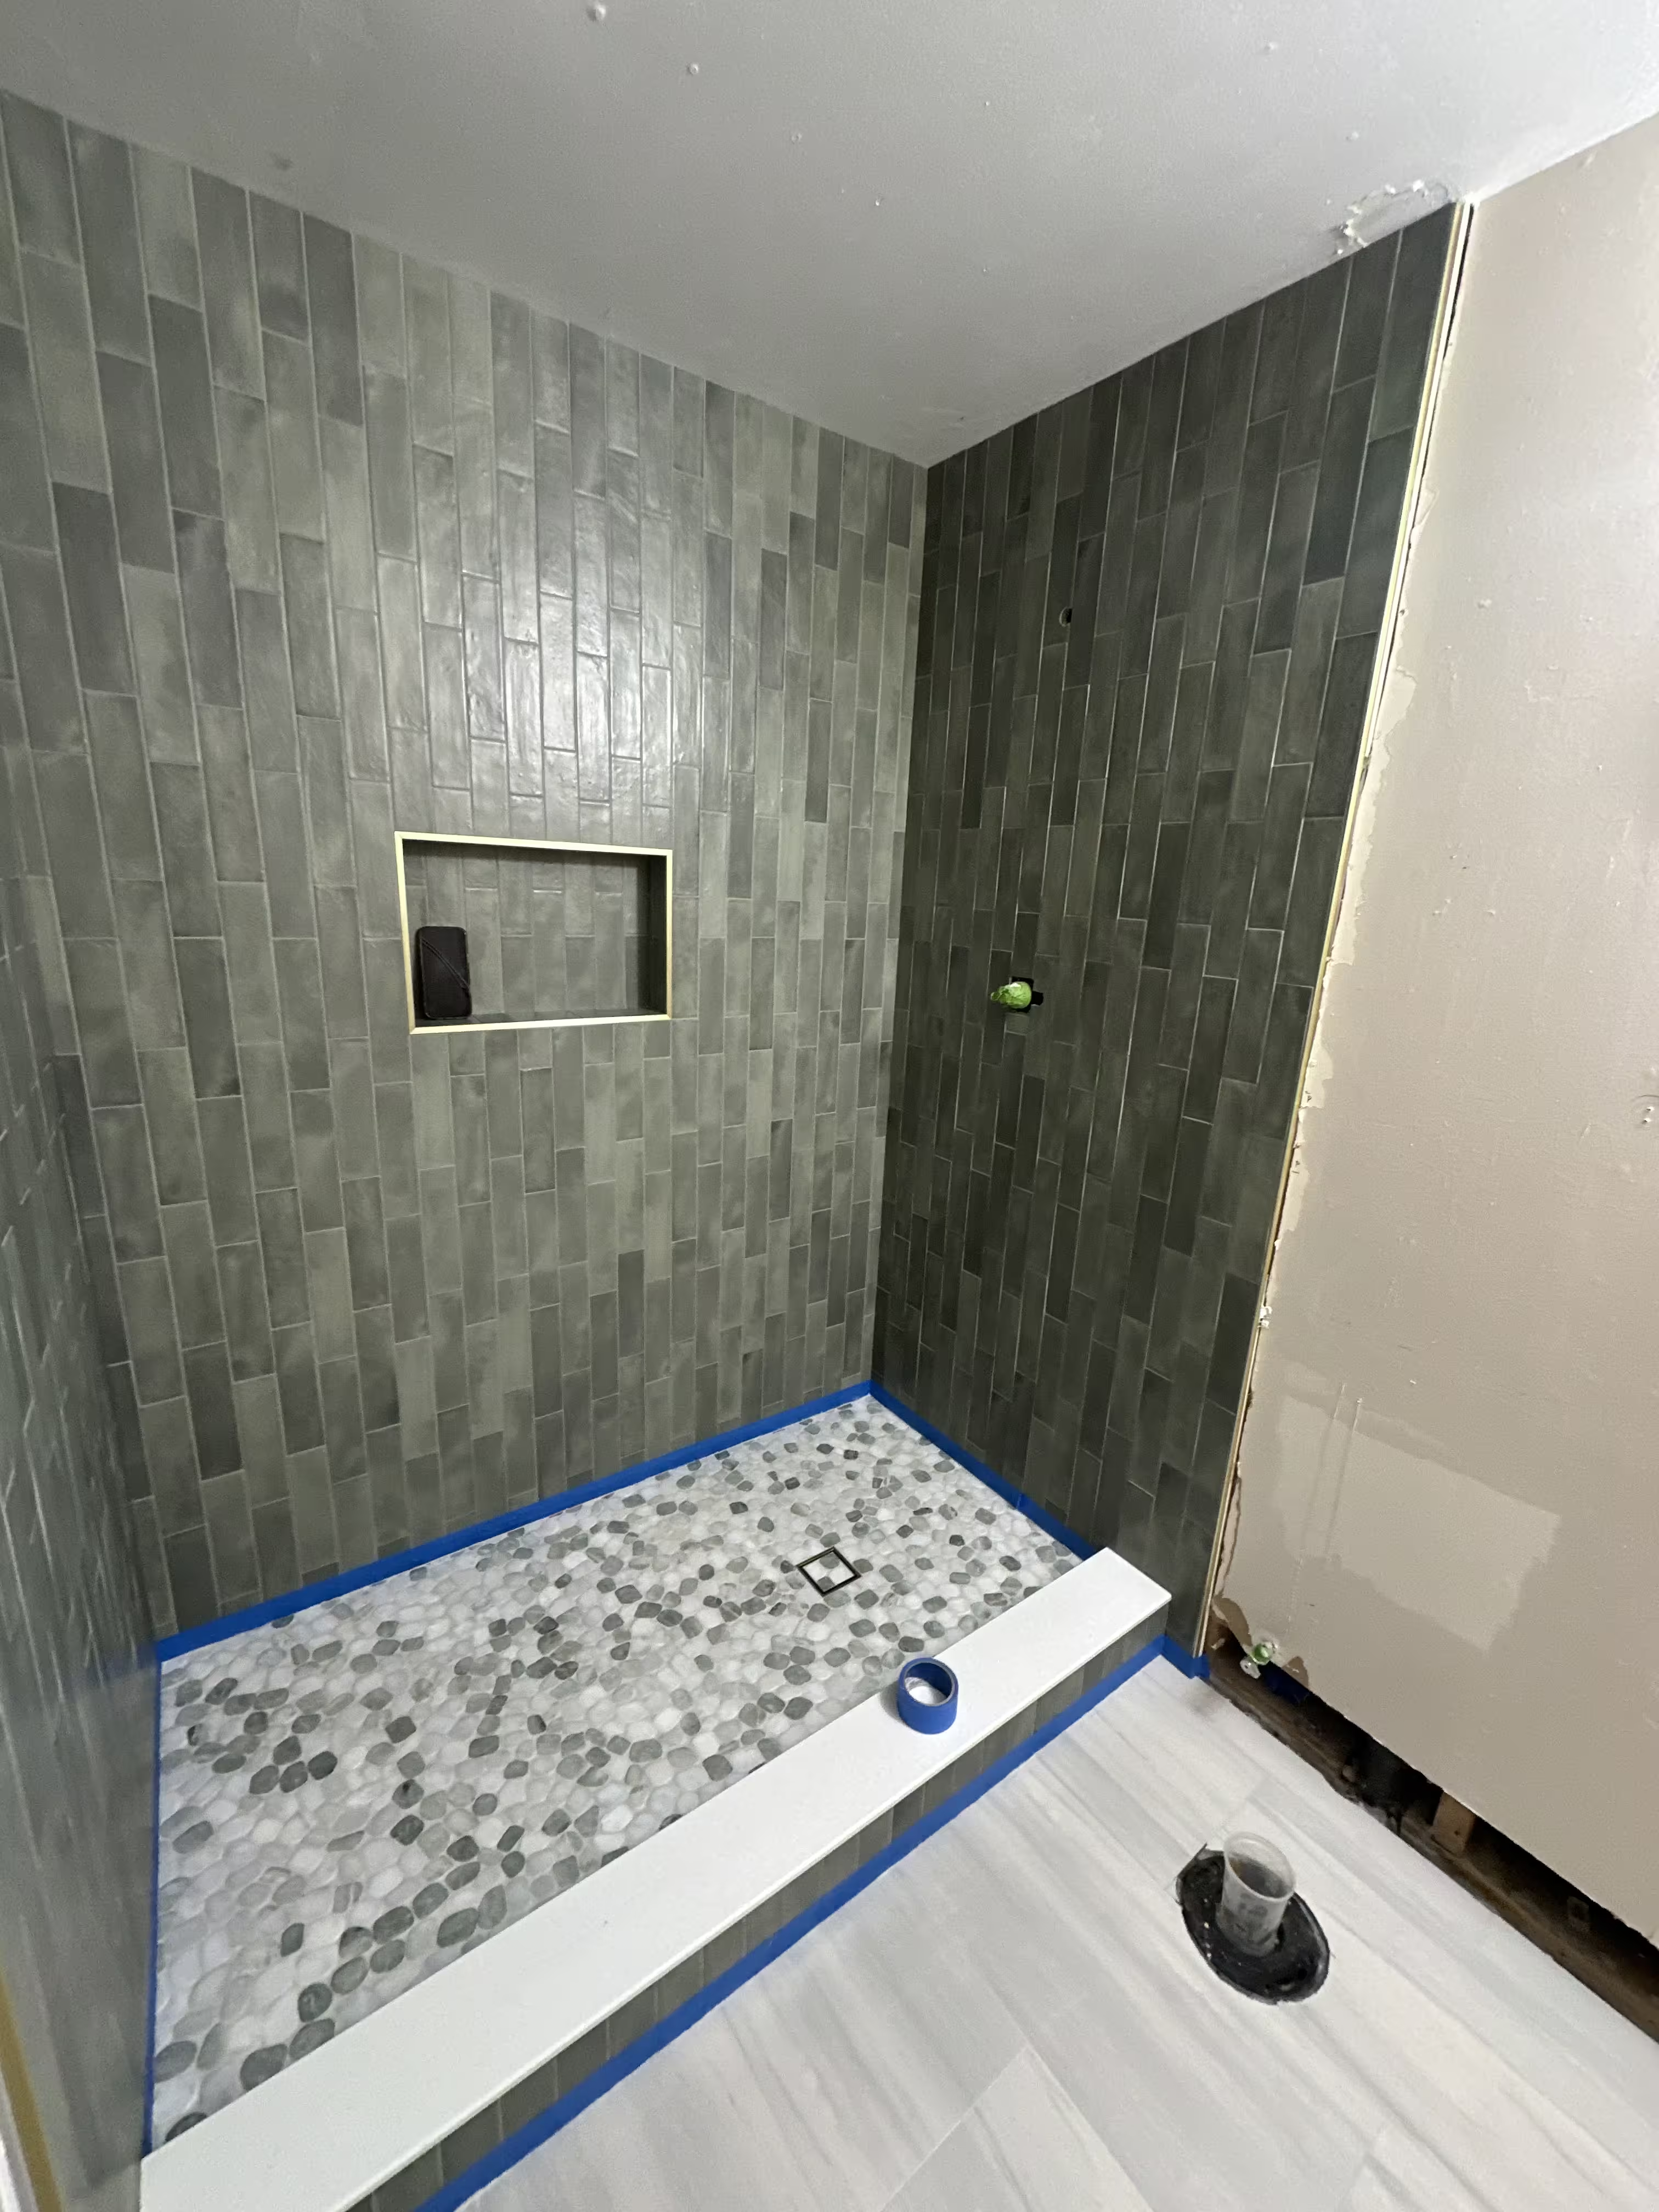
Shower Remodeling in Commerce City — Green Stacked Tile & Pebble Floor
A complete tear-out and rebuild: new plumbing rough-in, a hand-floated deck-mud pan, sealed waterproofing, green vertical stacked wall tile, a river-rock pebble floor, and new glass.
Project Overview
This project was a complete shower remodeling job in Commerce City, CO — the existing shower was torn out to the bare studs and rebuilt from the framing outward. The homeowners wanted a shower that looked nothing like the unit it replaced: green rectangular tile stacked in clean vertical lines, a natural river-rock pebble floor, a recessed niche with metal edge trim, and a new glass enclosure to finish the opening.
Because everything came out, everything could be done properly. We reworked the plumbing rough-in with new copper supply lines, floated a new deck-mud pan over a waterproof liner, hung fresh cement backer board, and taped and sealed every seam before a single tile went on the wall. The finished walls read as one calm field of vertical lines, and the pebble floor gives the wet area real texture underfoot.
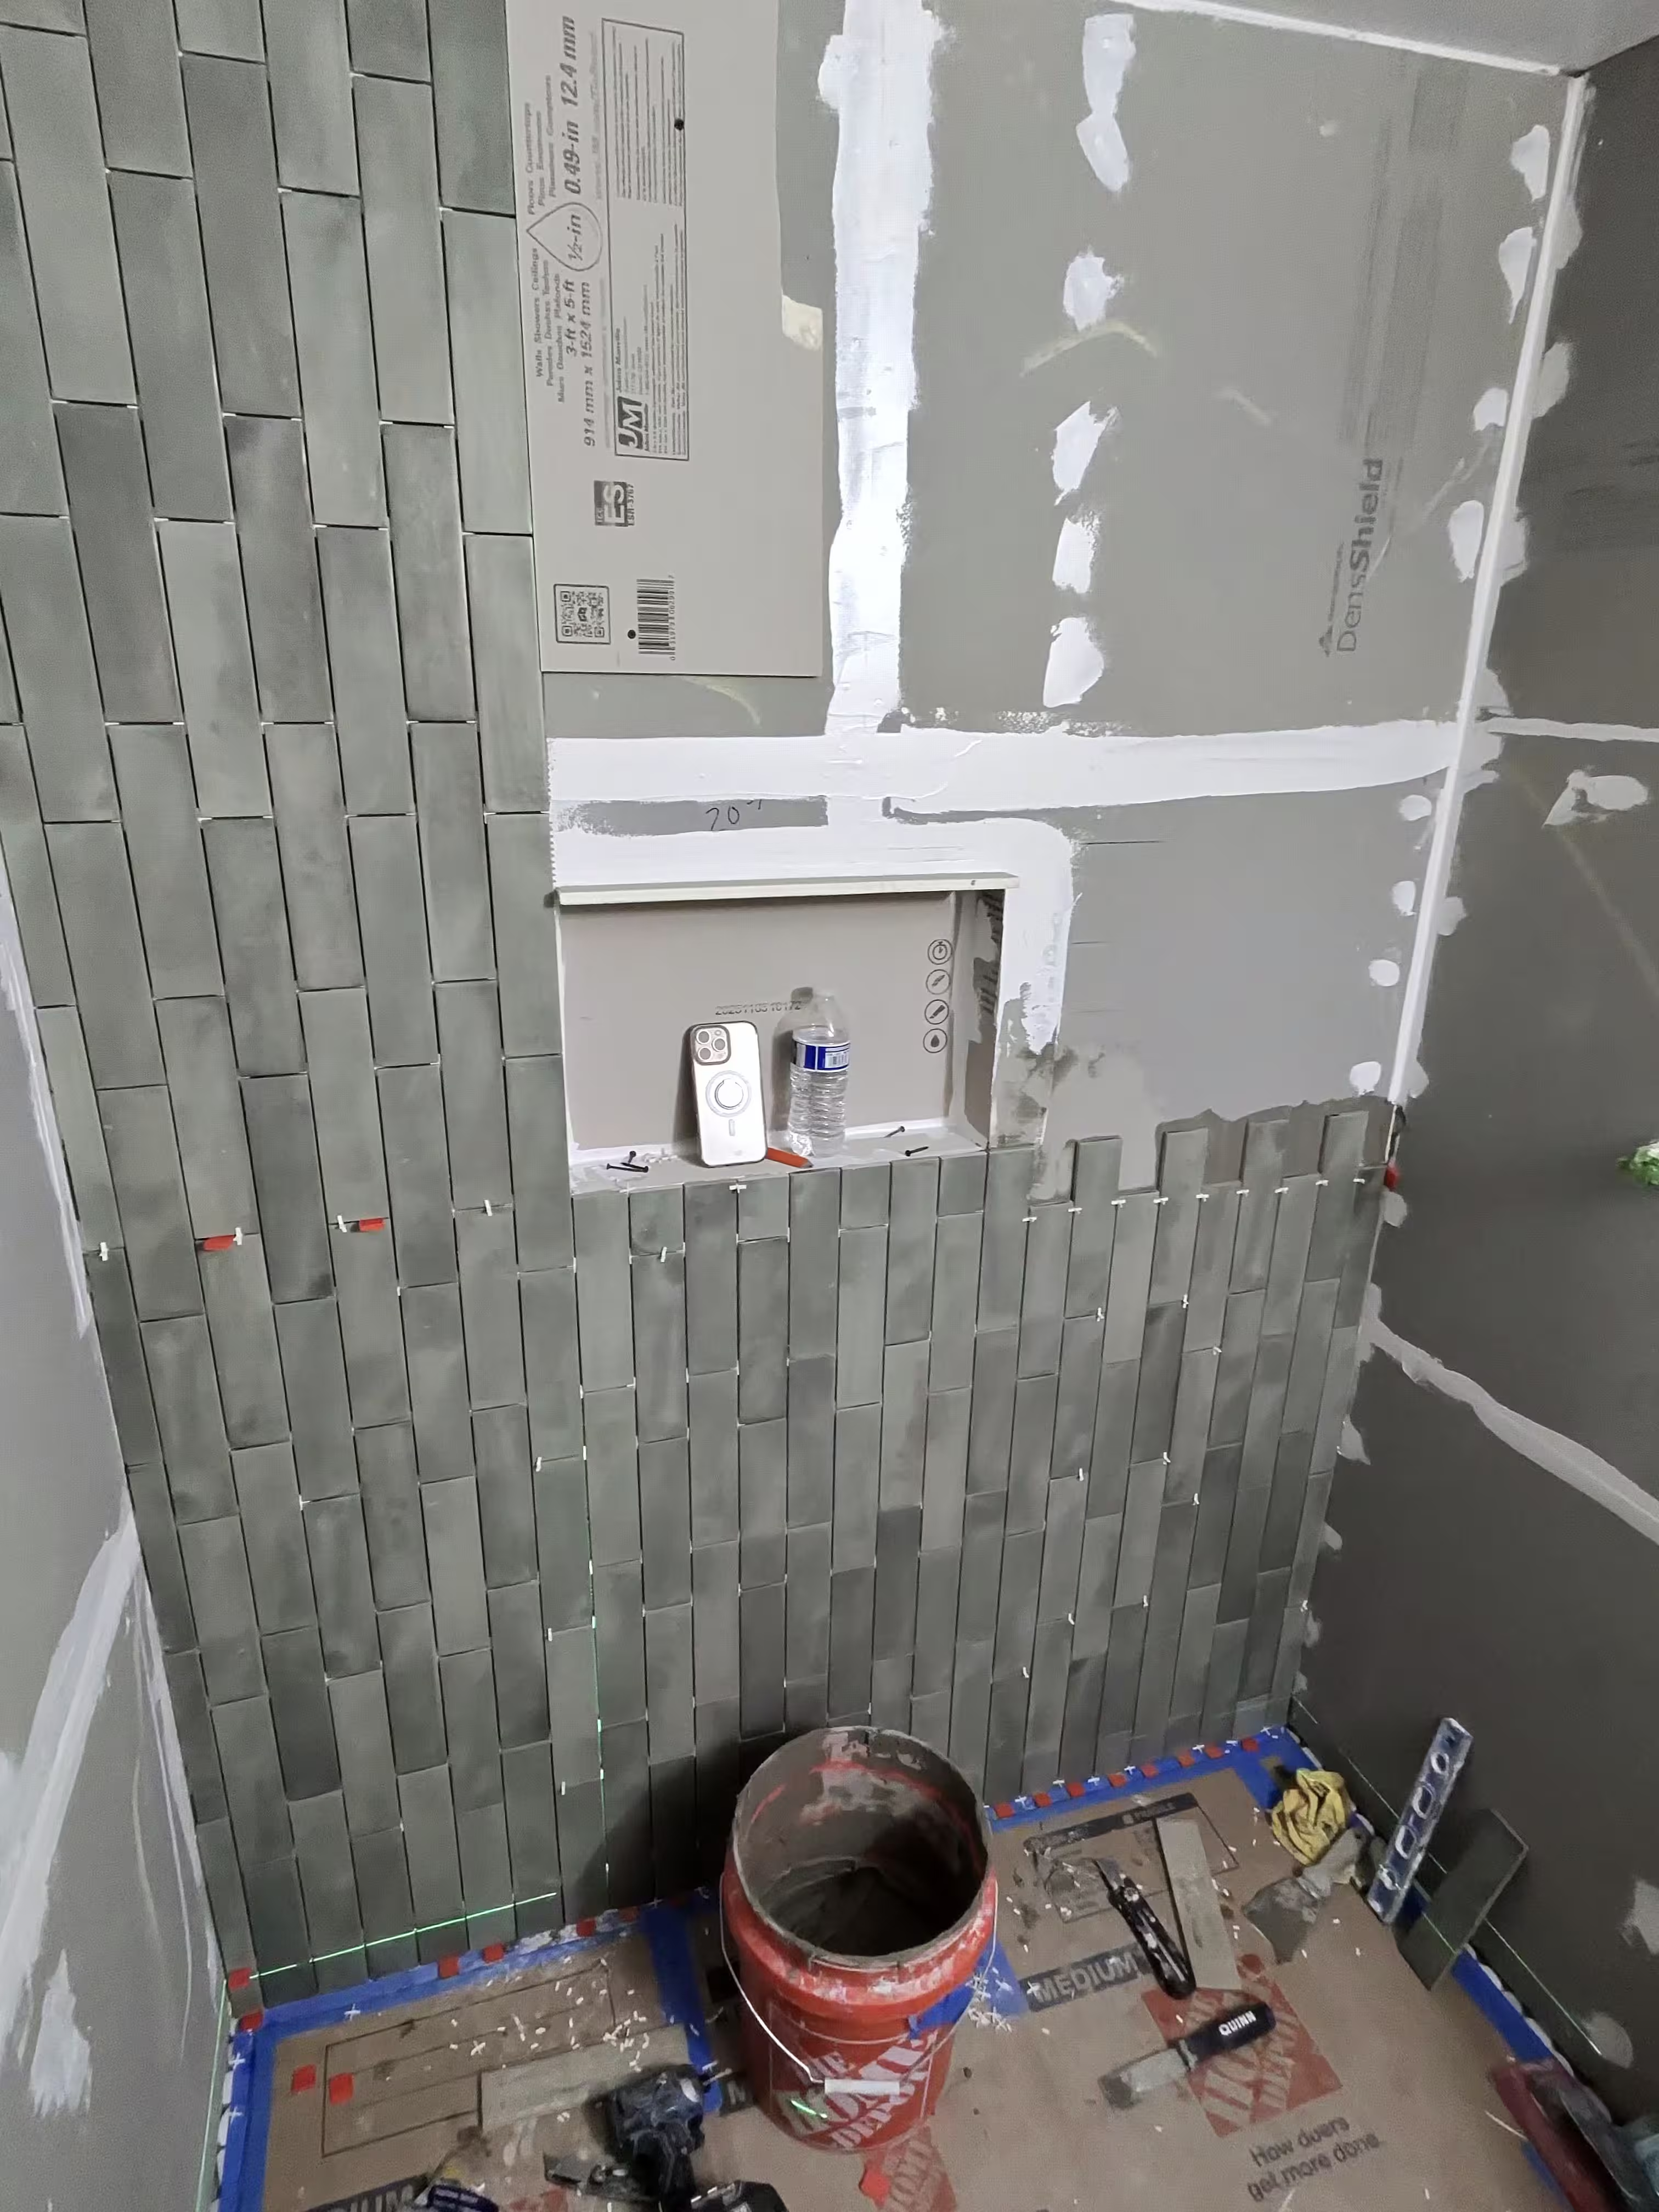
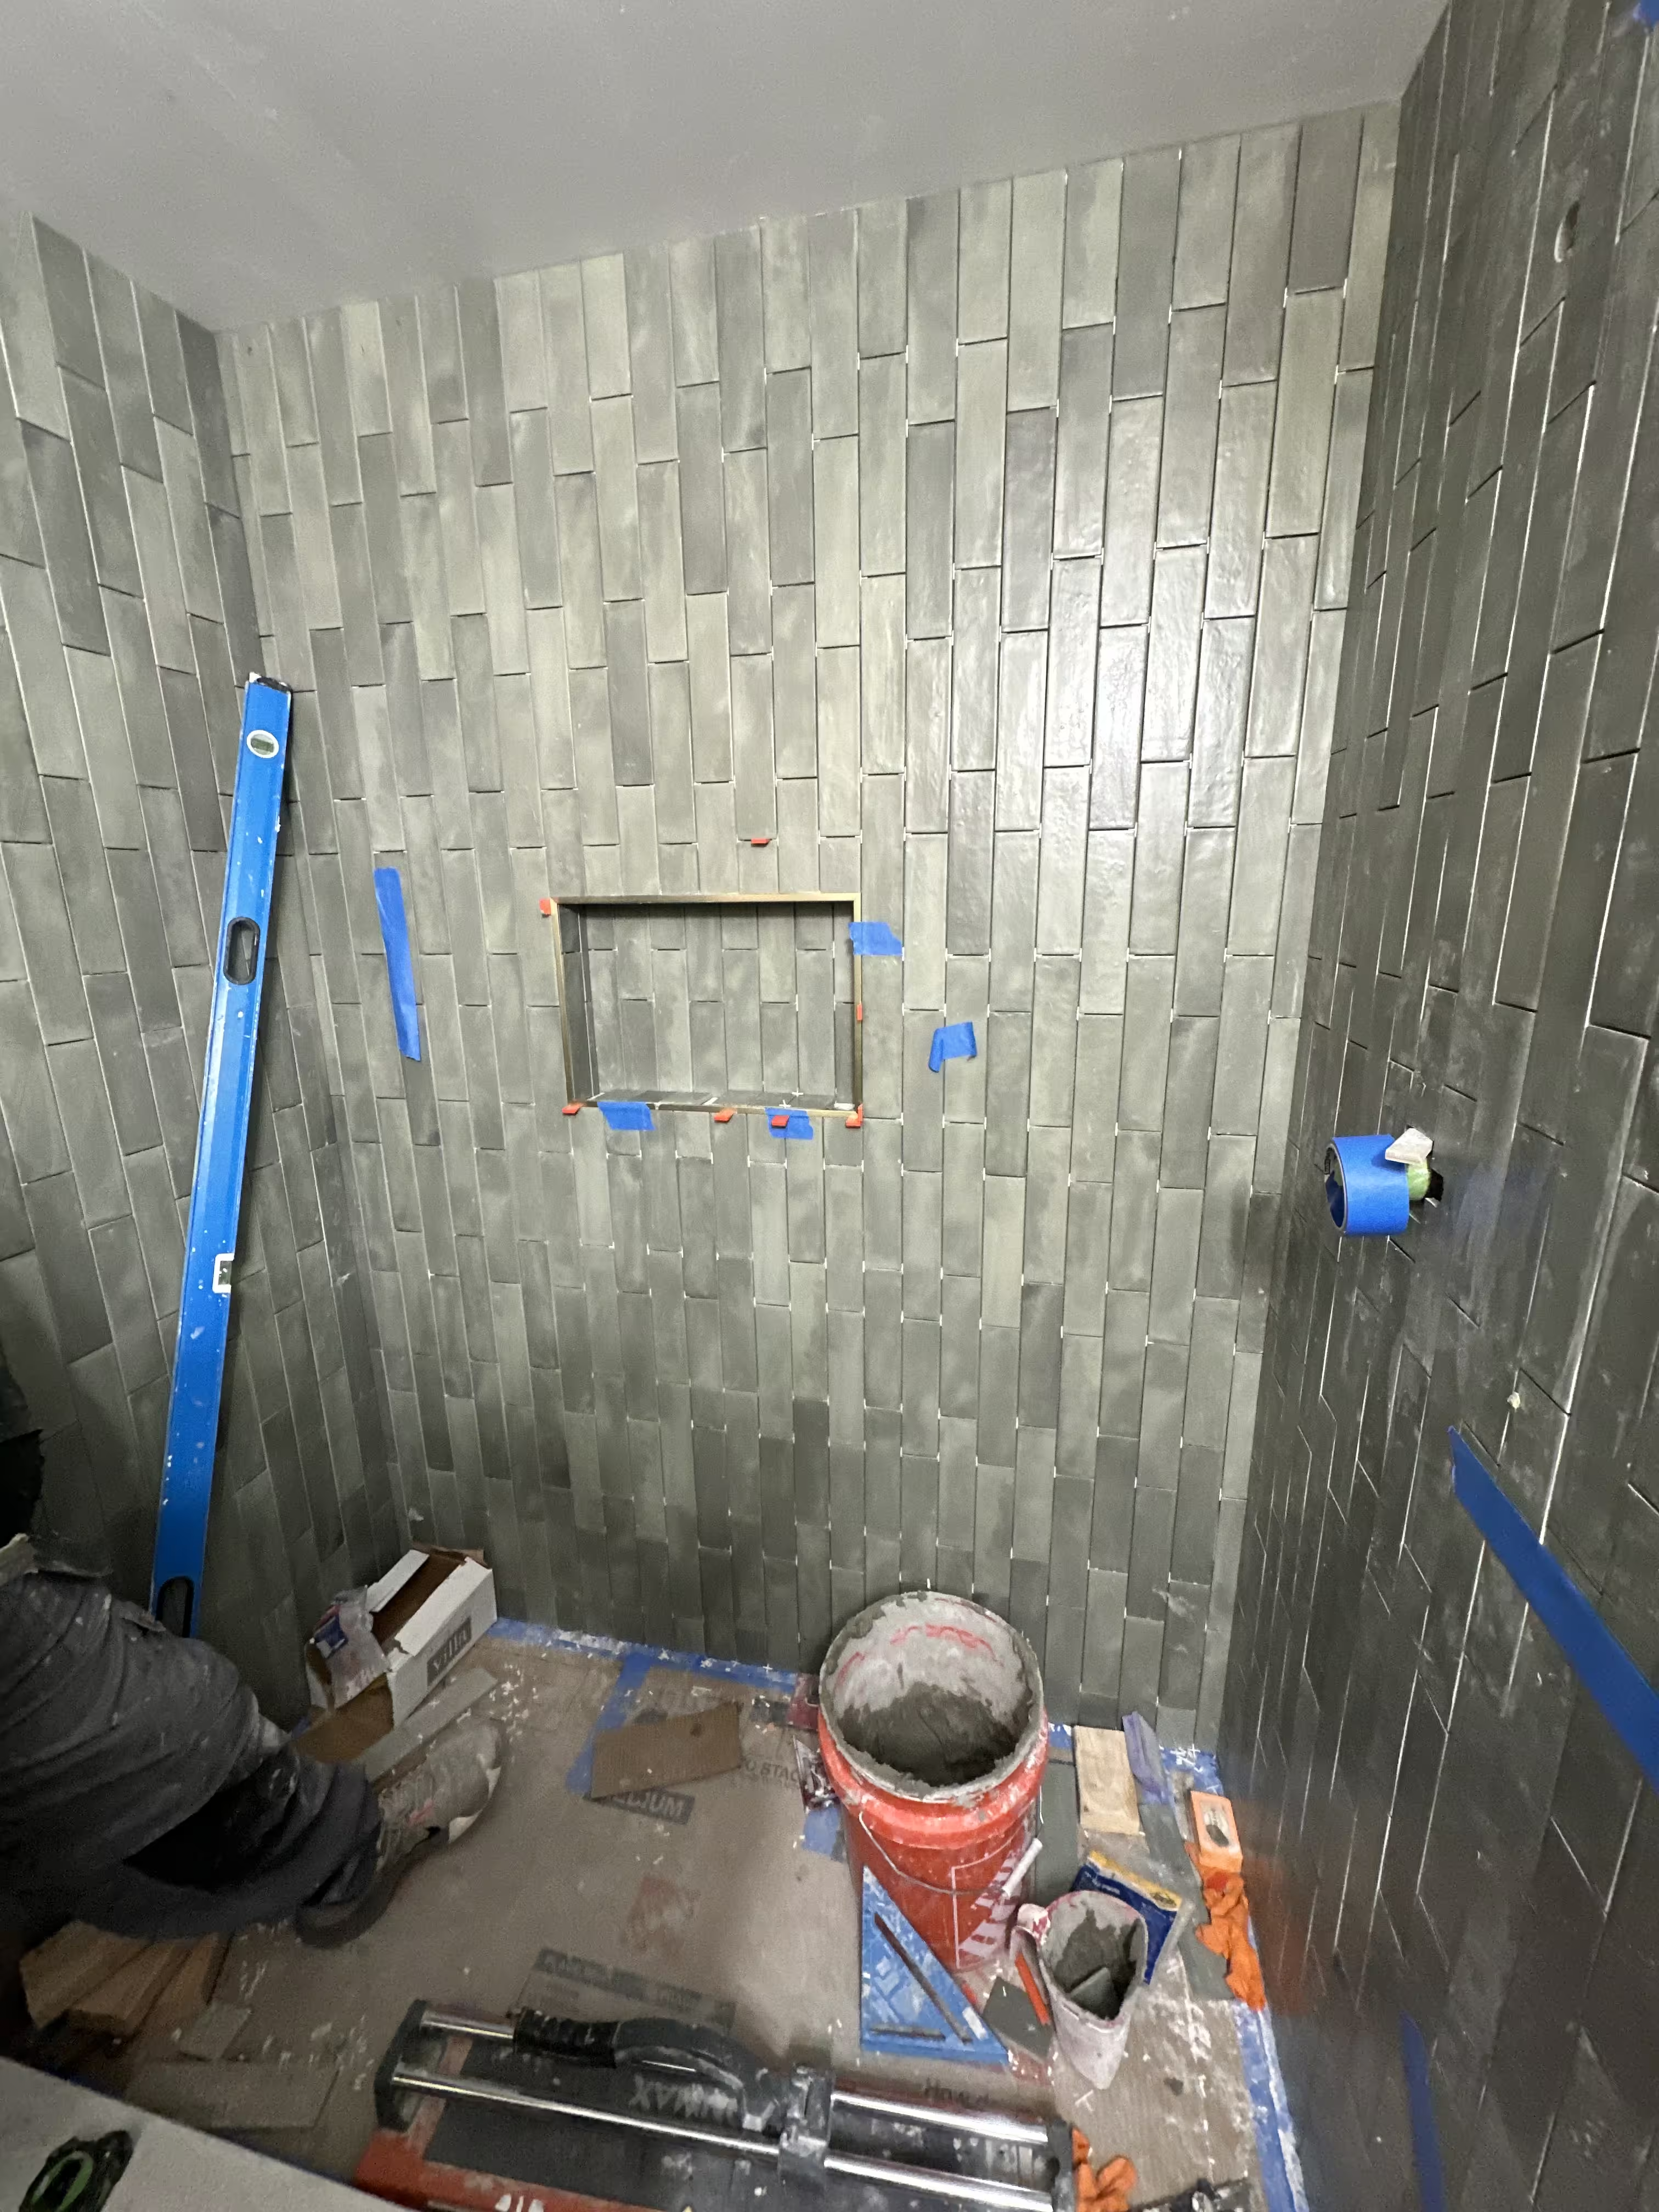
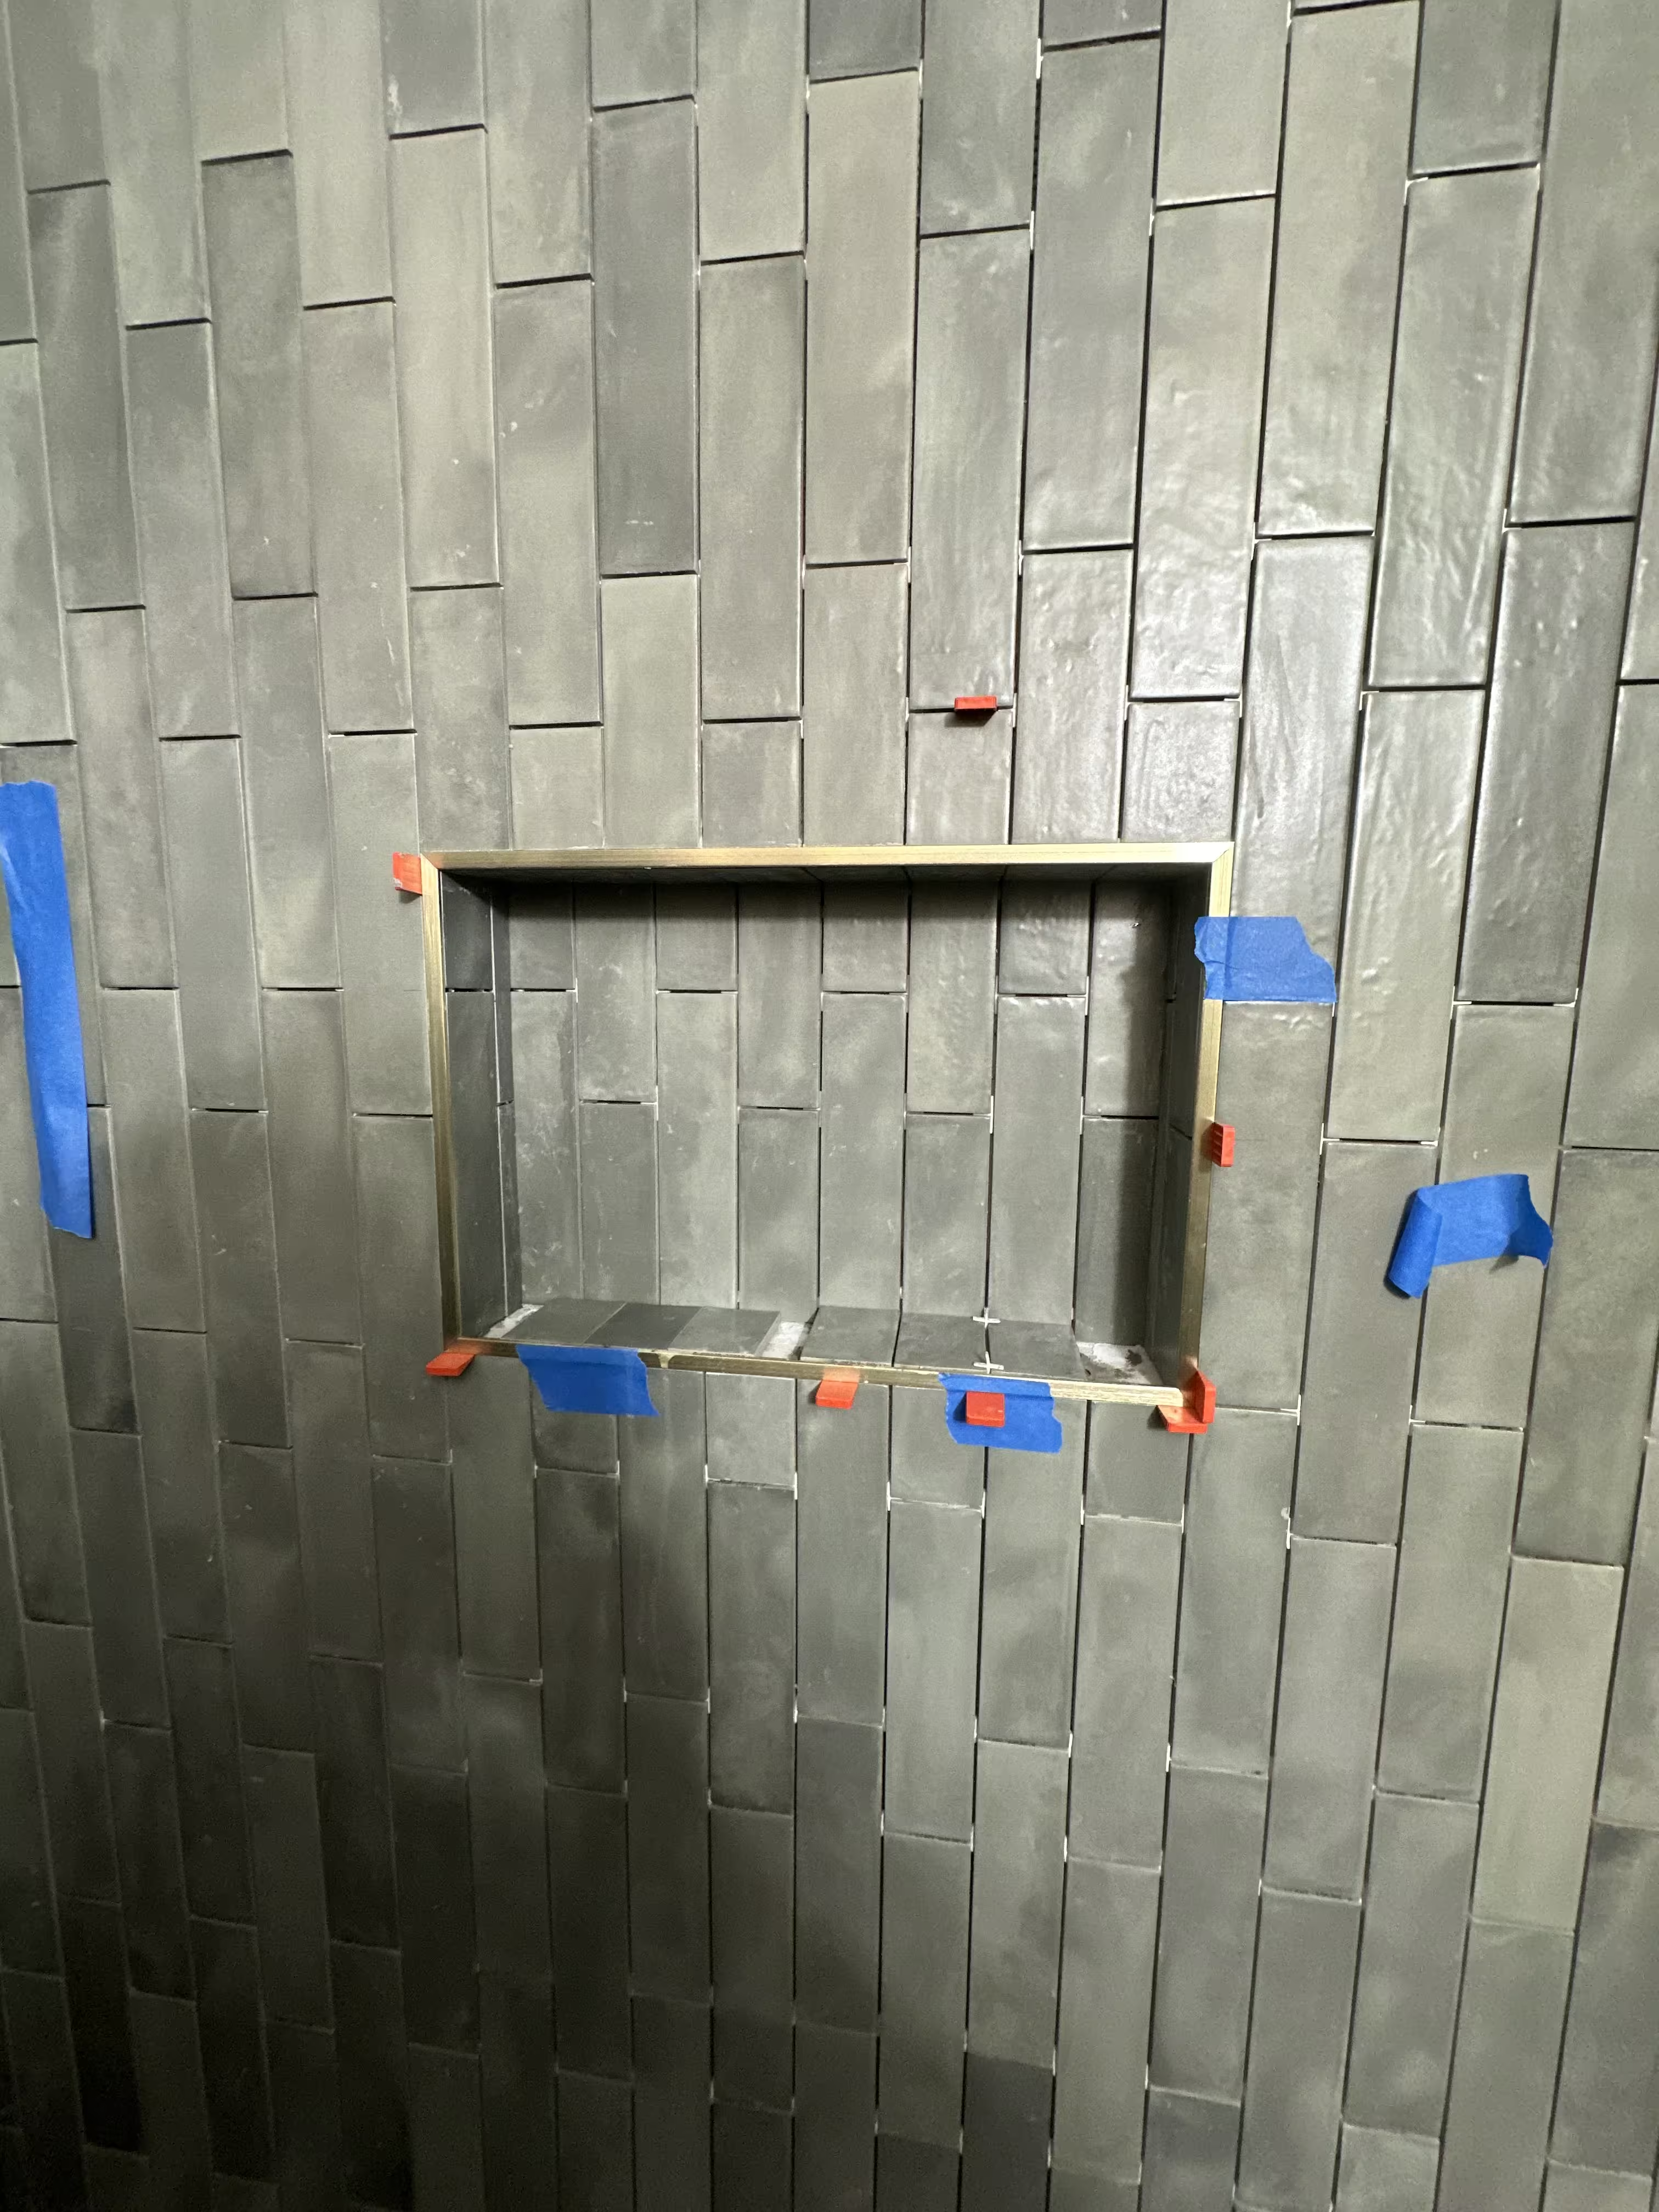
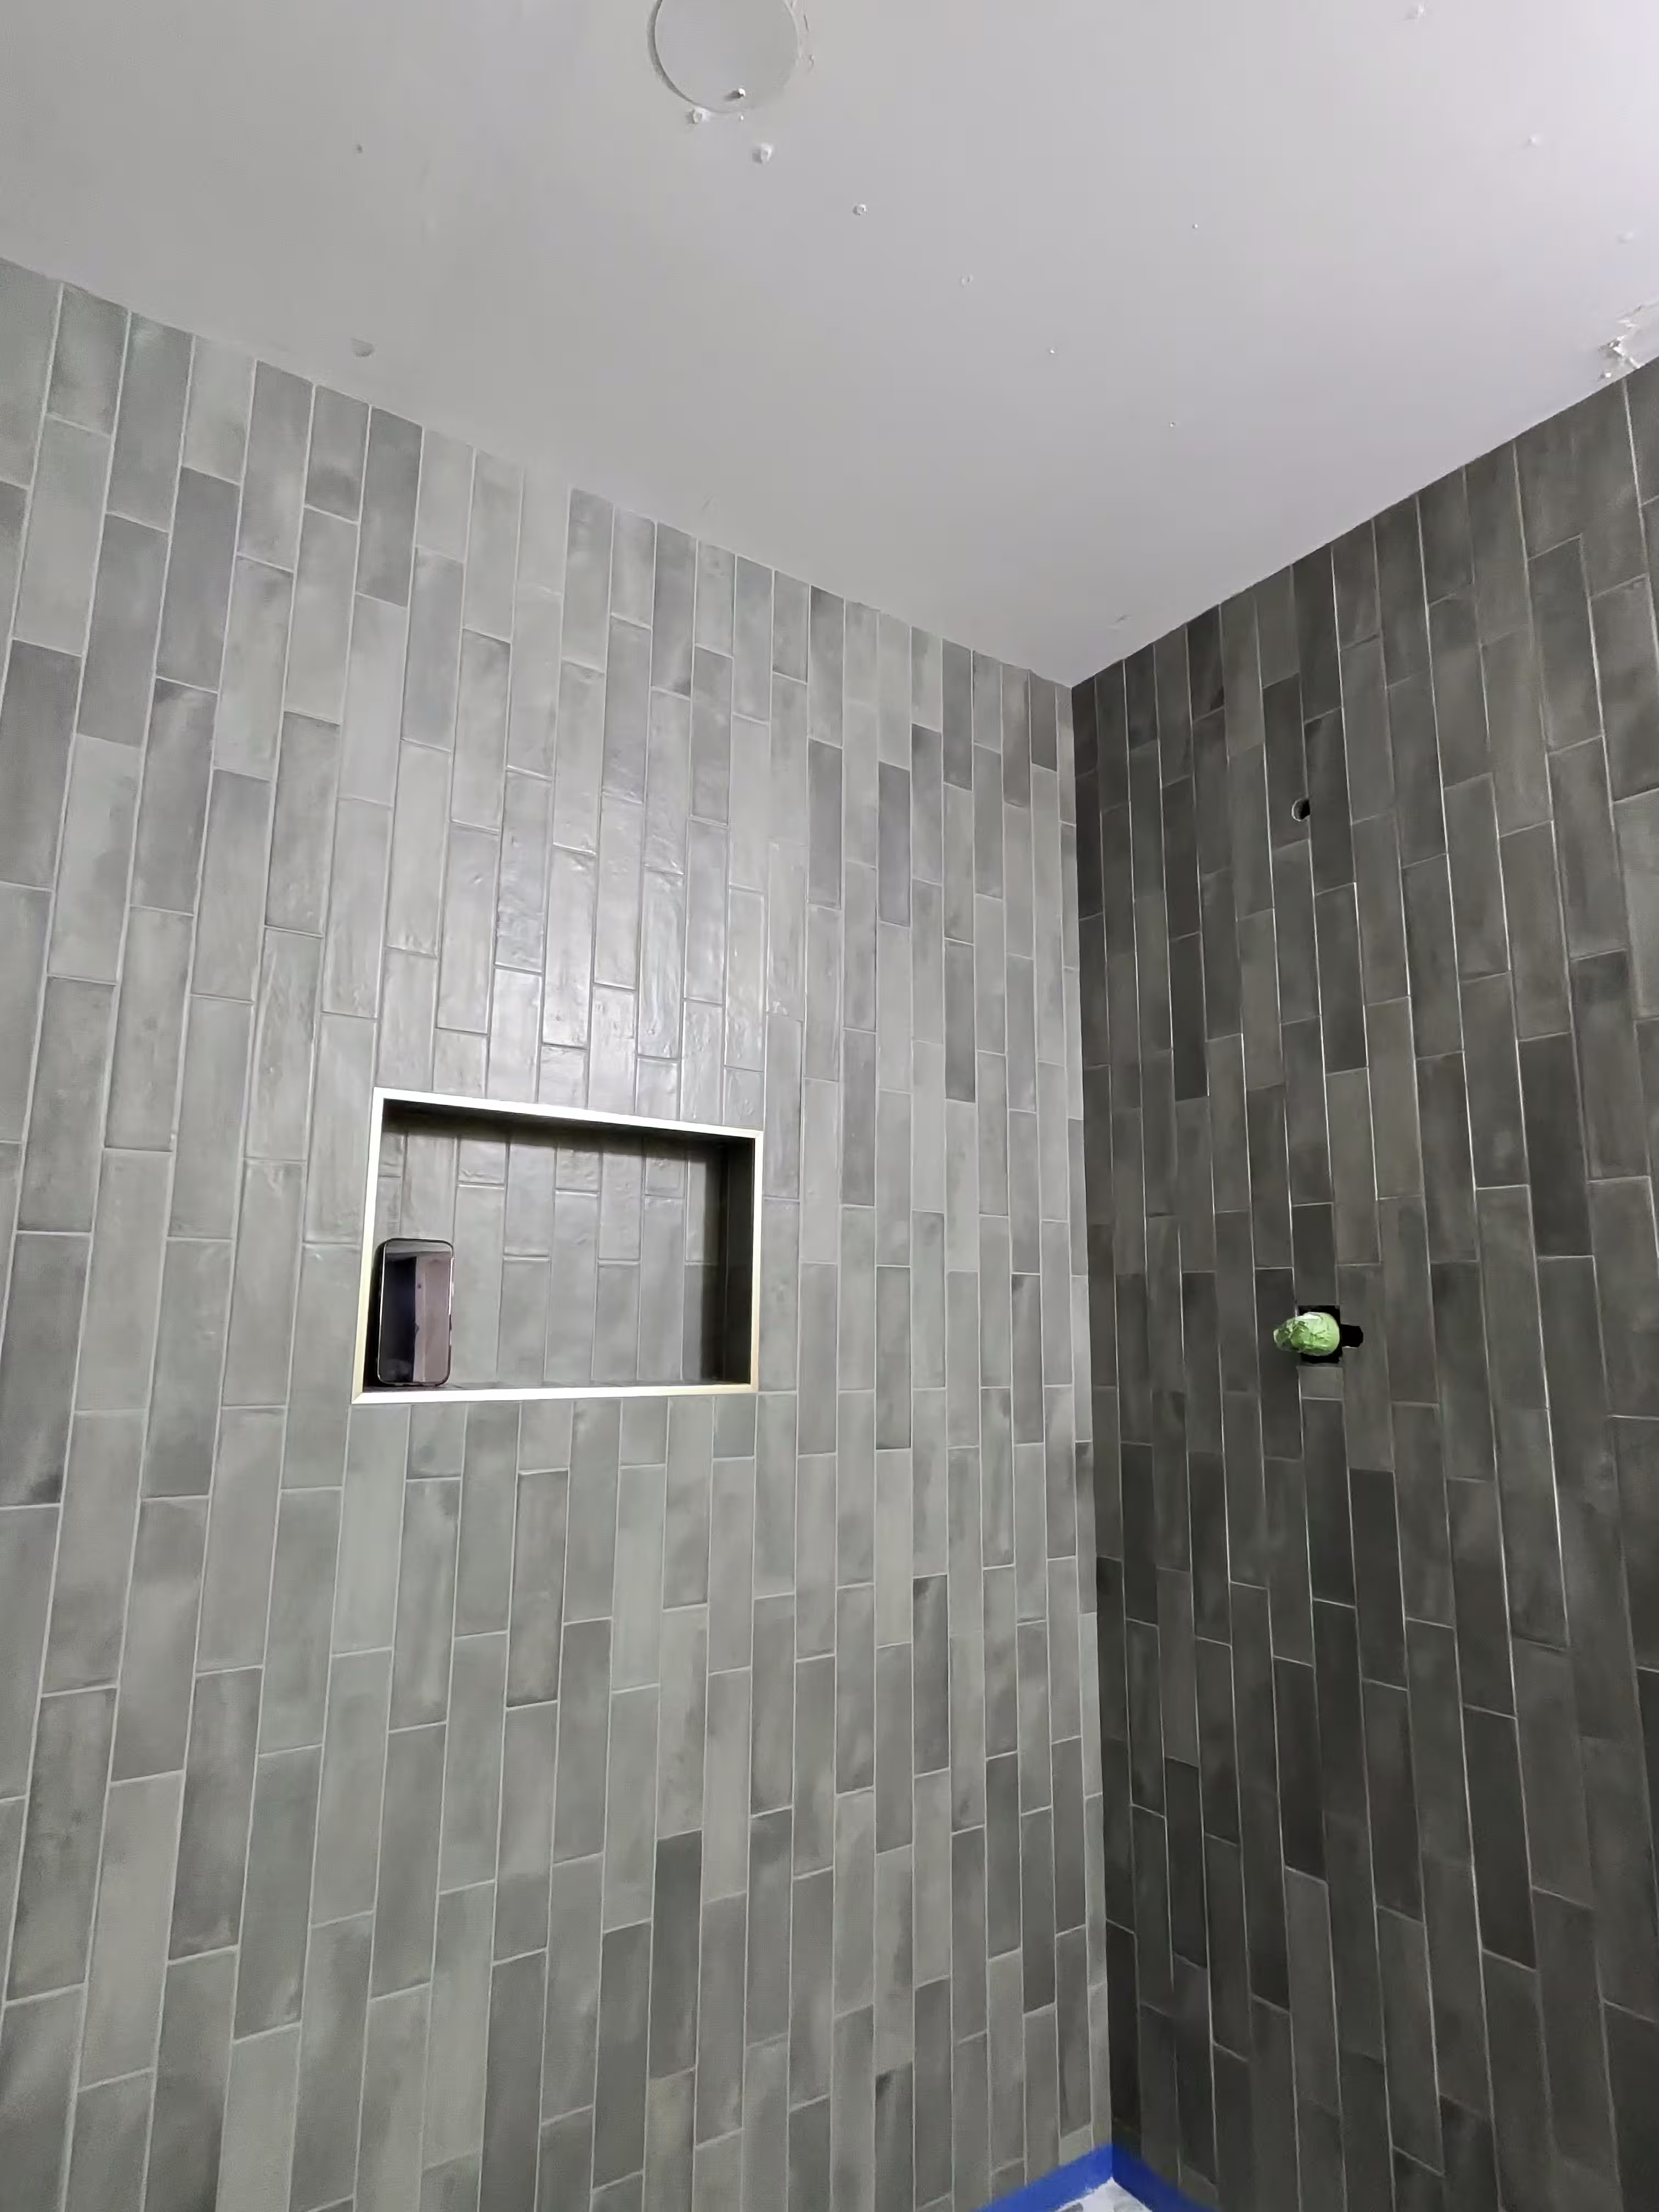
The photos on this page follow the actual sequence of the build — framing, rough-in, pan, waterproofing, tile, and the finished shower — so you can see exactly what a full shower rebuild involves long before the pretty part shows up.
Project Details
Location
Commerce City, CO
Project Type
Full Shower Remodel
Style
Green stacked tile & pebble floor
Approach
Tear-out & rebuild from the studs
Scope of Work
- Full demolition of the existing shower
- New copper supply lines & valve rough-in
- Hand-floated deck-mud shower pan
- Cement backer board & sealed waterproofing
- Green vertical stacked wall tile
- Recessed niche with metal edge trim
- River-rock pebble shower floor
- New glass enclosure
The Challenge
The existing shower had reached the point where cosmetic fixes no longer made sense. Rather than regrout tired walls or patch around a worn base, the right call was a full tear-out: strip the enclosure to the studs, open the plumbing wall, and rebuild the wet area as one new assembly. When the walls are still sound and only the base is failing, a targeted shower pan repair in Commerce City can solve the problem on its own — here, the whole enclosure was at the end of its life, so a complete rebuild was the honest recommendation.
The design itself raised the difficulty. A vertical stacked layout has no pattern offset to hide small errors, so every joint had to run dead straight from the pan to the ceiling, and the framing and backer board underneath had to be flat and plumb to match. The pebble floor added its own demands: natural stone needs a properly sloped base, careful grout work, and sealing that flat tile does not require. None of that shows in the finished photos — which is exactly the point.
Our Solution
A full shower rebuild in three stages — rough-in, waterproofing, and tile
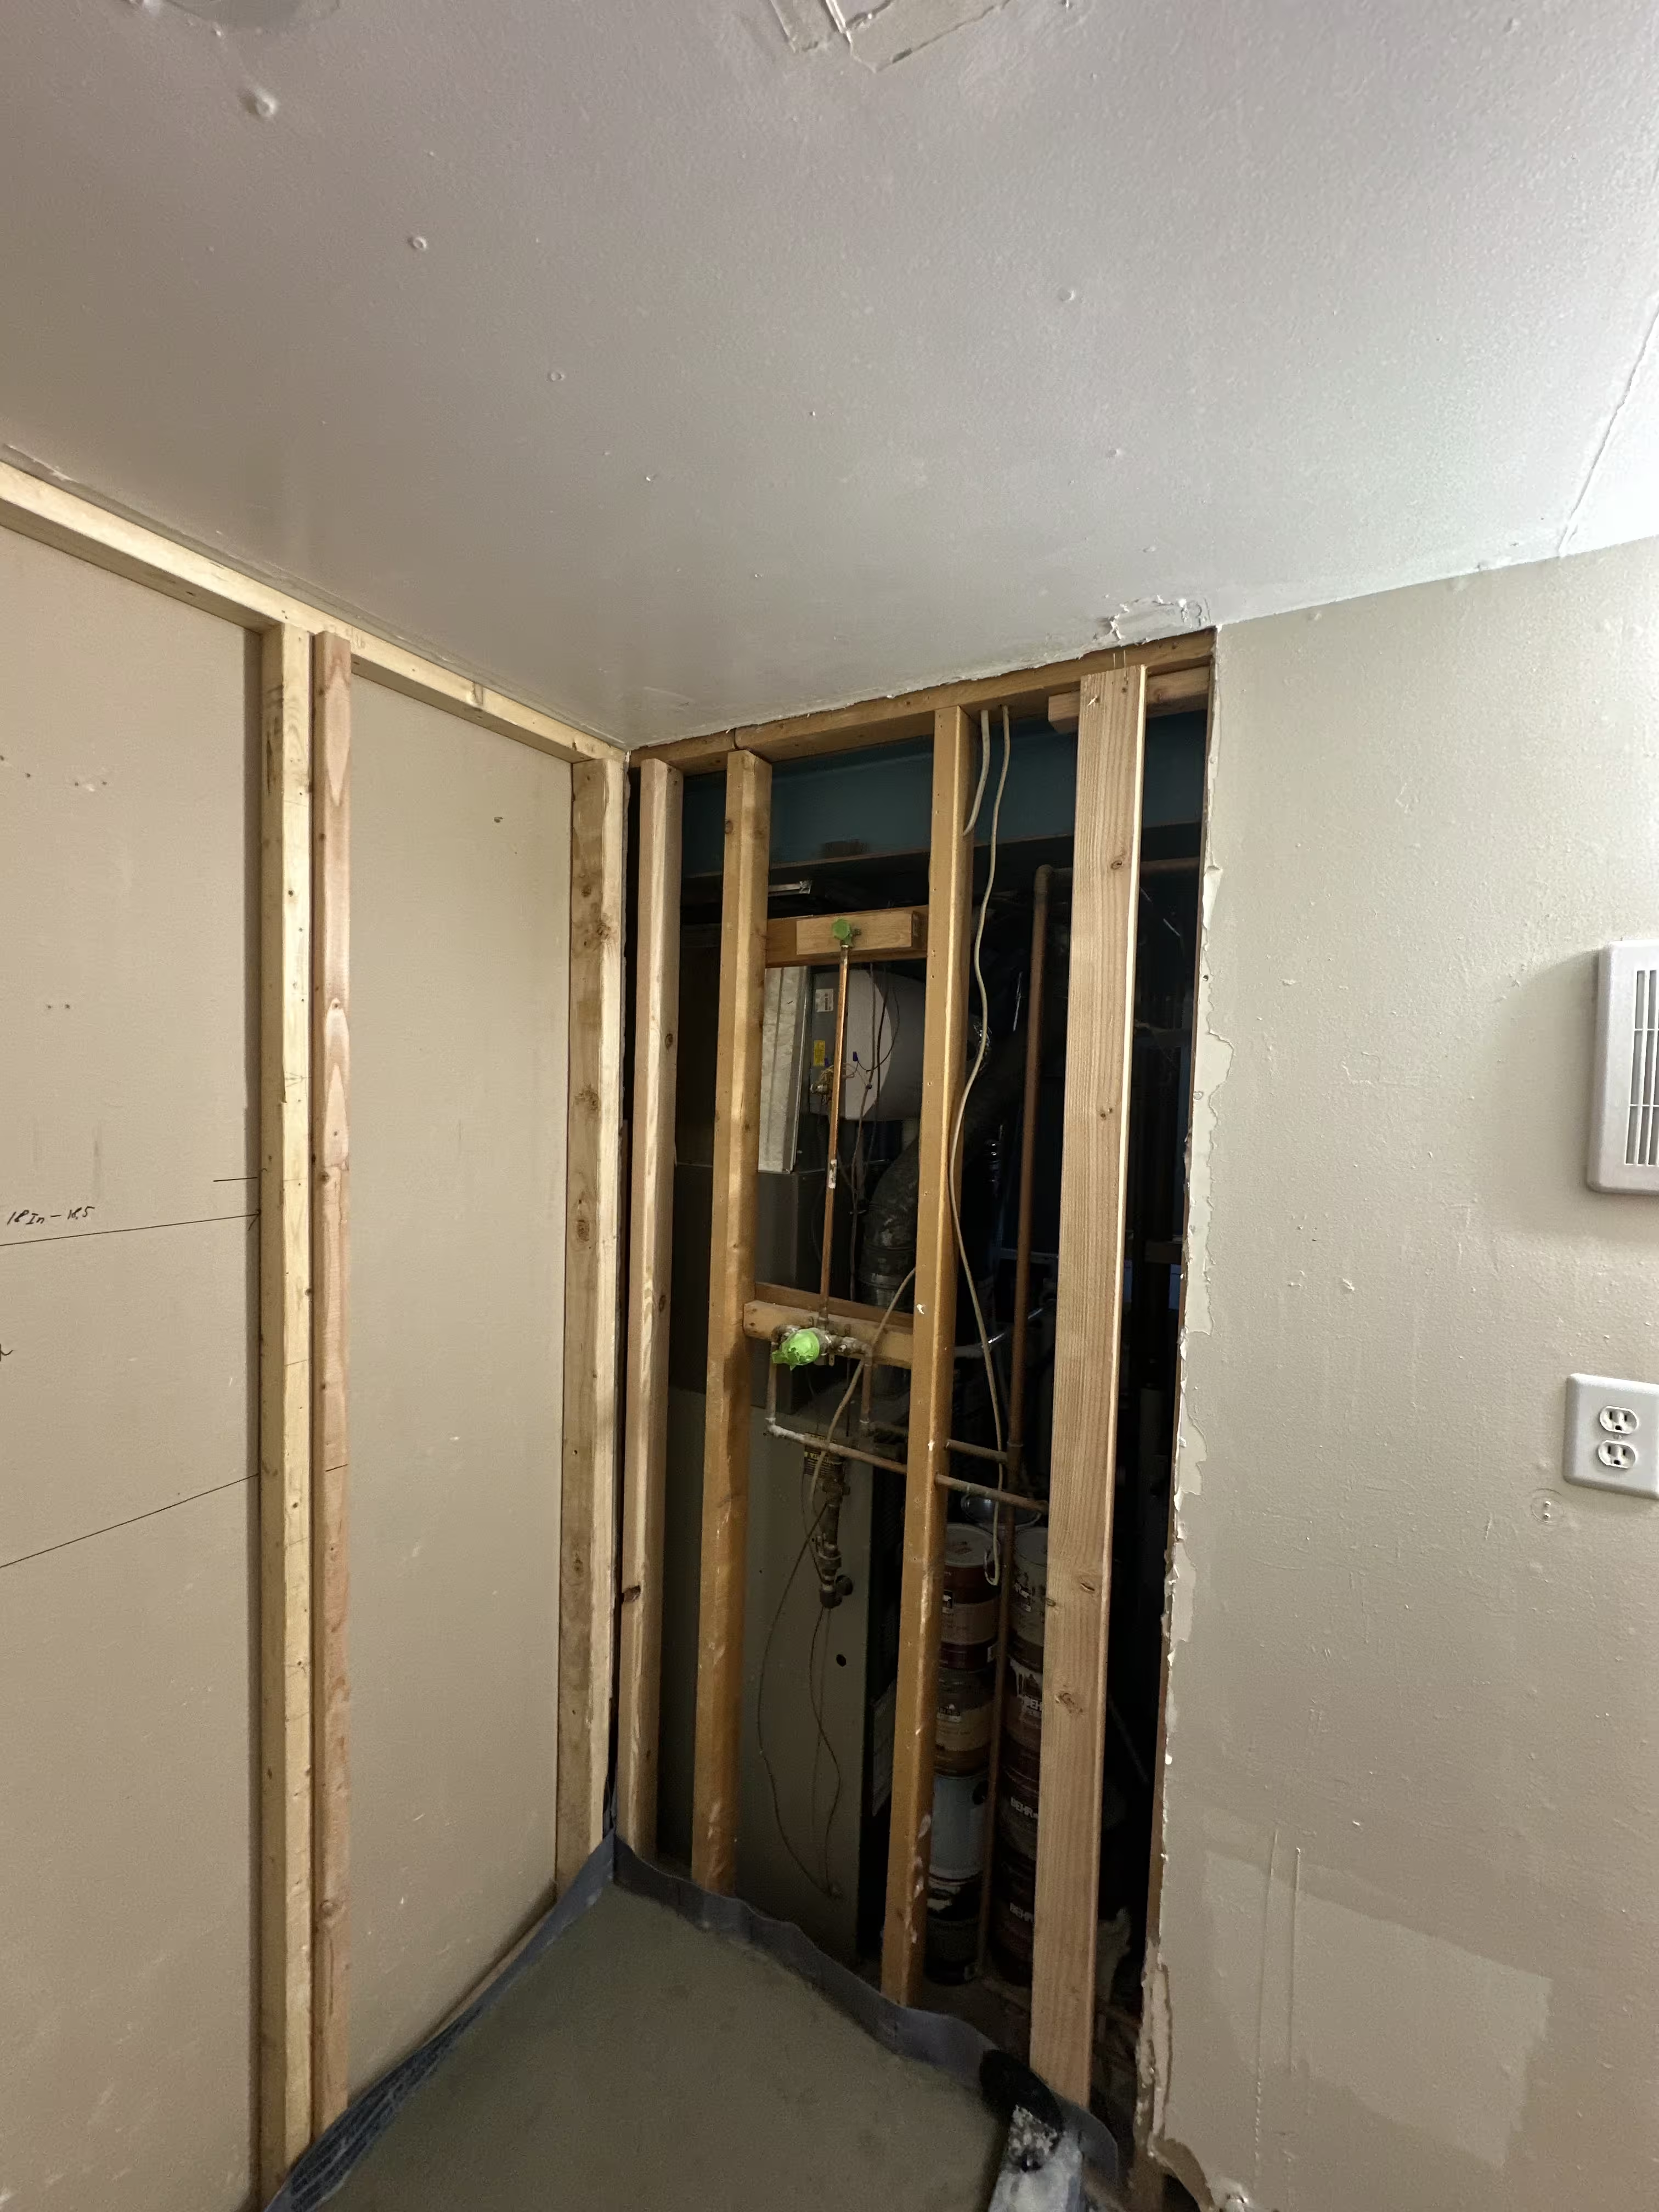
Tear-Out, Framing & Plumbing Rough-In
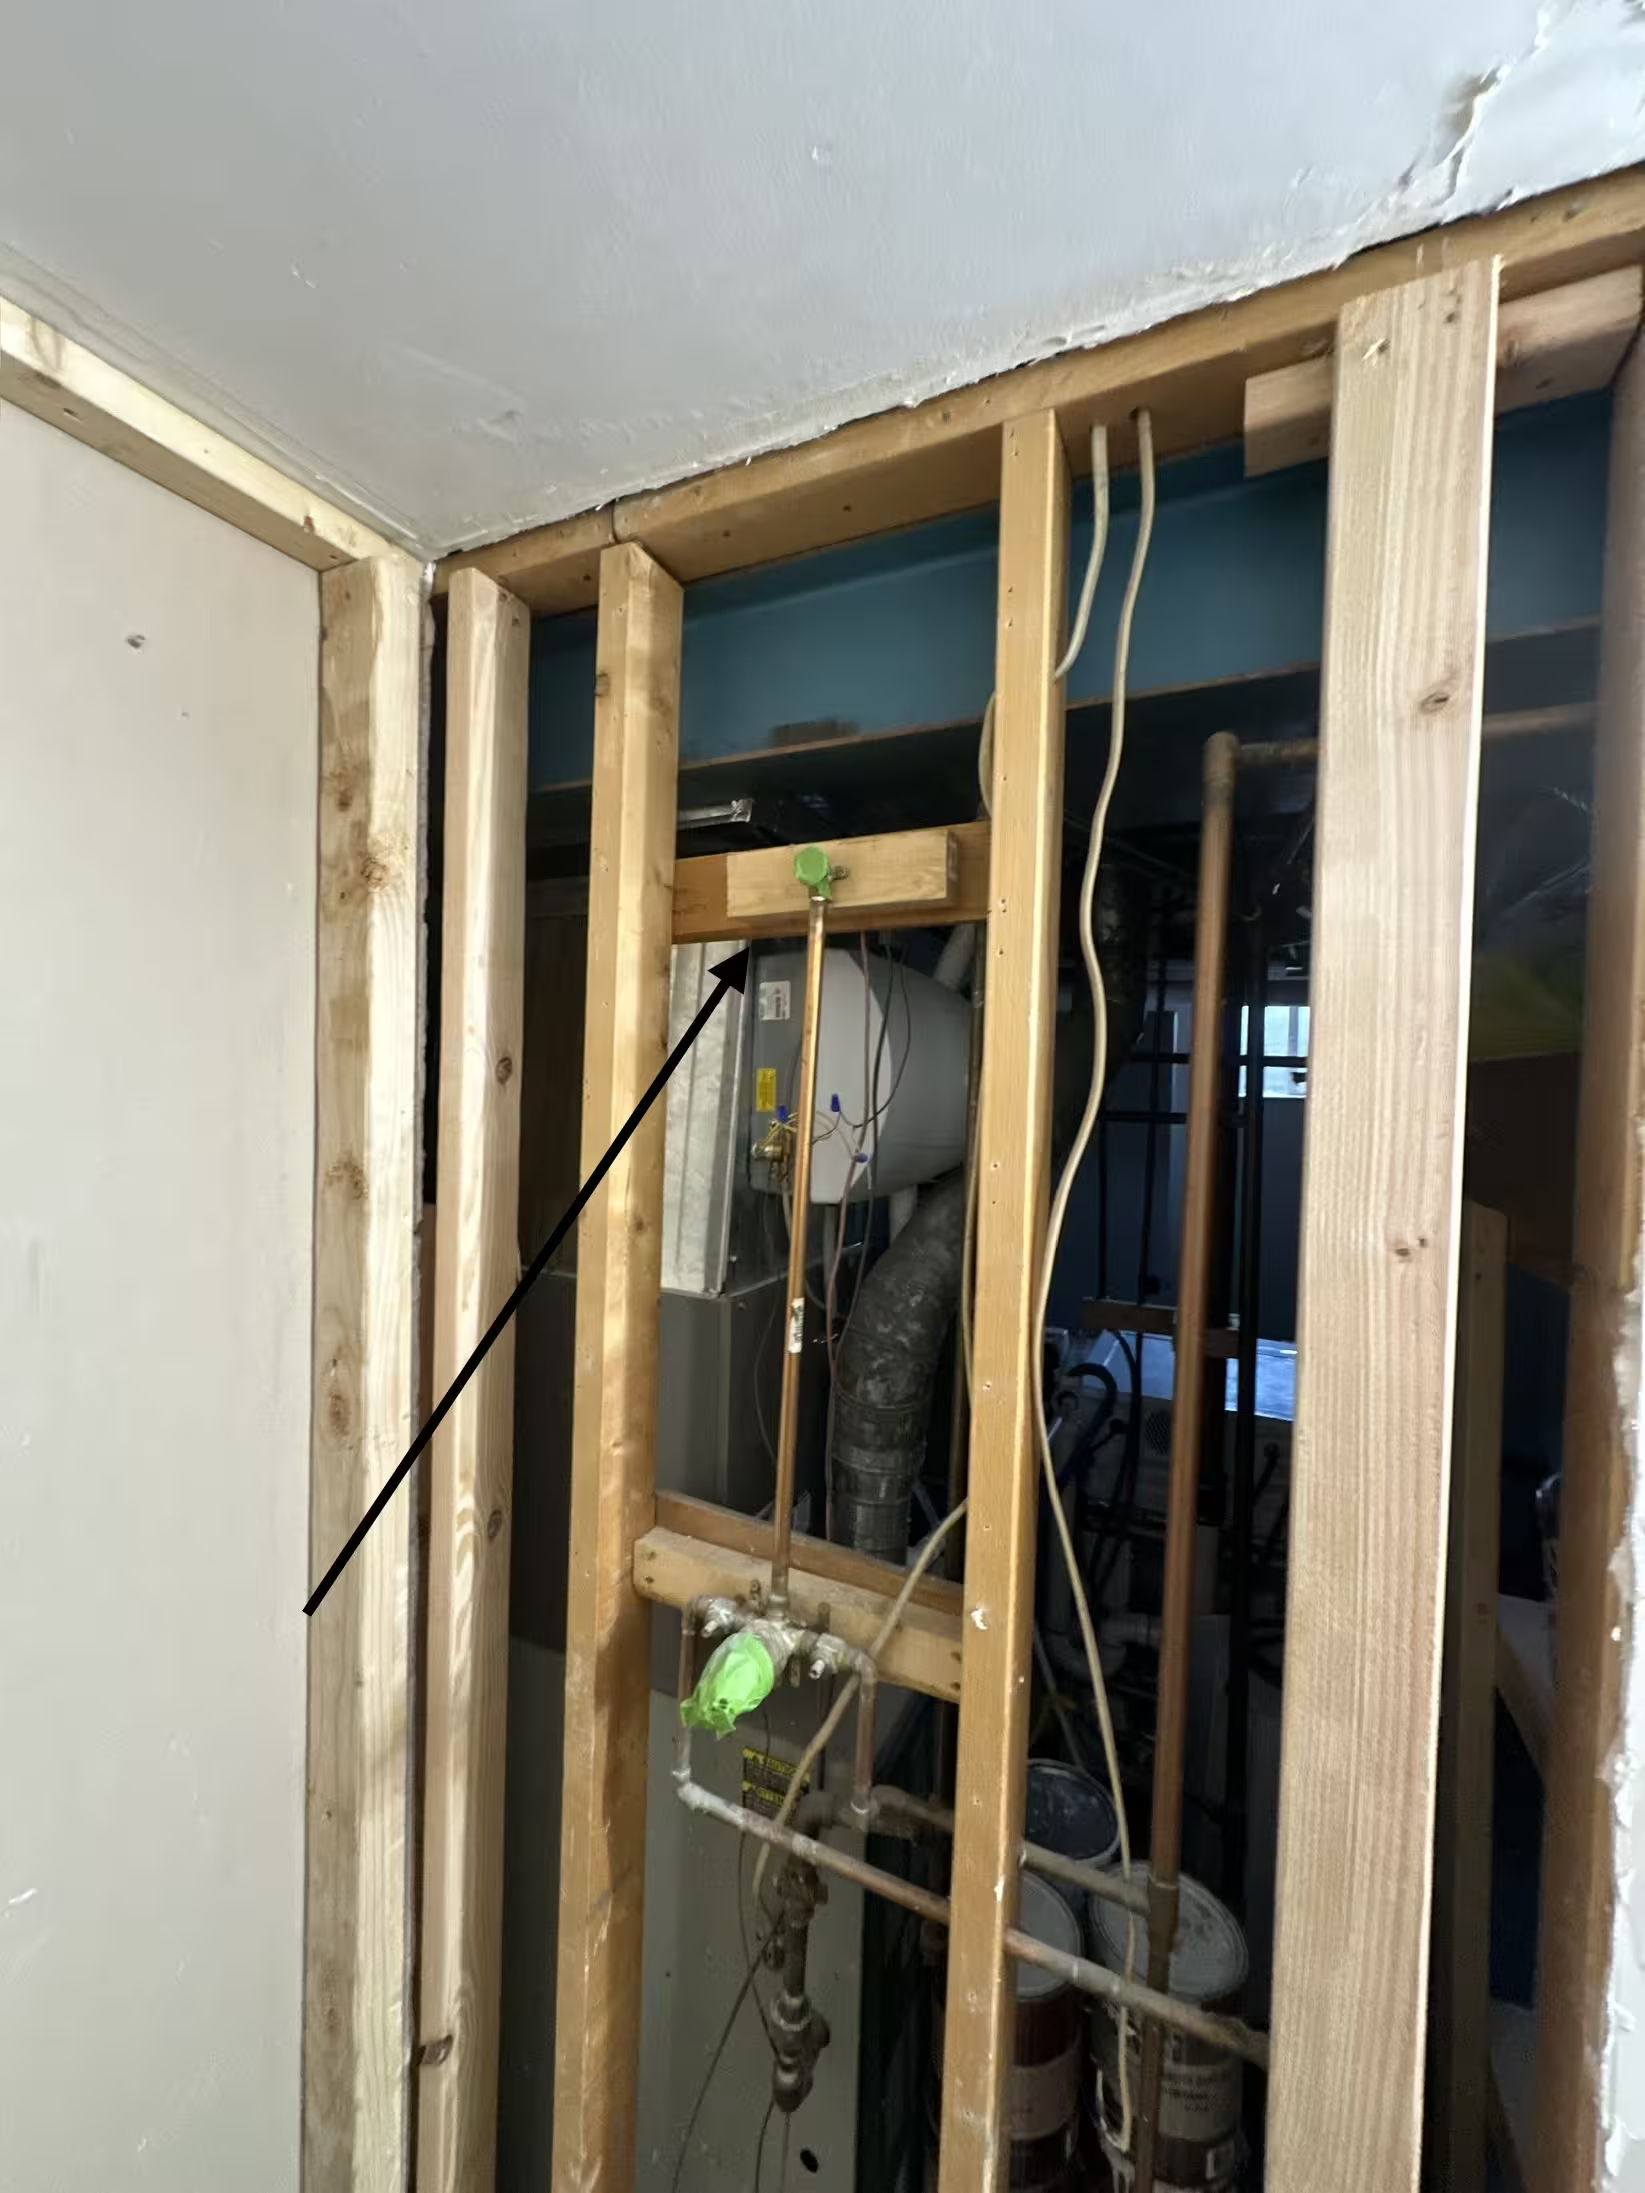
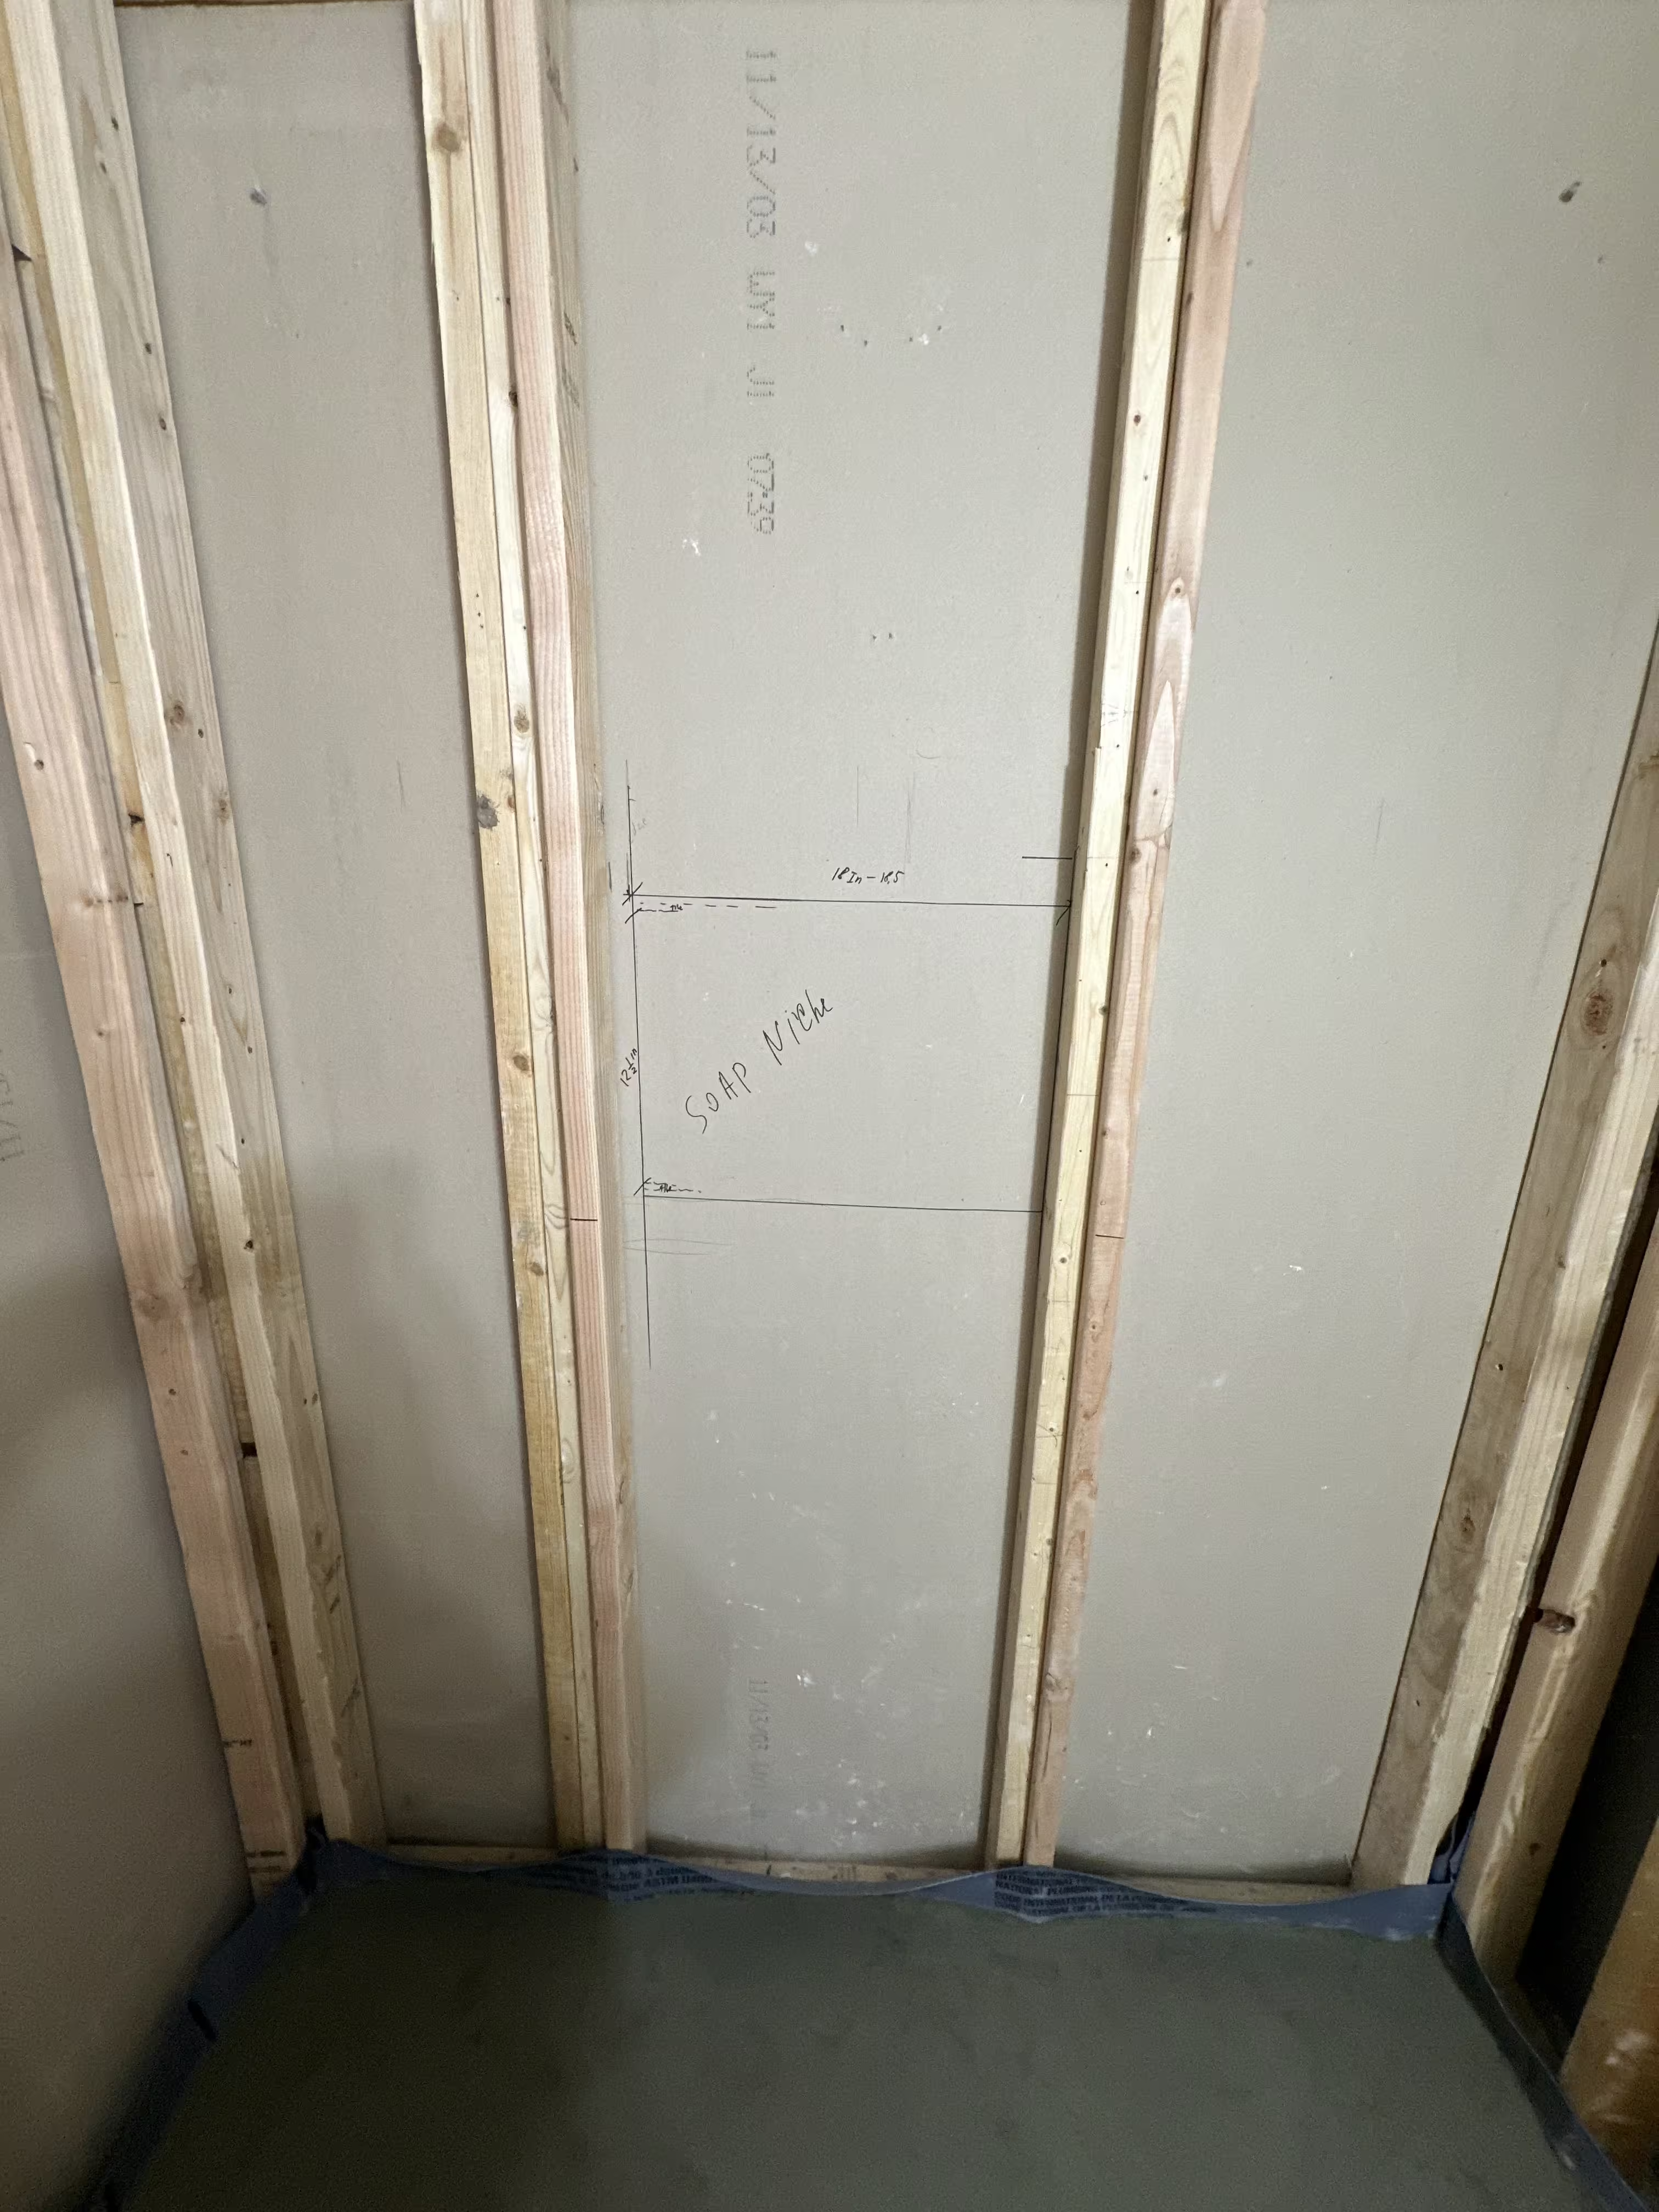
Demolition came first. We removed the old shower completely — wall covering, base, and trim — and took the enclosure back to bare studs, opening the plumbing wall into the mechanical space so the rough-in could be rebuilt rather than patched. New copper supply lines were run to a new mixing valve, set at the correct depth for the future tile plane, with the valve and shower-head heights marked on the framing before anything was closed up. We also checked the studs for plumb and flat, because a stacked tile layout will telegraph any wave in the wall behind it.
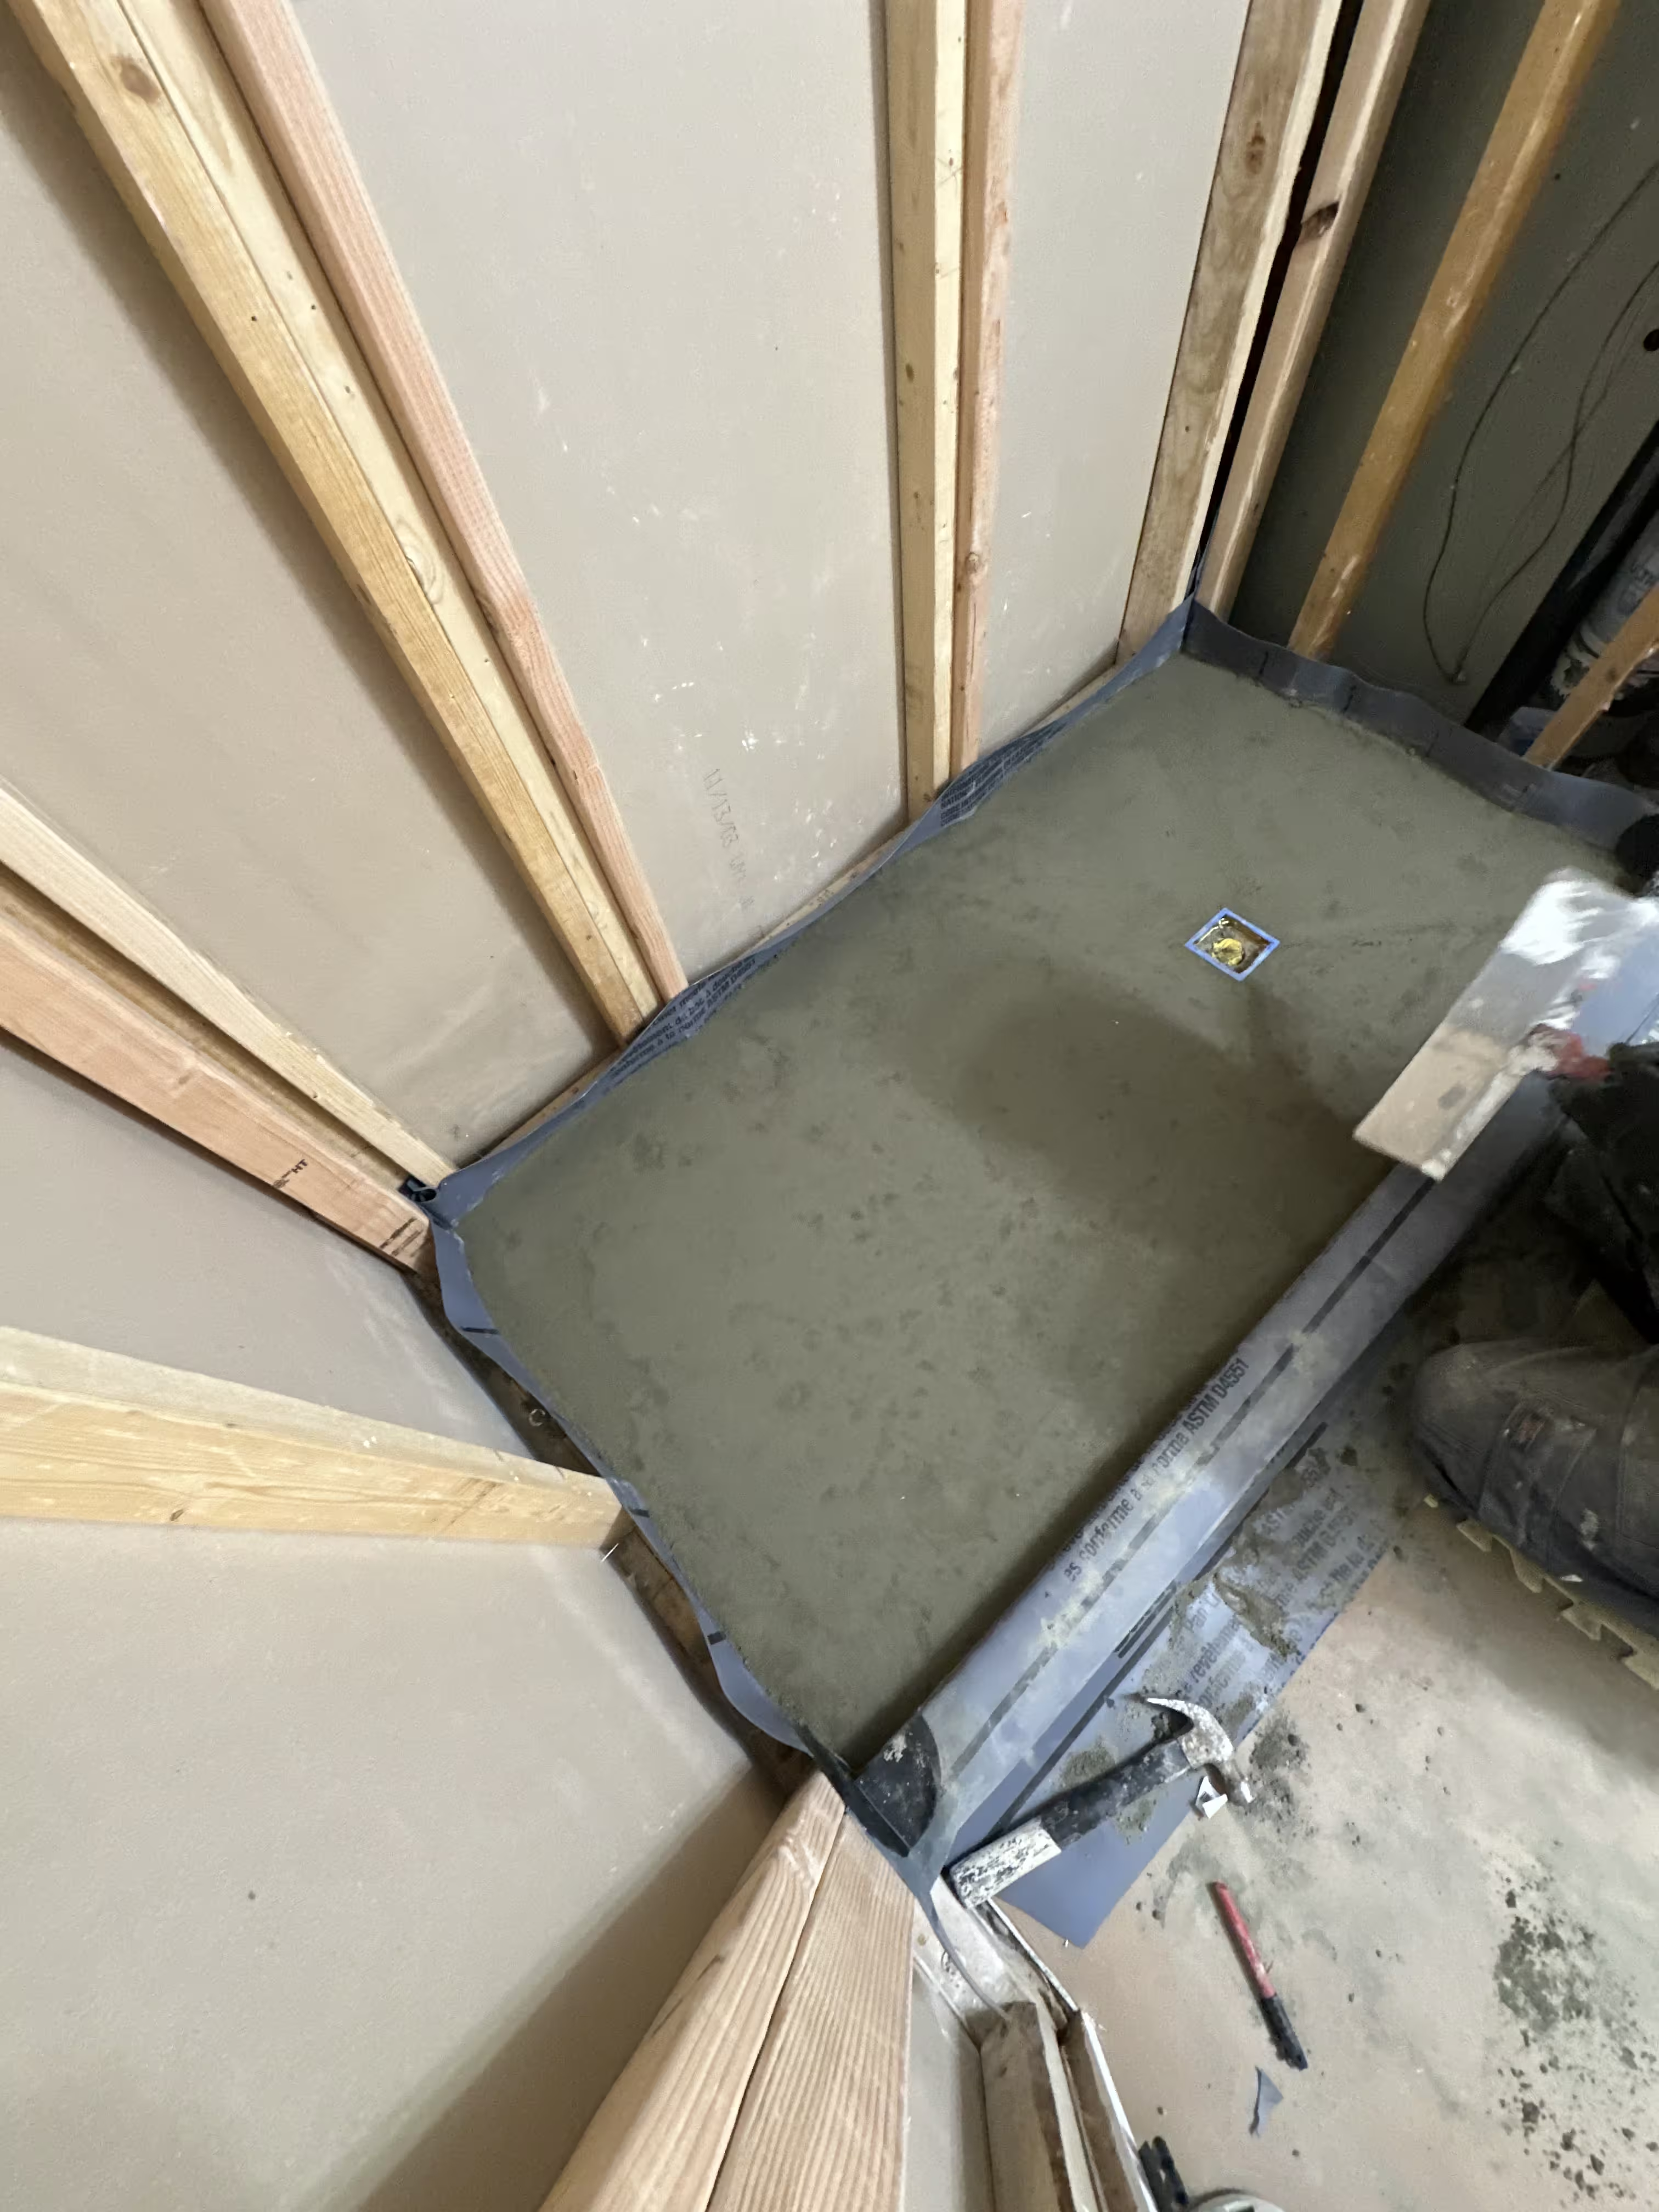
Deck-Mud Pan & Sealed Waterproofing
The base was rebuilt as a traditional mud pan: a waterproof liner went down first, then a deck-mud bed was hand-floated over it and screeded to a consistent slope toward the drain. It is the method tile setters have relied on for decades, and it is an excellent base for a pebble floor because the slope can be shaped precisely under stone that will follow every contour.
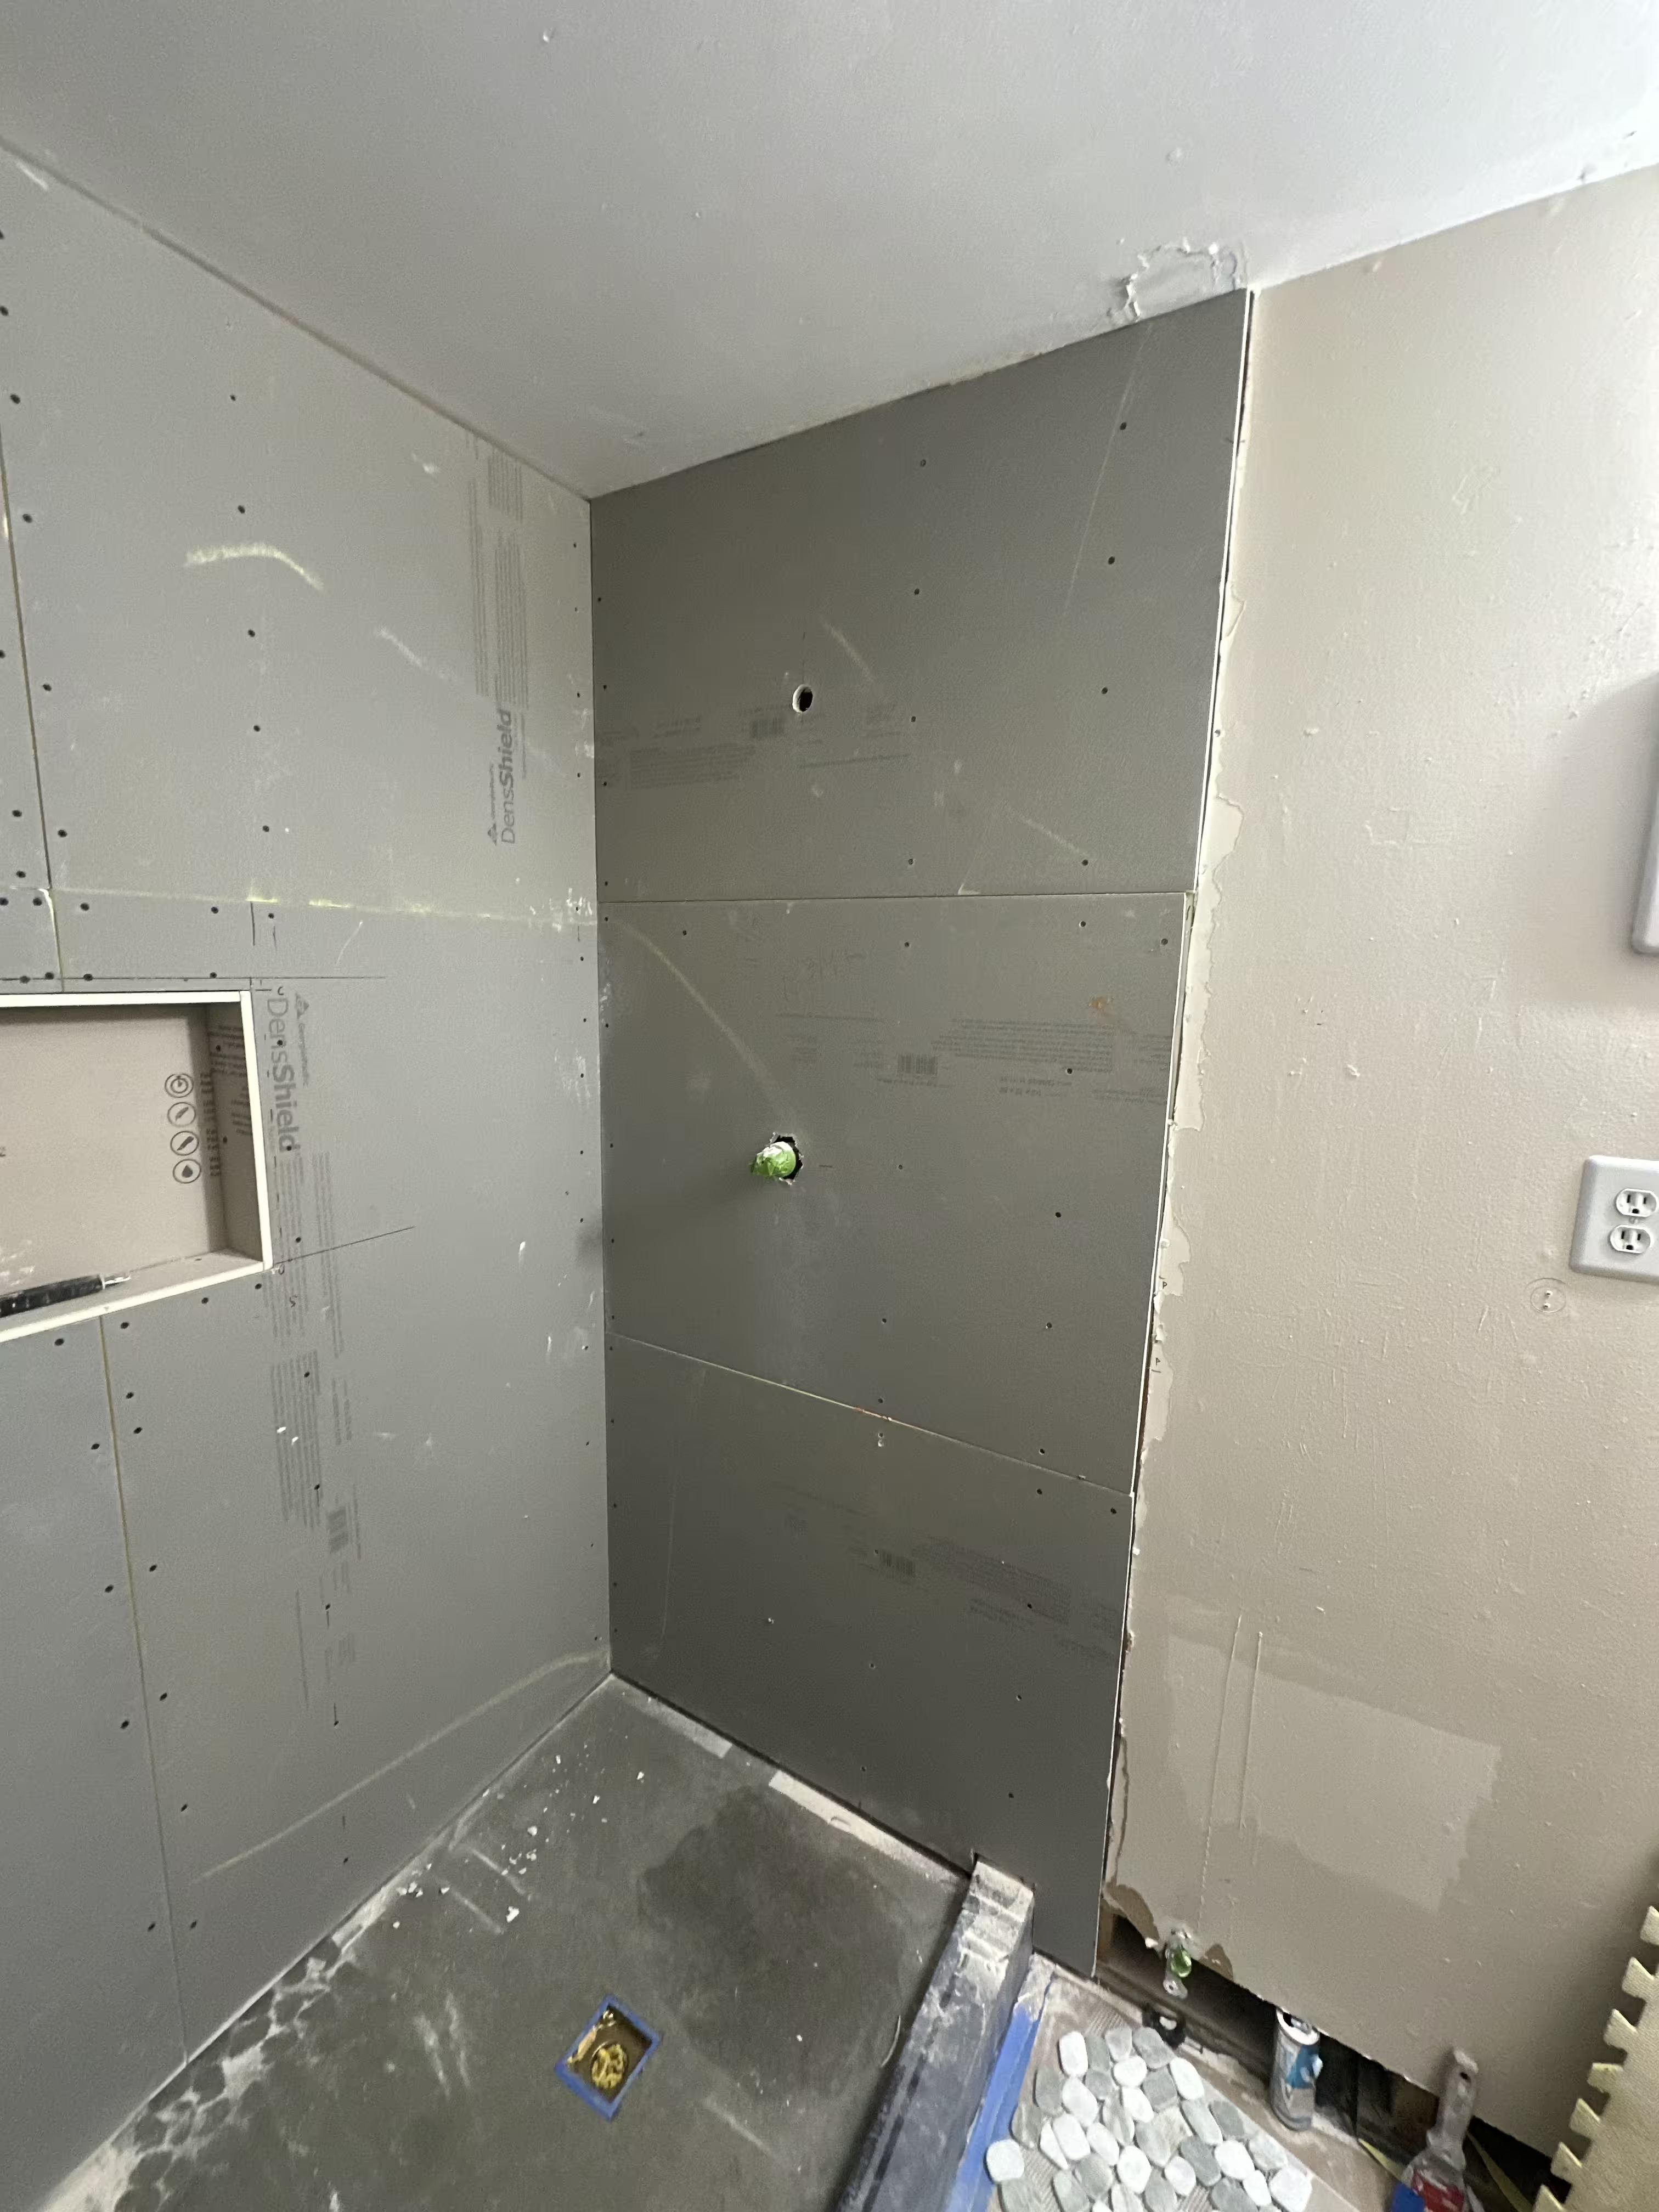
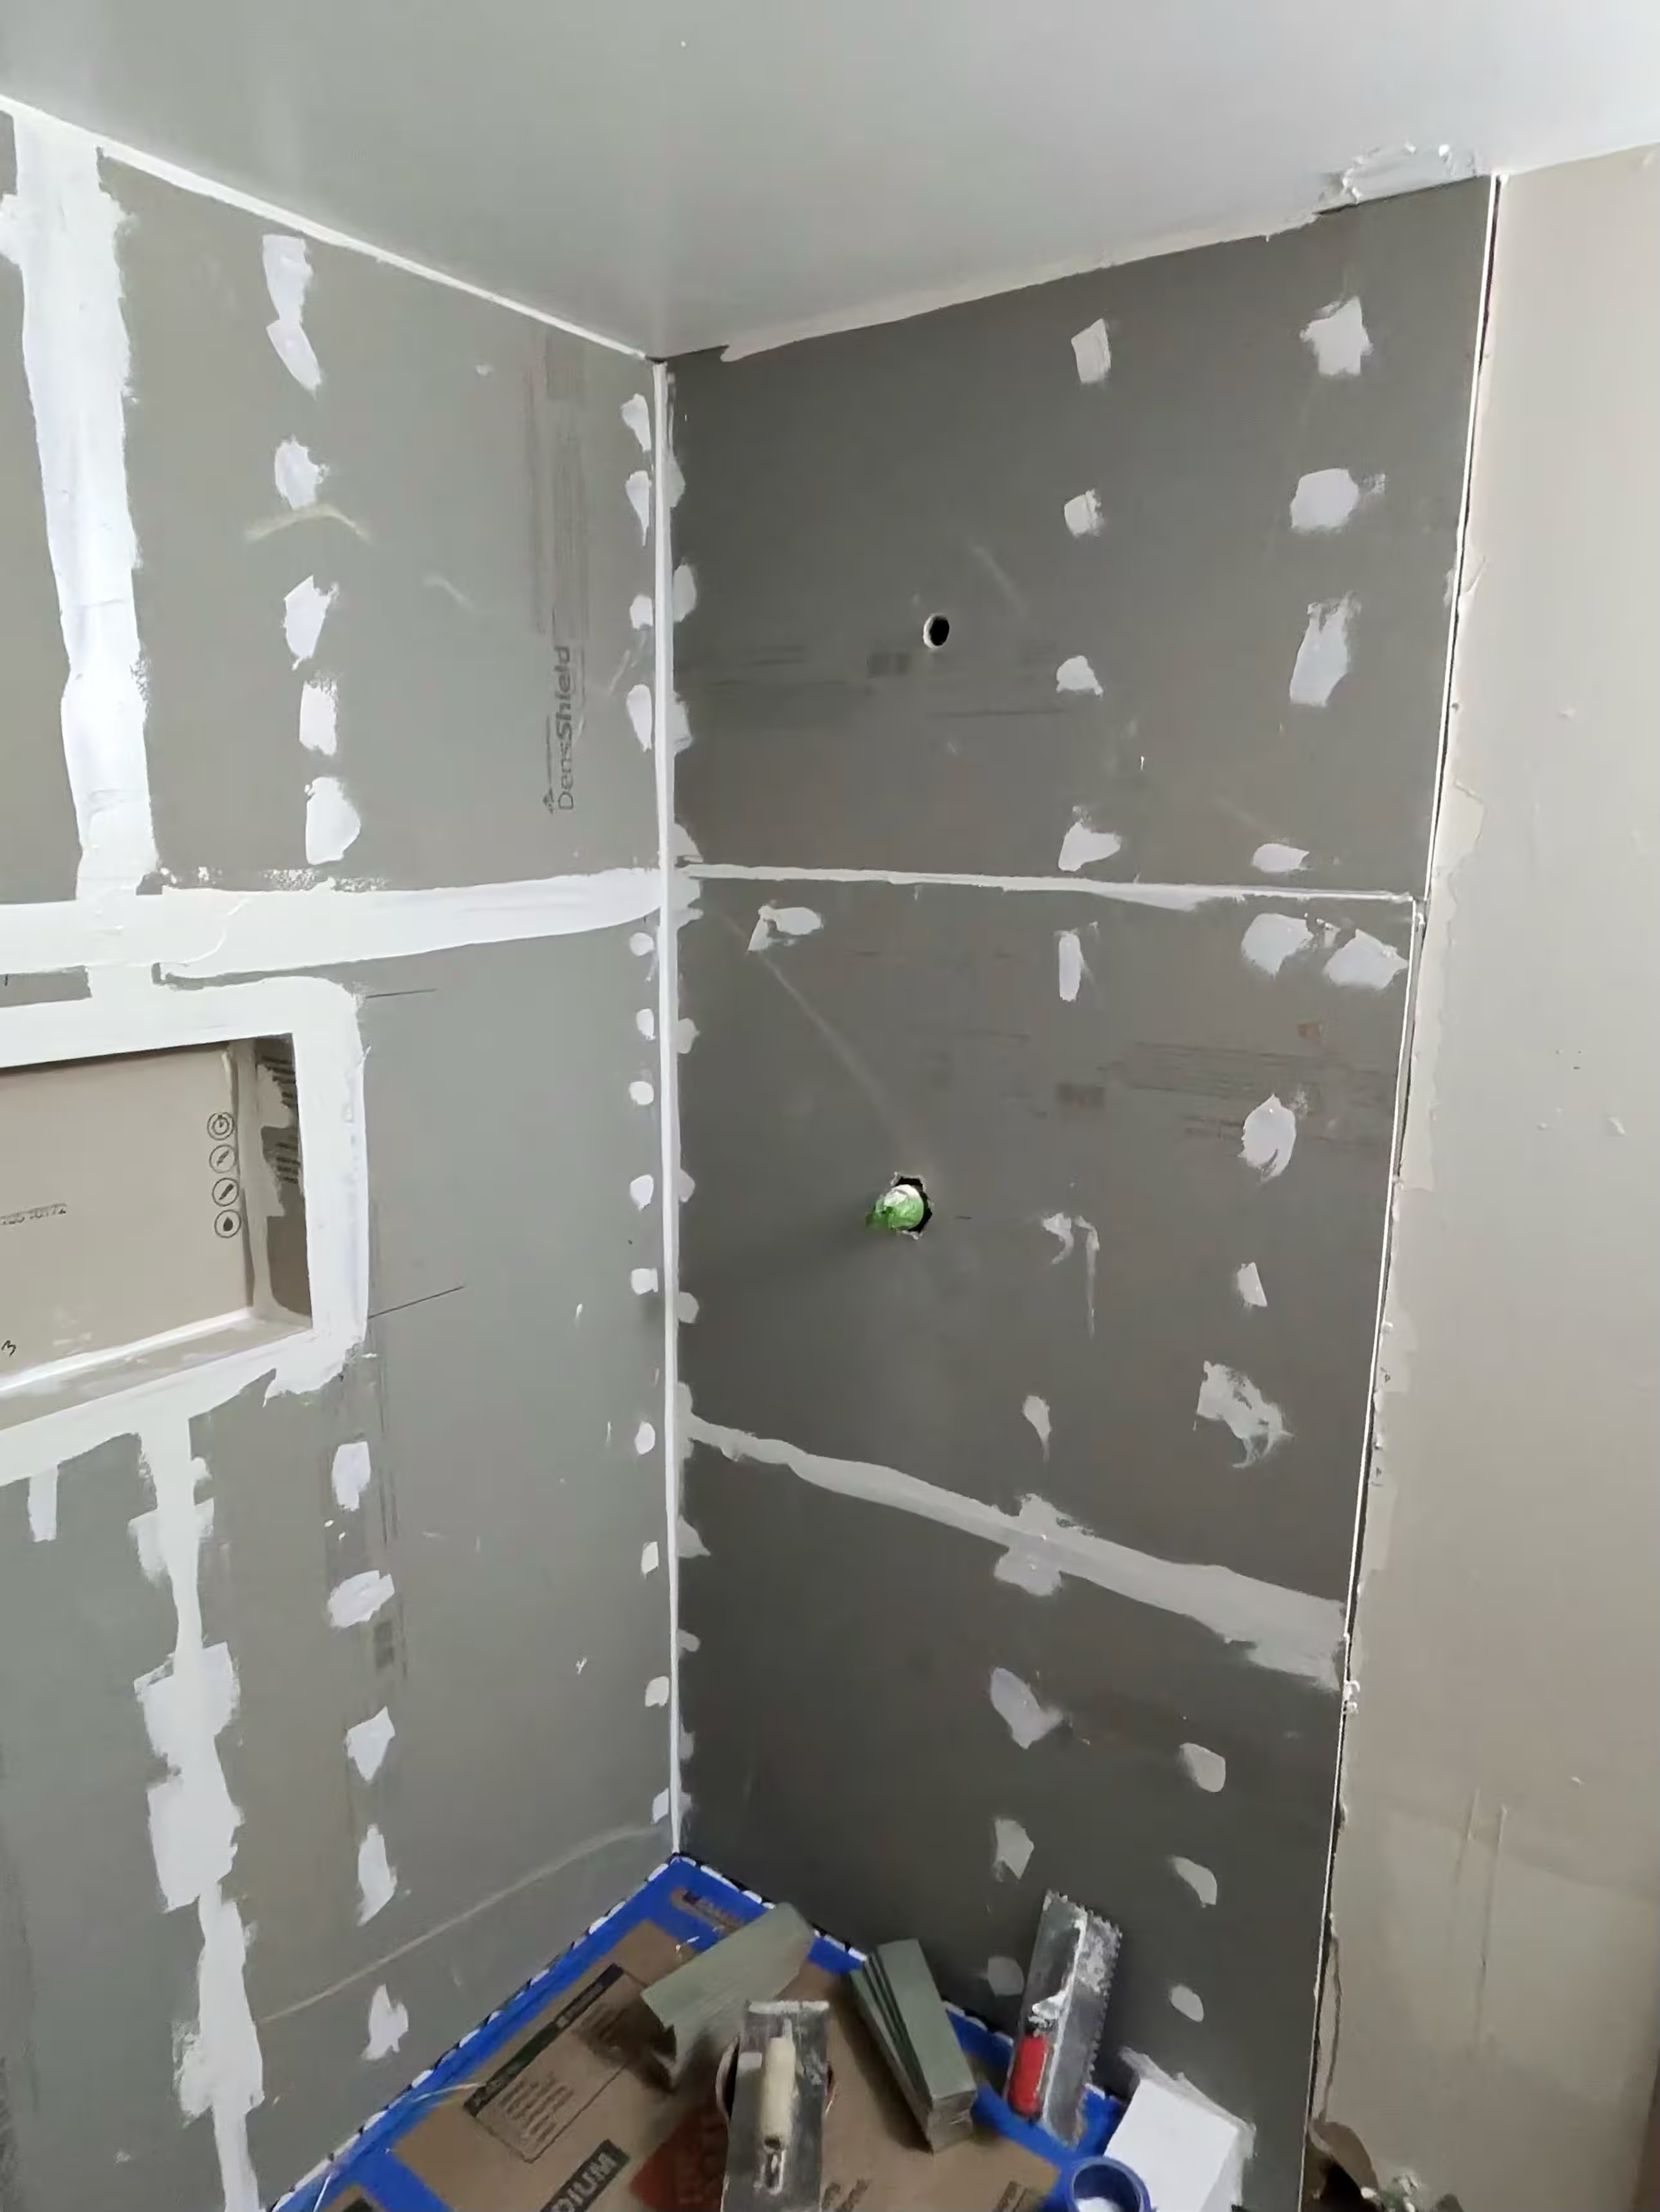
With the pan floated, cement backer board went up on the walls. The soap niche was laid out in pencil on the board, cut, and built into the stud bay, and then every seam and the niche opening were taped and sealed. The goal is a continuous waterproof assembly behind the tile — the layer that actually protects the framing for the life of the shower.
Green Stacked Tile Walls & Pebble Floor
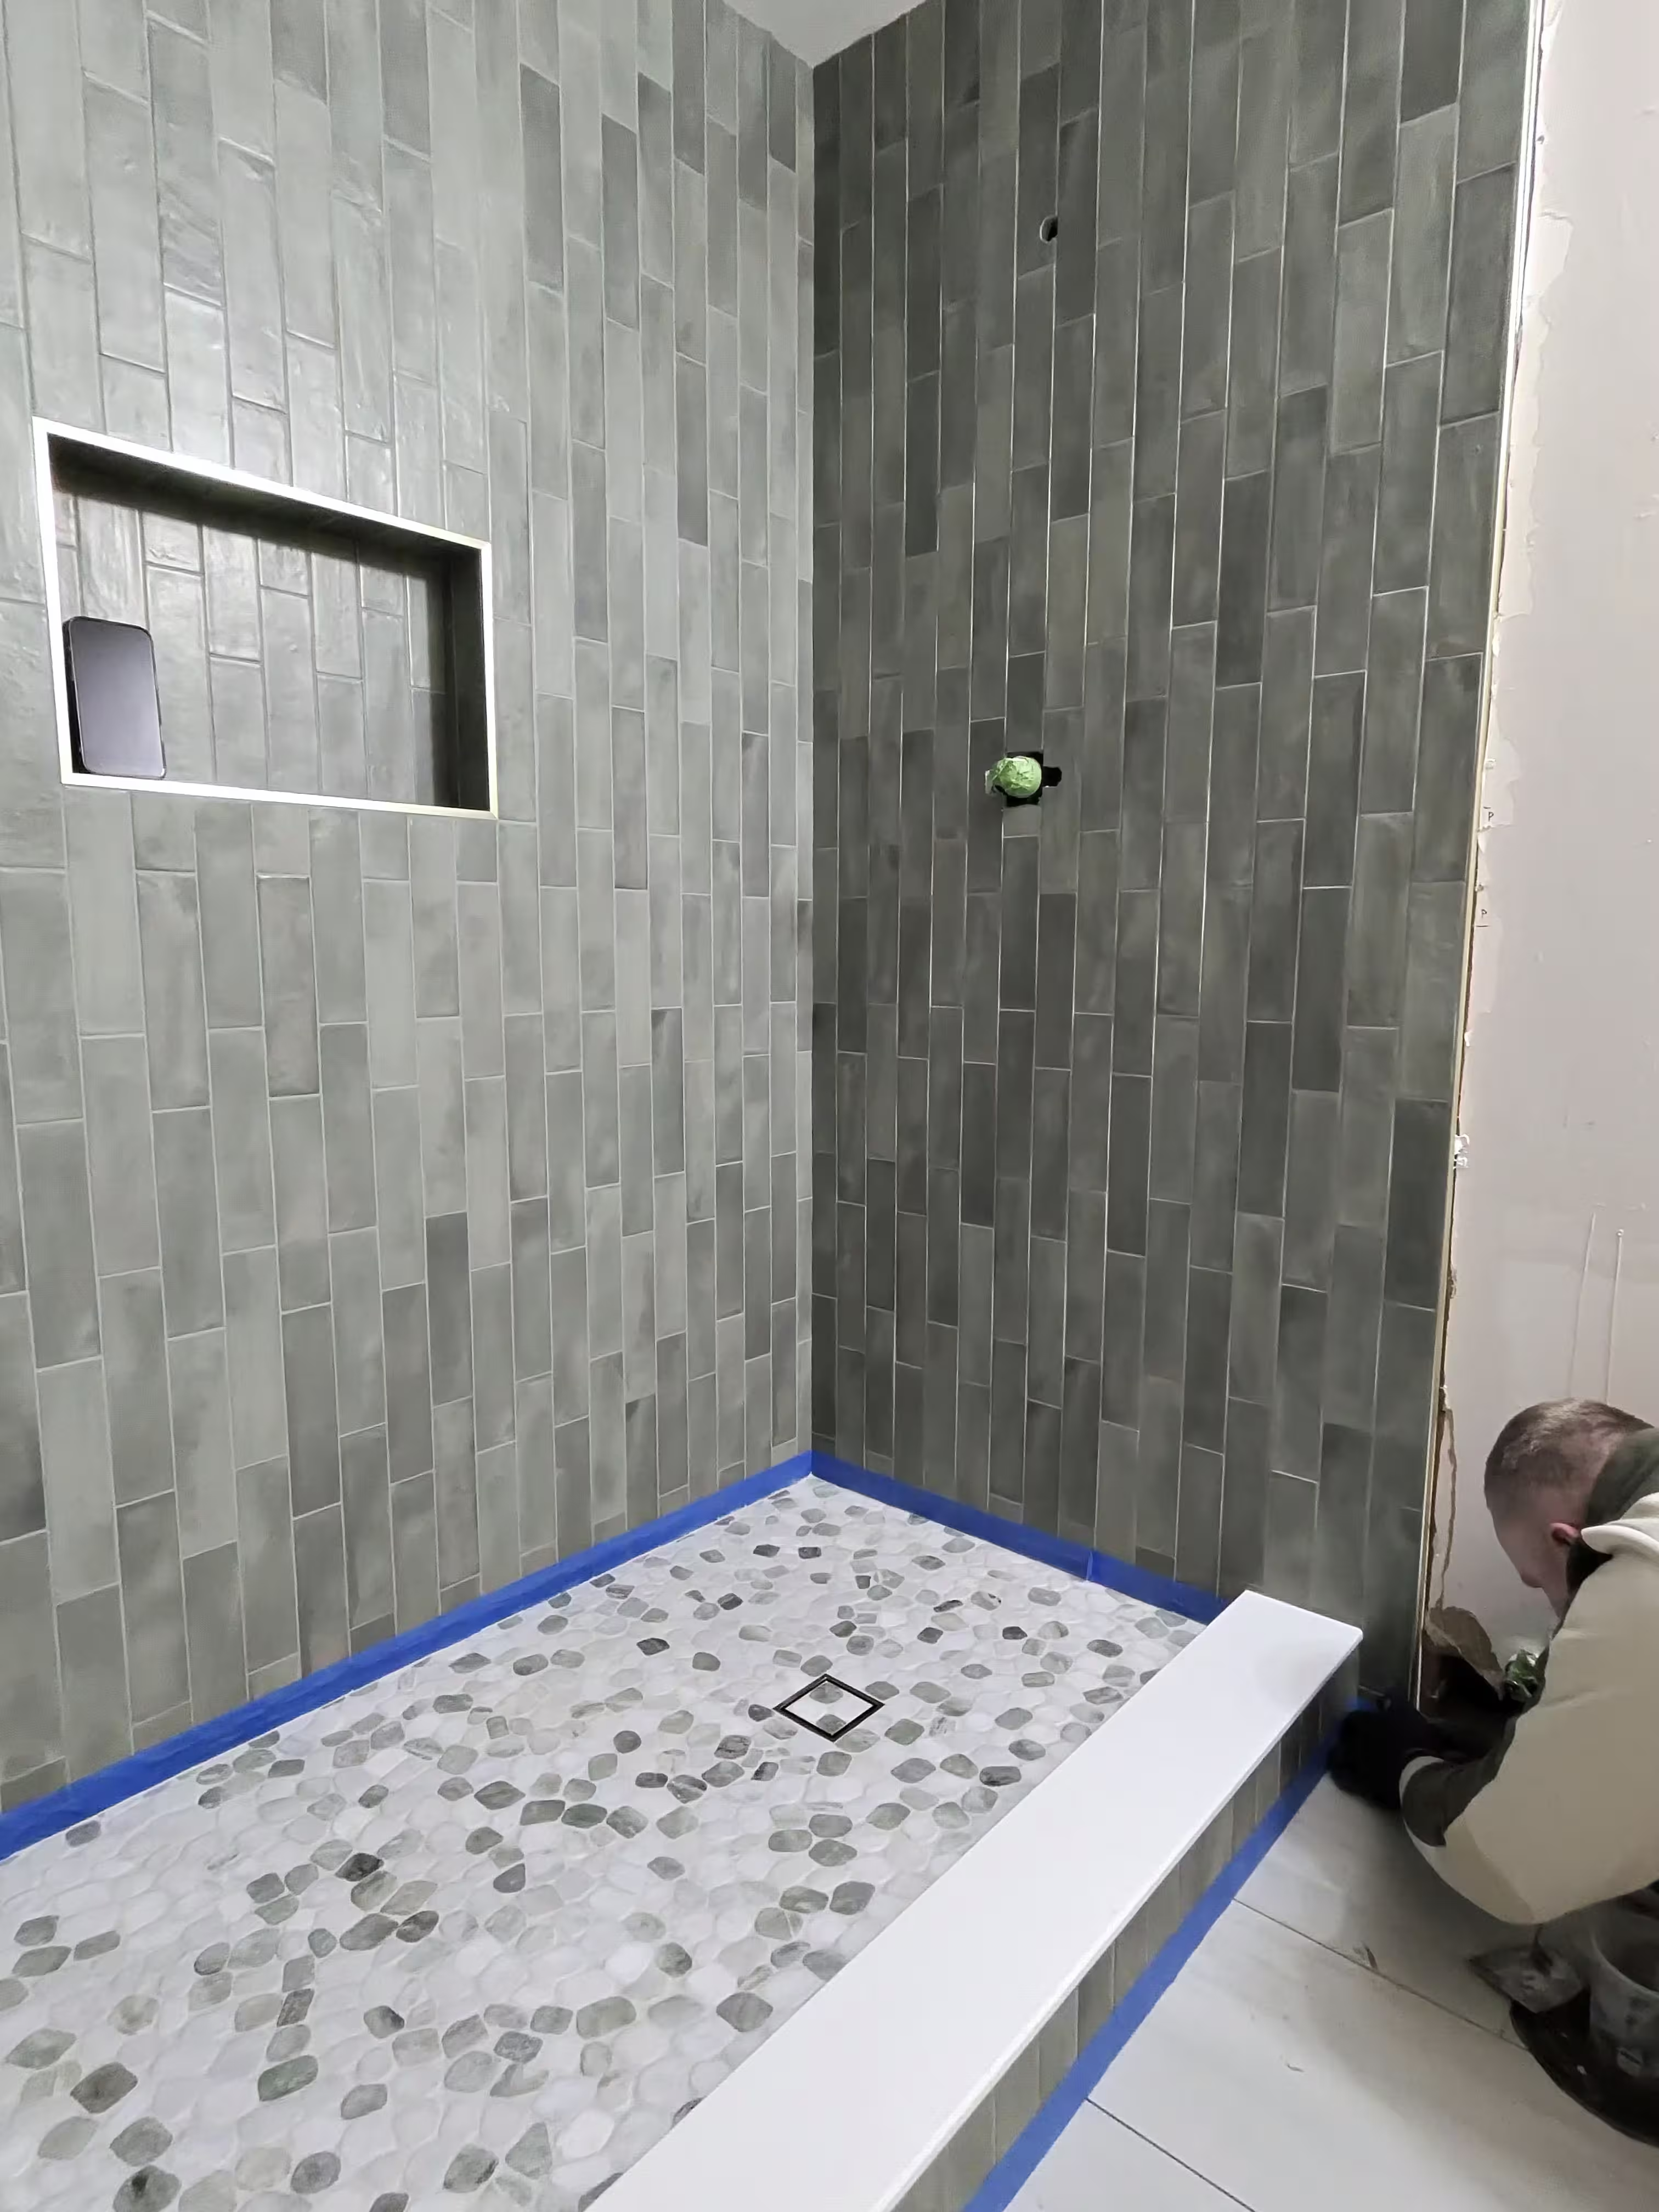
The green rectangular wall tile was set in a vertical stack bond — every joint aligned, columns running unbroken from the pan to the ceiling. Stack bond looks simple and is anything but: with no offset to absorb small errors, each course has to land dead level and dead plumb or the whole wall reads crooked. The layout is worth the discipline, because those clean vertical lines are what make the shower feel taller and unmistakably modern, using standard rectangular tile rather than a specialty product. The niche was finished with brushed metal edge trim set flush into the tile.
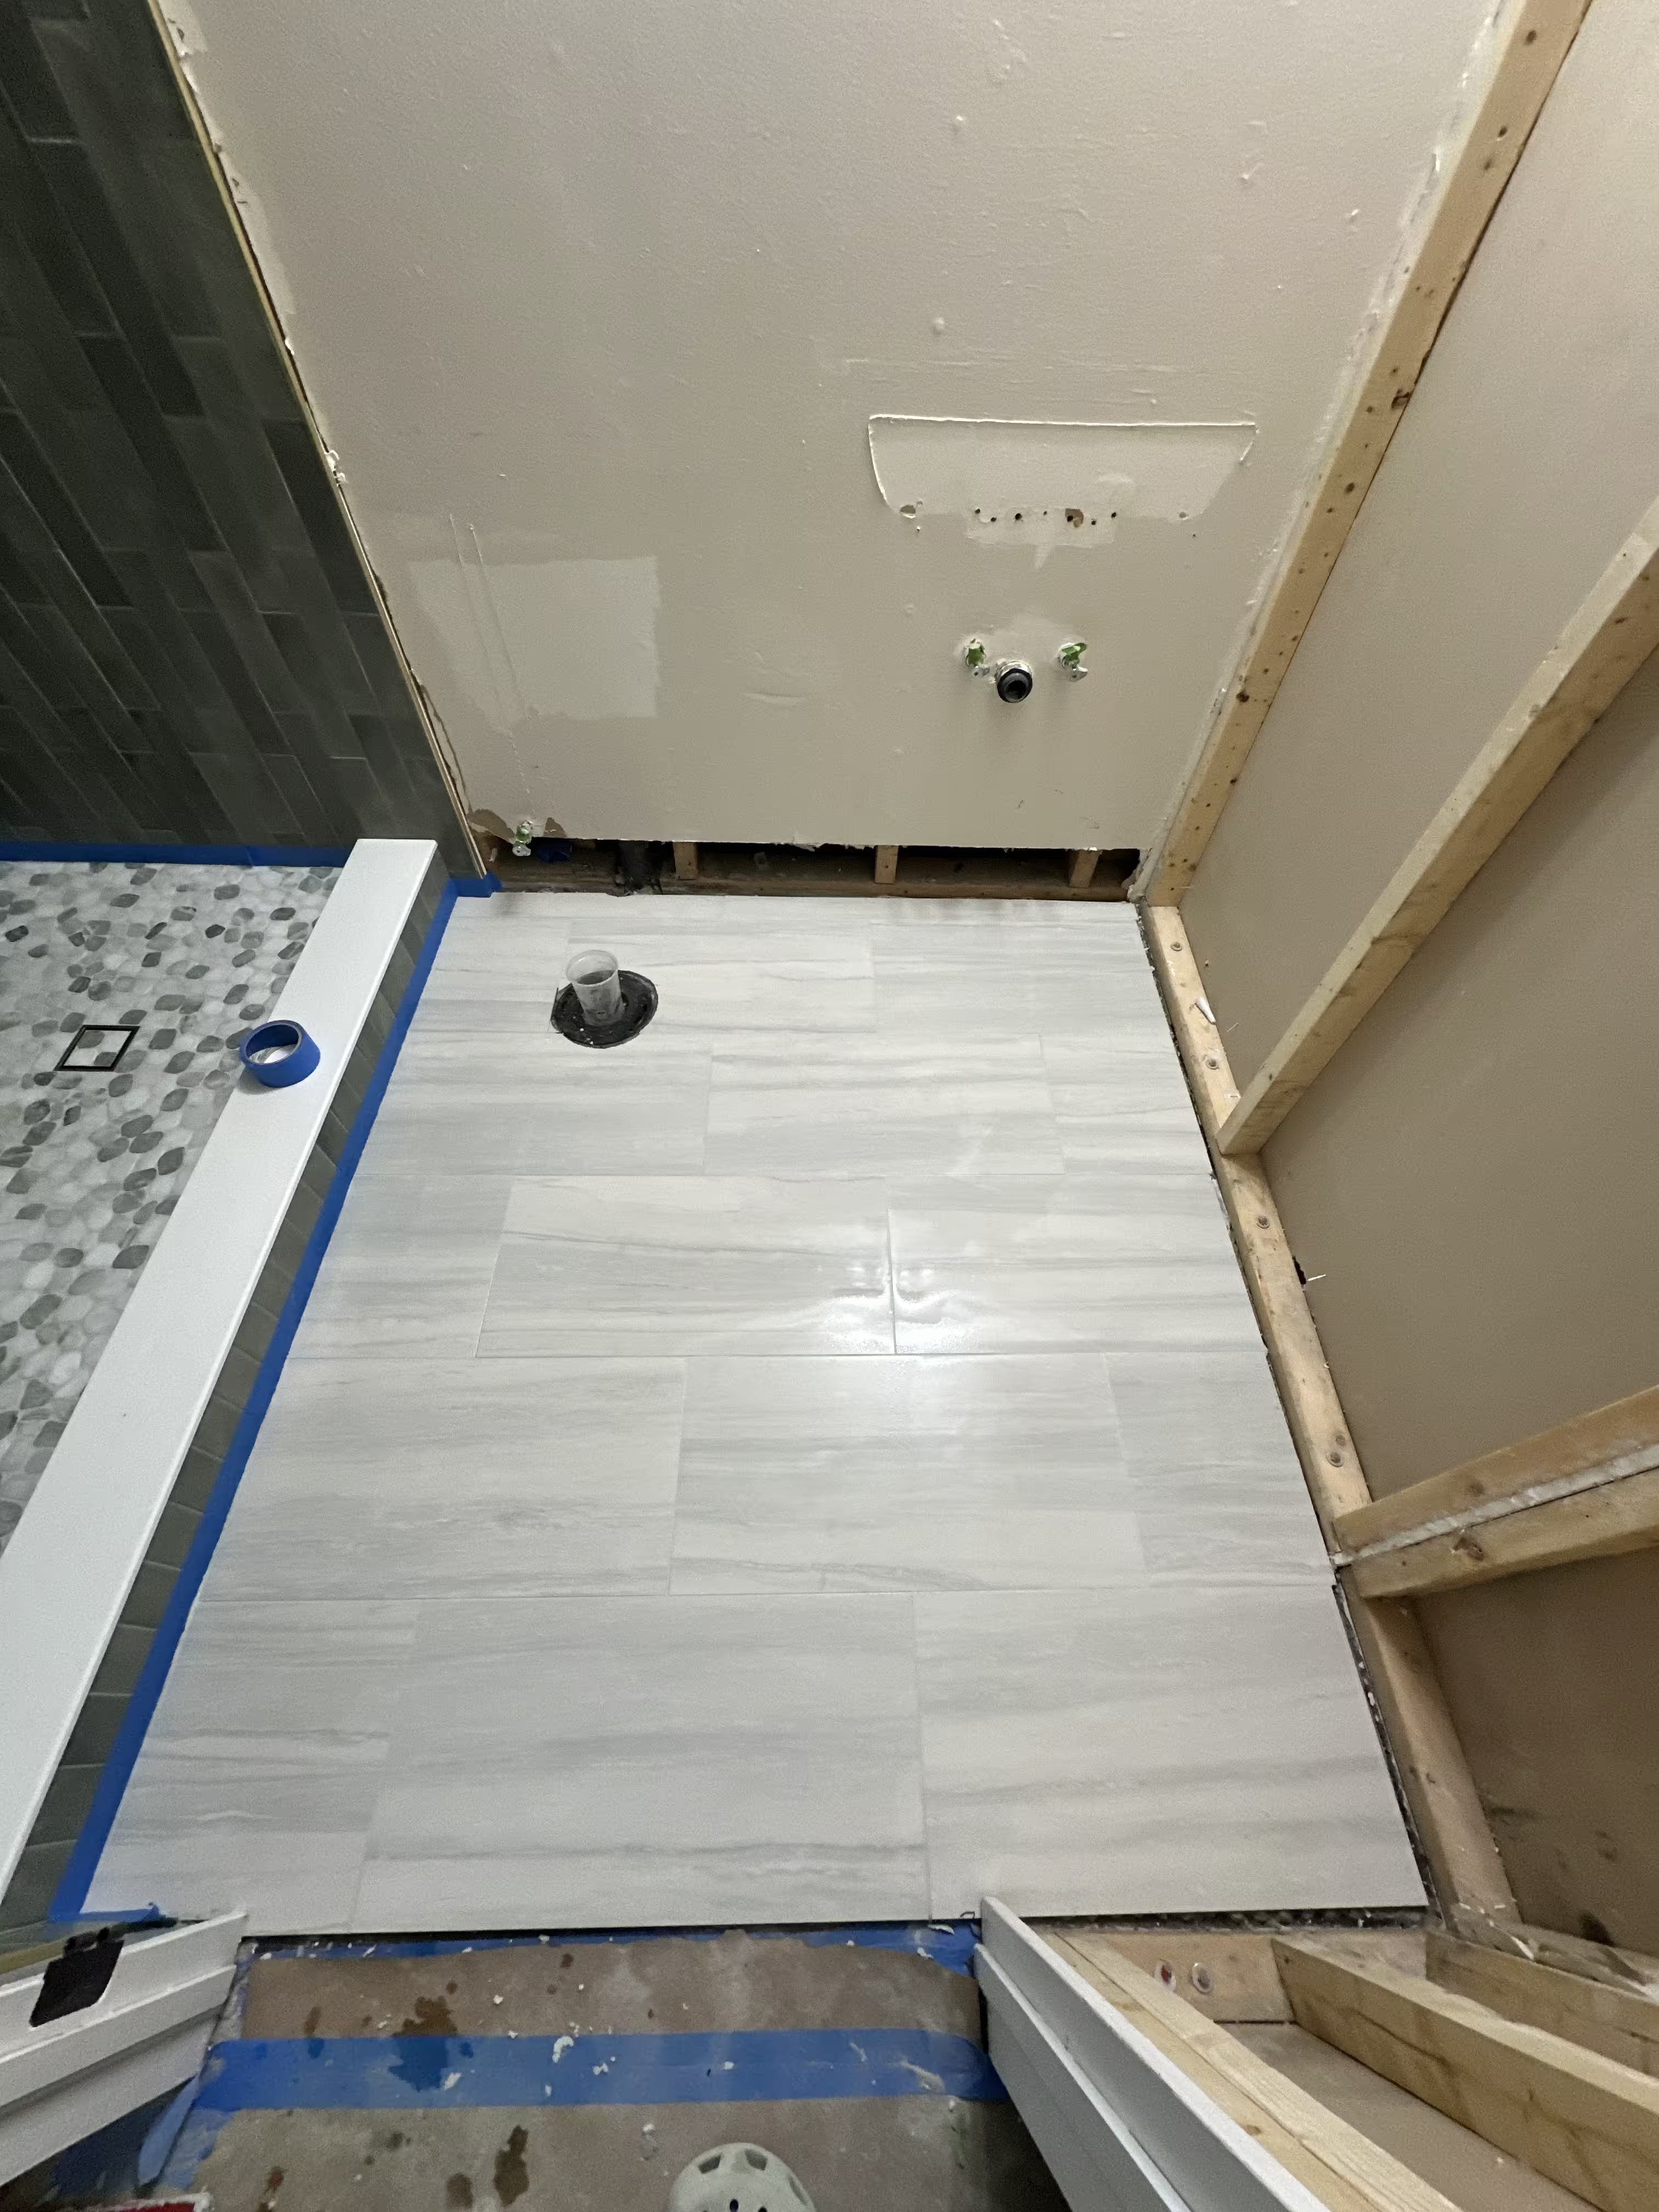
The floor is natural river-rock pebble, set piece by piece and fitted around the drain. Pebble takes noticeably more grout than flat tile, and both the stone and the joints were sealed after grouting to keep the porous surface protected. Outside the curb, the bathroom floor was finished in wood-look tile, and the opening received new glass once the tile work had fully cured.
Project Gallery
The full build in order — from bare studs to the finished green tile shower
Technical Standards
A distinctive finish built on industry-standard installation methods
- ANSI A108.01 substrate preparation & general requirements
- ANSI A108.02 installation & workmanship standards
- TCNA movement joint requirements for all tile installations
- ASTM C920 elastomeric sealant at all plane changes
- Caulk (not grout) at wall-to-wall & wall-to-floor joints
- Green rectangular tile in vertical stack bond — shower walls
- Natural river-rock pebble — shower floor, sealed after grouting
- Brushed metal edge trim — recessed shower niche
- Hand-floated deck-mud pan over waterproof liner
- Wood-look tile — bathroom floor outside the shower
- New glass enclosure at the shower opening
The Results
The finished shower is the centerpiece of the bathroom. Unbroken green columns run from the pebble floor to the ceiling, the metal-trimmed niche sits flush in the wall at hand height, a tiled bench adds a practical place to sit, and the river-rock floor gives the wet area a texture that flat tile simply cannot match. Wood-look floor tile carries the room right up to the curb, so the whole space reads as one continuous build rather than a shower dropped into an old bathroom.
The bigger win is what the homeowners cannot see: new copper supply lines, a correctly sloped deck-mud pan, and a taped-and-sealed waterproofing layer behind every tile. That is the part of a shower remodel that determines whether it lasts, and it is the reason we photograph our projects at every stage — the work under the tile is the work that matters.
What Commerce City Clients Say
Marcus T.
Commerce City
“They took our old shower down to the studs and rebuilt everything — new plumbing, new pan, waterproofing, all of it. The green tile with the straight vertical lines is exactly what my wife wanted, and the pebble floor feels great underfoot. The crew kept the dust contained and cleaned up at the end of every day.”
Dana K.
Commerce City
“We talked to three contractors and this was the only team that walked us through the waterproofing under the tile, not just the tile itself. The niche trim and the stacked layout came out perfectly straight. The whole process was organized from demo day to the final glass, and our bathroom finally feels finished.”
Frequently Asked Questions
Common questions about full shower remodels, stacked tile, and pebble floors
Most full tear-out shower remodels take roughly two to three weeks from demolition to a usable shower. The schedule is driven by cure times as much as labor: the deck-mud pan, waterproofing, thinset, and grout each need time to set, and glass is measured only after the tile is complete. We give every client a written schedule before demolition starts.
It depends on the size of the shower, the tile you choose, how much plumbing work is needed behind the walls, and whether new glass is included. A full tear-out and rebuild costs more than a surface-level refresh because the pan, waterproofing, and rough-in are all replaced. We provide free, written, itemized quotes so you can see exactly where the money goes.
Vertical stack bond aligns every joint in straight columns from the pan to the ceiling, which reads clean and modern without requiring specialty tile — standard rectangular tile works. The unbroken vertical lines also draw the eye upward and make a standard-height shower feel taller. It does demand precise setting, because a stacked layout has no offset to disguise a drifting joint.
A pebble floor is one of the more slip-resistant shower floors you can choose. The rounded stones create a varied surface, and the many grout joints between them add texture underfoot, so there is far more grip than a large smooth tile provides. Many clients also like the gentle foot-massage feel of natural stone under bare feet.
Yes. A pebble floor has far more grout surface than a standard tile floor, and the natural stone itself is porous, so we seal both the stones and the grout after installation. Plan on resealing every year or two depending on how heavily the shower is used. With that simple routine, a pebble floor holds up well in daily-use showers.
This shower was built with a waterproof pan liner under a hand-floated deck-mud base sloped to the drain, and cement backer board on the walls with every seam and the niche opening taped and sealed before tile. The tile and grout you see are the wear layer; the waterproofing behind them is what actually keeps water out of the framing.
TCNA lists ANSI A108.01 and A108.02 among its current installation standards for ceramic tile, covering substrate preparation, general requirements, and workmanship. TCNA also states that movement joints are needed in every tile installation, because tile is a surface layer and stress can build between the tile and the structure beneath it. We build to those standards on every shower.
Wall-to-wall and wall-to-floor joints are places where two surfaces meet and move independently, so TCNA guidance calls for a flexible sealant there instead of rigid grout, which would crack. ASTM C920 is the standard specification for those elastomeric joint sealants. In this shower, every plane change — the corners, the pan perimeter, and the niche — was caulked, not grouted.
Related Services & Resources
Shower Pan Repair Commerce City
Fix a leaking shower base without a full remodel
Shower Remodeling Denver
Custom tile shower remodels across the Denver metro
Bathroom Renovation
Complete bathroom remodeling services
Where to Browse Tile
Looking for green stacked tile, pebble stone, or trim options? Browse these retailers:
Get a Free Quote for Shower Remodeling in Commerce City
Tell us about your shower and we'll put together a detailed, written estimate
Request a Free Quote
Planning a Shower Remodel in Commerce City?
We handle complete shower rebuilds — demolition, plumbing rough-in, mud pans, waterproofing, tile, and glass — throughout Commerce City and the Denver metro area.