Two contractors look at the same leaking shower. One says it can be fixed in a week with most of the tile left in place. The other says tear it out. Both can be right, for different showers. Here is how we decide which one yours is, and what each answer actually involves.
Step one: find the actual source
Nobody can decide between repair and rebuild from the hallway. A shower can leak from the pan, the drain connection, the wall waterproofing, a niche or bench, the valve or shower arm, the curb, the door or glass, or a supply or drain pipe that has nothing to do with the tile. We work through them in order:
- Supply plumbing. Shut the valve, leave the water pressurized and check for weeping at the valve body and arm. A supply leak drips whether or not anyone showers.
- Drain line. Pour water straight down the drain without wetting the pan. If the ceiling below gets wet, the trap or drain joint is the problem, not the tile.
- The pan. Plug the drain and fill the pan to just below the curb. The code test is 2 inches for 15 minutes; on an existing shower we hold it for several hours and check from below. Tim Carter's advice for homeowners is the same: flood the pan and inspect for where the water gets past the membrane.
- The walls, curb and door. If the pan holds, spray each wall, the niche, the bench and the curb separately with a handheld and wait between each. A door or glass leak shows up on the bathroom floor, not below.
- Look from below. If there is a basement, a crawlspace or a ceiling we can open, a thirty-minute look often tells us the exact corner. In our Denver case the ceiling opening confirmed the water was coming from the pan area before we touched a single tile.

What a targeted repair involves
The repair most people are hoping for is a pan replacement that keeps the wall tile. It is a real option, and it is more work than it sounds. The code requires the liner to run at least 2 inches above the threshold and around the jambs, and the new liner has to tuck behind the wall tile and fasten to the framing above the flood level. So the scope is:
- Remove the floor tile and the mortar bed down to the liner, then the liner and the pre-slope if it is damaged.
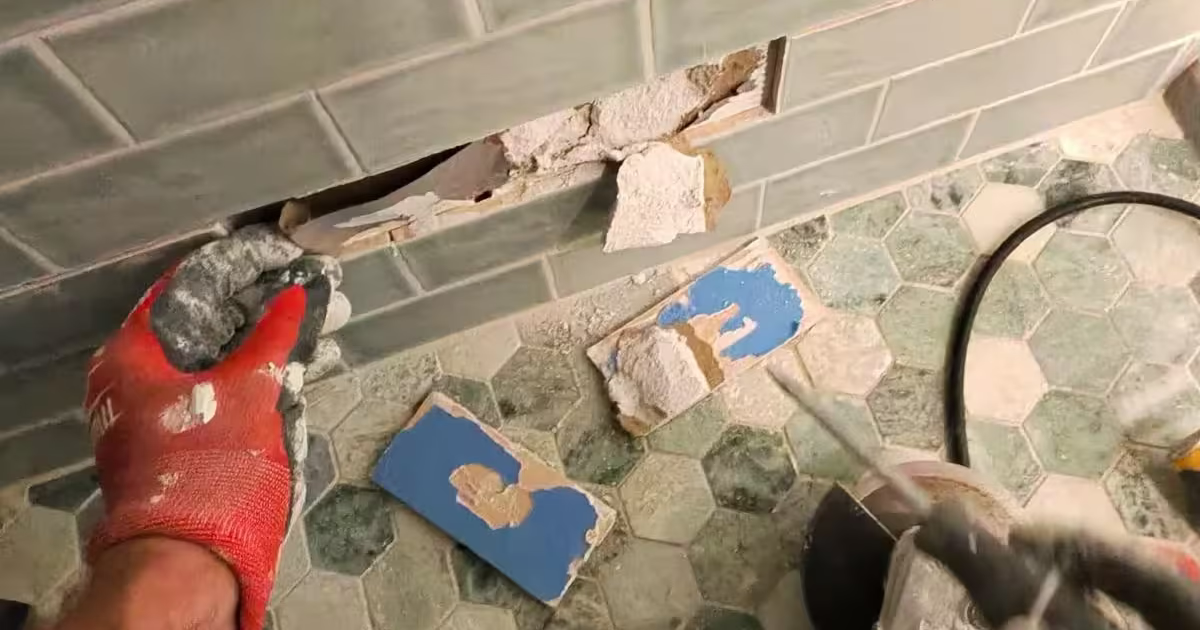
- Remove the bottom rows of wall tile, usually three to five courses, so the new liner can go up behind them. If a curb or jamb is involved, strip it too.
- Inspect and, where needed, repair the subfloor, bottom plates and curb framing. Let wet wood dry; the EPA's rule is 24 to 48 hours for any wet material.
- Install a new pre-slope, a new liner folded (not cut) into the corners, and a new flanged drain with the clamping ring sealed and the weep holes protected.
- Flood test, and show the homeowner the water level holding.
- Pack a new sloped mortar bed, tile the floor, reset the bottom rows of wall tile, seal every change of plane with silicone, and repair the ceiling below.
For this to be the right call, four things have to be true: the leak is confirmed in the pan, the wall assembly above the removed rows is sound (a membrane or vapor retarder over cement or foam board, no drywall), the framing damage is confined to what the opening exposes, and matching tile exists for the rows that come out. If any of those fails, the repair starts turning into a rebuild done in pieces, and that is the worst of both.

When a rebuild is the honest answer
We tell homeowners to rebuild, not repair, when we find any of the following:
- Drywall or greenboard behind the wall tile. It is already soft wherever water reached it, and the next leak is a matter of time. Carter's advice after a wall collapse: remove the wall tile and drywall and replace it with cement board.
- No membrane or vapor retarder on the walls. A new pan under walls that leak solves half the problem.
- Framing rot beyond a corner. Soft bottom plates on more than one wall, a subfloor that flexes, or joists that need sistering mean the shower is coming out anyway.
- More than one failure point. A punctured liner plus a low curb plus a leaking niche is not a repair list; it is a shower that was built wrong.
- Mold inside the wall cavity. Visible growth on the back of the backer board or the studs has to be removed and the cavity dried before anything is closed. That is not compatible with keeping the tile on that wall.
- No matching tile. A visible band of "almost the same" tile around the bottom of the shower disappoints people every day they use it.
- You want a different shower. Bigger footprint, curbless entry, a bench, a linear drain, a tub-to-shower conversion. If the pan is out and the bottom rows are off, you are already a third of the way into a rebuild.
We also decline surface-only patches when water is reaching the structure. Caulk over a leaking corner or a regrout over a failed pan is, in the words of tile consultants who investigate these failures, treating the symptom of the problem rather than fixing the problem. See Why New Grout Won't Fix a Leaking Shower.
The decision at a glance
| Finding | Repair under existing tile | Rebuild |
|---|---|---|
| Flood test fails, walls hold when sprayed | Likely | Only if other findings push it |
| Pan holds, one wall or niche leaks | Local wall repair (not a pan job) | If that wall is on drywall |
| Cement or foam board with a membrane behind the wall tile | Yes | — |
| Drywall behind the wall tile | No | Yes |
| Rot limited to a corner or the curb framing | Yes, with framing repair | — |
| Rot on multiple walls or a soft subfloor | No | Yes |
| Matching tile available for the bottom rows | Yes | — |
| Tile discontinued, no acceptable match | Only with a deliberate accent band | Usually |
| Homeowner wants layout, size or drain changes | No | Yes, as a remodel |
The Denver case: a repair that qualified
A second-floor shower in Denver, installed by another contractor less than a year earlier, leaked from its first uses and left the ceiling below sagging. The wall tile was new and in excellent condition. We opened the ceiling, confirmed the water was coming from the pan, and removed only the bottom four rows of wall tile plus the floor and mortar bed. The liner had been screwed through in the corner below the curb line, and there was no sign it had ever been flood tested. The framing showed early rot at that corner and nowhere else; the walls were sound.
That is the profile of a repair. New liner, new drain, flood test, new bed, new floor tile, the four rows reset, ceiling patched. Most of the wall tile the homeowner had just paid for stayed on the wall. The full project record is on our leaking shower and pan repair page.

Had we found drywall behind the tile or rot along the far wall, the same shower would have been a rebuild, and we would have said so before quoting.
What drives the cost of each option
We do not publish price ranges here because the spread between two "pan repairs" is wider than most people expect. What moves the number, for a repair or a rebuild:
- Access. A basement ceiling we can open is cheaper than a finished first-floor ceiling with a textured finish to match.
- How many rows come off. Set by the liner height and the tile size, not by preference. Large-format wall tile means fewer, larger pieces to source and reset.
- Tile matching. Leftover boxes in the garage save real money. Discontinued tile means sourcing, dye-lot differences, or a design decision.
- Framing and subfloor repair. A soft corner is a few hours. Sistered joists and a new subfloor section are not.
- Ceiling and adjacent-room repair. Drywall, texture, paint, sometimes baseboard and flooring in the next room.
- Plumbing changes. Moving a drain, converting to a linear drain, replacing a valve. These may bring a licensed plumber and an inspection into the job.
- Drying time. Wet framing has to dry before it is closed in, which can add days of schedule even when it adds little labor.
- Permits and inspections. See below.
Ask any contractor to itemize these in the quote. A single number for "shower repair" hides where the money is going.
Permits and inspections in the Denver metro
A pan replacement touches the shower receptor and the drain connection, and a rebuild may change plumbing, electrical and framing. Whether a permit and a liner inspection are required depends on the jurisdiction and the scope, and the metro is a patchwork:
- The City and County of Denver adopted the 2025 Denver Building and Fire Code, based on the 2024 I-Codes, effective December 31, 2025.
- Aurora's adopted-codes form, revised April 2023, listed the 2021 International Residential Code and 2021 International Plumbing Code with city amendments; its Building Division permit page and permit counter (303-739-7420) confirm what a given scope needs.
- The Town of Parker takes building permit applications through its eTRAKiT portal; the Building Division is at 303-841-1970. A Parker mailing address can also fall in unincorporated Douglas County, which has its own building department.
We confirm the requirement for each job's address before work starts rather than assuming one city's rule applies to another. If an inspection is required, the liner flood test is the inspector's test, which is one more reason it is part of every pan we build.
Want a straight answer on repair versus rebuild for your shower? We flood test, open the smallest area that tells us what we need to know, and quote the option that fits what we find. If it is a rebuild, we say so.
Frequently asked questions
Can a shower pan be replaced without removing any wall tile?
Not properly. The liner has to run above the threshold and behind the wall tile, so at least the bottom rows come off. Anyone offering a "no-demolition" pan replacement is either applying a surface coating over the tile, which is not a liner, or planning to stop the new liner at the floor, which is below code.
How long does each option take?
It depends on drying time, tile availability and how much of the ceiling and framing needs work, so we quote a schedule per job rather than a standard number. A repair is measured in days to a couple of weeks; a rebuild adds the walls, glass and any plumbing changes. Ask for a written schedule with the flood test and curing periods shown.
The shower is old. Should I just rebuild?
Not automatically. Age alone does not fail a pan; the causes in What Causes a Shower Pan to Fail do. An older shower with a sound wall assembly and a single pan failure can be a good repair candidate. An older shower on drywall with a low liner cannot.
Will the repair be visible?
With matching tile and care in resetting the bottom rows, no. With close-but-not-matching tile, we recommend making it deliberate: a contrasting base course or a new floor that ties in. We will show you the options before any tile comes off.
Sources and notes
- 2021 International Residential Code, Section P2709 Shower Receptors (UpCodes) — why a liner replacement always reaches the bottom of the wall tile: the lining must extend above the threshold and around the jambs.
- 2021 International Residential Code, Section P2503.6 Shower Liner Test (UpCodes)
- Tim Carter, Ask the Builder: Leaking Shower Pan – Membrane Failure — flood the pan to find the leak; remove the floor and cement base for a new liner; patch only above the floor; replace drywall behind tile with cement board; dry studs and subfloor before closing.
- Ceramic Tile and Stone Consultants: Is it alright to use silicone sealant to fix a shower leak? — surface patches treat the symptom; there may be undetected leaking elsewhere.
- U.S. EPA, Mold Course Chapter 2 — dry wet materials within 24 to 48 hours.
- City and County of Denver: Building and Fire Codes — 2025 Denver Building and Fire Code, based on the 2024 I-Codes, effective December 31, 2025.
- City of Aurora Building Division: Permits — Aurora's adopted-codes form (rev. April 2023) listed the 2021 IRC and 2021 IPC; permit counter 303-739-7420.
- Town of Parker: Obtaining Permits — applications through eTRAKiT; Building Division 303-841-1970.
- South Denver Tile Experts: Leaking shower and pan repair, Denver (project record)
Code references are to the model International Residential Code (IRC). Denver, Aurora, Parker and other metro jurisdictions adopt different editions with local amendments, so confirm requirements with your building division before relying on them. Last reviewed October 25, 2026.