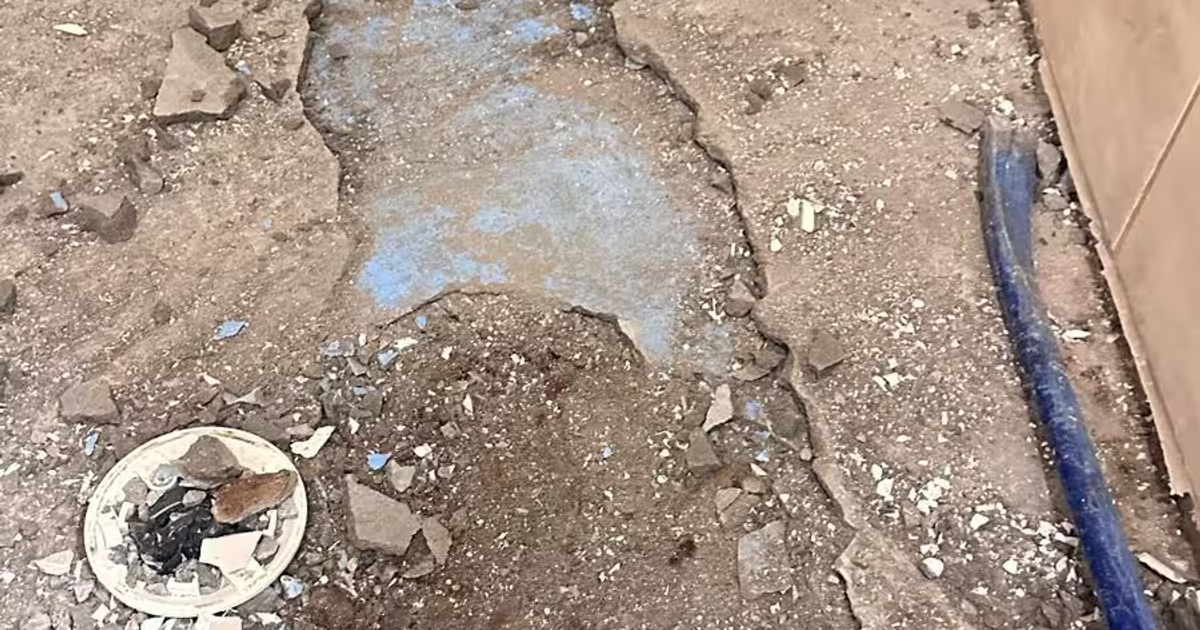
Every leaking shower we open tells the same story in a different order. These are field notes from six showers around the Denver metro, written from our own project records: what the homeowner noticed, what came out when the tile came off, what had actually failed, and what it took to fix. Then the part that matters more than any single job: the patterns, and the rule each one breaks.
How to read these notes
We write a project page for most of the leak repairs we do, with photos taken as each layer comes off. This article pulls the demolition findings out of seven of those pages (six repairs and one inspection) and lines them up. We have left out customer names, prices and schedules. City names stay, because the age and style of construction in each area is part of the story. Where a project page is vague about a detail, we stay vague here rather than fill it in.
If you want the general theory first, start with What Causes a Shower Pan to Fail and Tile and Grout Are Not Waterproofing. This piece is the evidence behind both. For what demolition turns up in the rest of the bathroom, there is a companion article: Hidden Problems Found During Bathroom Demolition.
Case notes: six showers, opened up
Denver: a one-year-old shower with screws through the liner
Second-floor bathroom. The shower was about a year old and had leaked from the start: after three or four uses, water came through the first-floor ceiling and the drywall sagged and bubbled. The wall tile was new and in good condition, so we did not want to tear it out to find the leak. We cut an access opening in the ceiling below, which showed the water was coming from the pan area rather than the walls or the plumbing, and let us look at the joists. Then we removed only the bottom four rows of wall tile, the floor tile and the mortar bed.
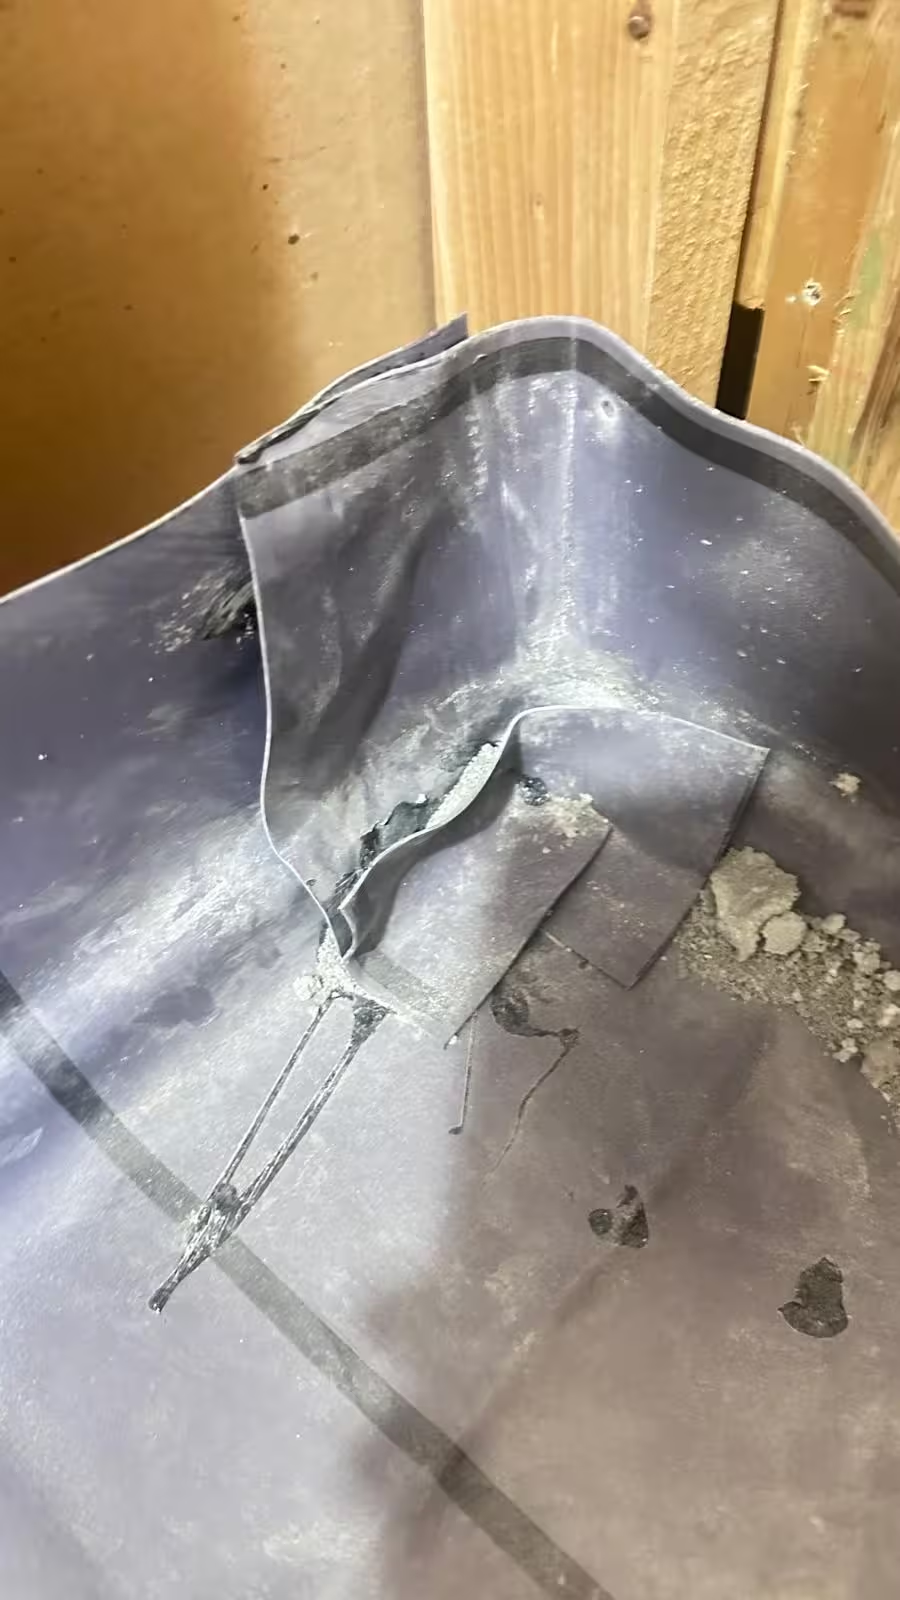
Under the bed was a PVC liner with several screws driven straight through it in one corner of the shower floor, below the flood level. The old liner had also been fastened to the framing improperly, and nothing suggested it had ever been flood tested. The drain connection itself was adequate, but the liner's seal at it was compromised. The framing had minor rot where water had been sitting, caught before the joists took real damage; the ceiling drywall below was saturated.
The fix: pull the liner and photograph the punctures for the homeowner, treat the wet wood, install a new 40-mil PVC liner with every fastener in its upper portion, re-seal the drain with silicone at the clamping ring and protect the weep holes with pea gravel, then flood test with the ceiling opening still open so we could check from underneath. After that, a dry-pack mortar bed sloped to the drain, a hexagon mosaic floor, the four rows of wall tile reset, and the ceiling repaired. The full record is on our leaking shower and pan repair page.
DTC: screw damage and missing dam corners under one row of tile
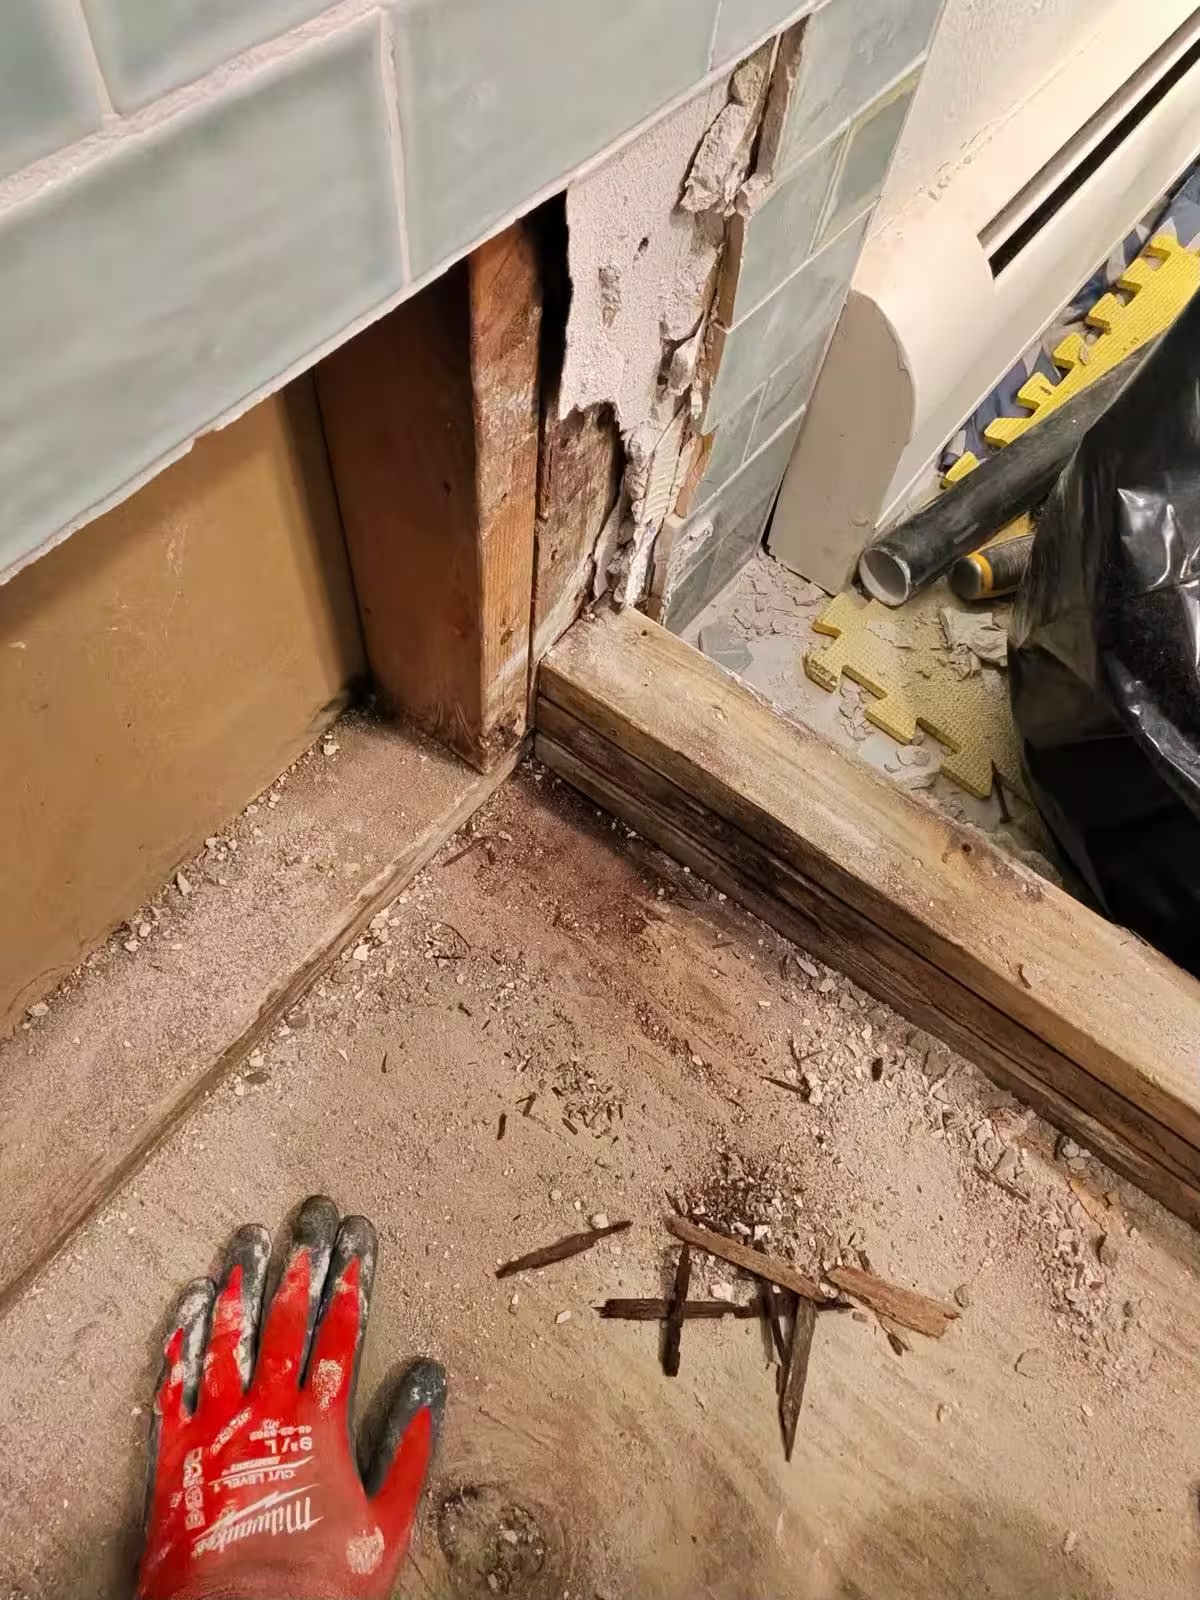
The homeowner noticed leaks showing up on the ceiling below the shower. We removed one row of wall tile and the existing pan. The old base was leaking, some areas had been damaged by screws, and the rubber corner pieces that waterproof the curb-to-wall junction (dam corners) were missing. The framing at the threshold showed mold and water damage.
Because the walls above that row were sound, this stayed a targeted repair. We dried the area, treated the exposed surfaces with KILZ, formed a new pre-slope, installed a new liner, floated the upper mortar layer and finished the floor in mosaic tile. The bench and the wall transitions in the repaired section were waterproofed with RedGard liquid membrane with reinforcing tape in the corners, and the wall tile was reset.
Commerce City: a 1990s liner with no pre-slope, and the floor under it
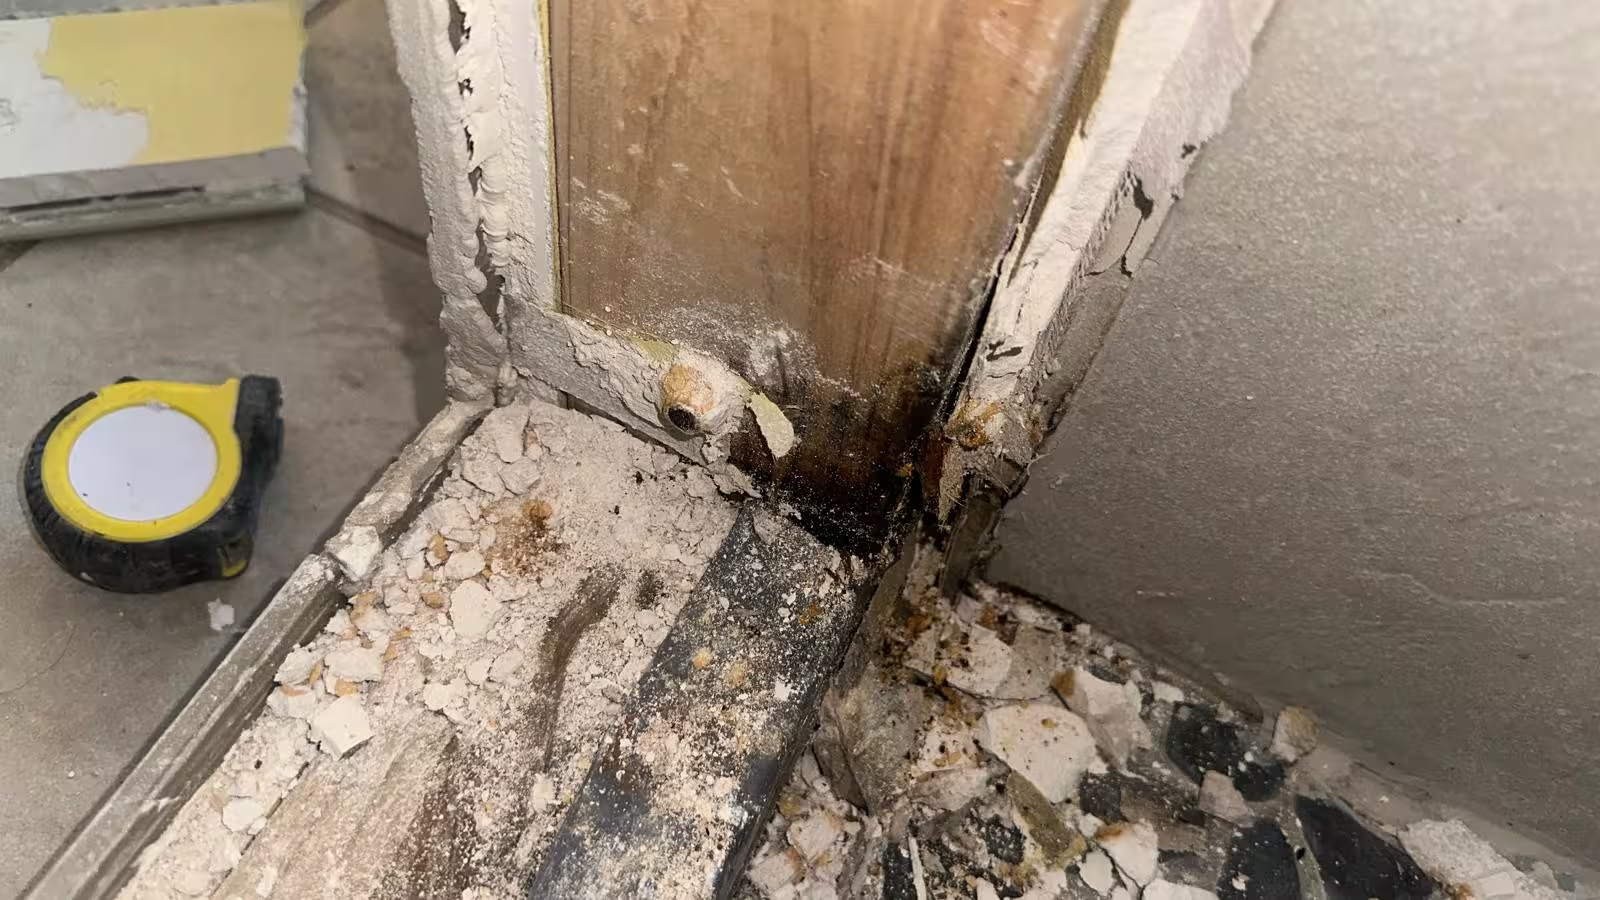
Second-floor shower. The first sign was small water stains on the living-room ceiling directly below. Our moisture inspection and the demolition that followed found that the original 1990s-era installation had used an inadequate vinyl liner with an improper drain connection and no pre-slope mortar bed, so water pooled against the liner seams until the material deteriorated. By then the plywood subfloor was saturated and falling apart, the floor joists showed early rot, and the ceiling drywall below was saturated, sagging and growing mold. The recessed lighting in that ceiling had to be checked by an electrician.
There was no partial version of this repair. Everything came out to the studs and joists. The structure was dried with dehumidifiers and air movers and checked with moisture meters, the subfloor was replaced with 3/4-inch plywood, the joists were sistered, and the pan was rebuilt as a traditional mortar-bed system: pre-slope, PVC liner run up the walls with folded corners, flood test, then the top bed. The walls and curb got a liquid-applied membrane, and the shower was finished in natural stone with a pebble floor and movement joints at the transitions.
Elizabeth: a liquid membrane on bare plywood, built in 2007
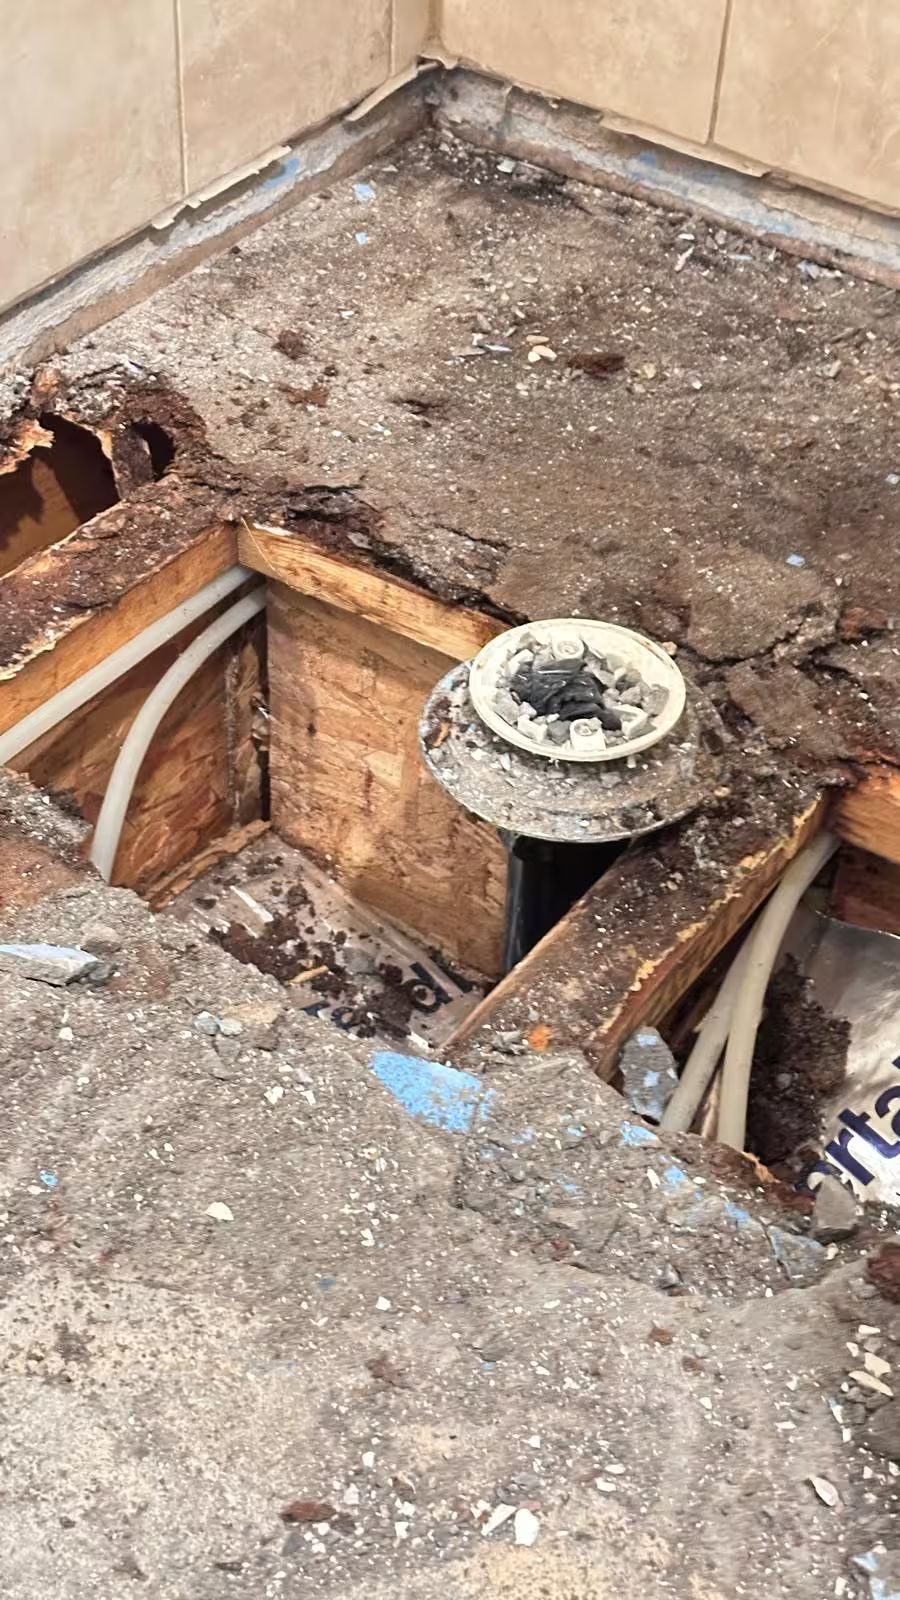
Mold appeared on the ceiling below the second-floor bathroom and spread to adjacent walls. The shower was built in 2007. When we opened the floor, we found a liquid-applied waterproofing membrane that had been put directly on the plywood subfloor and had failed outright. The mortar bed crumbled as it came out, the plywood underneath was soft and spongy and in places gone, and the joists showed early rot.
We cut out and replaced the damaged plywood with new OSB, inspected and treated the joists, then built the pan the traditional way: a pre-slope at 1/4 inch per foot, a 40-mil PVC liner with the corners folded rather than cut and run well above the curb, silicone at the drain with the weep holes kept open, a flood test and inspection, and a final mortar bed with pea gravel around the drain before a hexagon mosaic floor that works with the existing wall tile.
Arvada: a corner joint that leaked for years
An older tiled shower with a persistent leak, handled as an insurance-related reconstruction. On the first visit the signs were already on the surface: tiles loose, sections failing, and water getting through a corner joint in the tile assembly. Demolition showed significant water intrusion behind the tile, rotted wood in the subfloor area and damage to sections of the 2x4 framing. The project page does not pin the original pan failure to one detail, and neither will we; the age of the shower and the leaking corner are what is documented.
We replaced the compromised plywood, cut out and rebuilt the damaged framing, and built a custom liner-based pan with a pre-slope shaped to the footprint. The shower was finished with 12-by-24 wall tile, a mosaic floor and a recessed niche.
Aurora: the subfloor around the drain
Water had been escaping this shower long enough to soak the subfloor around the drain and rot the framing under the adjoining tub deck, and none of it was visible from the finished side. We stripped the lower wall tile and the flooring to expose the subfloor and the drain line. Around the drain the plywood was saturated and delaminating. Our page lists the usual paths for a slow leak like this, a cracked grout joint, a failed pan connection, a gap where caulk should have been, without naming which one it was, so we leave it there. The rebuild went framing, subfloor, cement substrate, membrane, and only then a new white shower base, tile walls and a tiled bench.
The one we caught before the tile went on
Not a demolition, but it belongs here because it shows the same mistakes before anything hides them. A Denver-area homeowner asked us to look at a pan another contractor had just built. The liner's inside corners had been cut rather than folded, the adhesive work at the folds was missing or incomplete, and the clamping drain was not assembled correctly. We put a test plug in the drain and poured in roughly half a bucket of water. It came out from under the pan almost immediately. The project stopped there, before the mortar and tile, which is the cheapest point at which any of the showers above could have been caught.
The six at a glance
| Shower | First symptom | What demolition exposed | Cause, as documented | Fix |
|---|---|---|---|---|
| Denver (2nd floor, about 1 year old) | Water through the ceiling below after 3 or 4 uses | Screws through the PVC liner in one corner; liner fastened improperly; minor framing rot; saturated ceiling | Fasteners through the liner below the flood level; no sign of a flood test | Targeted: 4 rows of wall tile off, new liner and drain seal, flood test, new bed and floor |
| DTC | Leaks on the ceiling below | Leaking base; screw damage; dam corners missing; mold on threshold framing | Punctures and missing corner treatment | Targeted: 1 row off, dry and treat, new pre-slope, liner, bed, mosaic floor, RedGard at bench and transitions |
| Commerce City (2nd floor, 1990s) | Small stains on the living-room ceiling | Deteriorated vinyl liner; rotted subfloor; early joist rot; saturated, moldy ceiling below | No pre-slope, so water pooled against the seams; improper drain connection | Full rebuild to studs and joists; new subfloor; sistered joists; mortar-bed pan with PVC liner; flood test |
| Elizabeth (2nd floor, built 2007) | Mold on the ceiling below and adjacent walls | Failed liquid membrane on bare plywood; crumbling bed; rotted subfloor; early joist rot | Liquid membrane applied directly to the subfloor, inadequate coverage | New OSB subfloor; pre-slope; PVC liner, folded corners; flood test and inspection; mosaic floor |
| Arvada (older shower) | Persistent leak; loose and failing tile | Water behind the tile; rotted subfloor; damaged 2x4 framing | Water through a corner joint of an aged assembly (not pinned further) | Full rebuild: plywood and framing replaced; custom liner pan; 12x24 walls, mosaic floor |
| Aurora | Not visible from the finished side | Saturated, delaminating subfloor around the drain; rotted framing under the tub deck | Slow leak; path not pinned on the record | Framing and subfloor rebuilt; substrate; membrane; new base; tile |
The patterns, and the rule each one breaks
Line the findings up and they stop looking like bad luck. Each failure below maps to a specific requirement. We distinguish the source: the model building code (the IRC, which Denver-metro jurisdictions adopt in different editions with amendments), the liner manufacturer's instructions (Oatey, whose PVC liner is what we and many installers use), and trade or professional guidance.
| Pattern | Seen in | What it breaks | Source |
|---|---|---|---|
| Screws or nails through the liner near the floor | Denver, DTC | The liner may not be nailed or perforated at any point less than 1 inch above the finished threshold. The manufacturer goes further: no nails or screws lower than 4 inches above the flood rim, staples only in the top half inch. | IRC P2709.3; Oatey |
| No pre-slope under the liner | Commerce City | Lining materials must be sloped 1/4 unit in 12 to the weep holes in the subdrain. A flat liner leaves the water that gets through the tile with nowhere to go, and the bed above it stays wet. | IRC P2709.3; Fine Homebuilding |
| Cut inside corners, missing dam corners | DTC, the inspection | The lining must extend at least 2 inches around the rough jambs and above the threshold, which a cut corner cannot do. The manufacturer's instruction is to fold inside corners, not cut them, and to use preformed dam corners where a cut is unavoidable at the curb. | IRC P2709.2; Oatey |
| Drain not sealed or assembled correctly | Commerce City, the inspection (and the compromised seal in Denver) | A flanged drain with a clamping ring must make a watertight connection to the lining, with weep holes into the drain. Silicone goes around the inner flange before the ring is tightened, and must not block the weep holes. | IRC P2709.4; Oatey guide |
| Liquid membrane applied directly to plywood, incomplete coverage | Elizabeth | Liquid-applied, bonded waterproofing is permitted only if it meets ANSI A118.10 and is applied per the manufacturer's instructions. Thin spots and gaps cannot be verified once it is covered. | IRC P2709.2.4 |
| No flood test | Denver (no evidence of one); the inspection (would have failed one) | The completed liner must be tested: drain plugged, filled to at least 2 inches at the threshold, held at least 15 minutes with no evidence of leakage. The manufacturer recommends longer. | IRC P2503.6; Oatey |
| An old liner or an old corner joint that finally gave out | Commerce City, Arvada | Not a rule broken on day one, but the same physics: tile and grout are not waterproof, so the liner is doing the work every day. When it stops, the water goes into the wood. | Fine Homebuilding |
One pattern is not in the table because it is in every row: the first symptom was not in the shower. Five of the six homeowners found out from the ceiling below. That is why regrouting or recaulking never had a chance in any of these cases; see Why New Grout Won't Fix a Leaking Shower.
Why the damage was so much bigger than the leak
The hole in the Denver liner was a few screw heads wide. The leak in Elizabeth was a membrane that was too thin in places. Neither sounds like a reason to replace a subfloor. The reason is time. The EPA's guidance for any wet building material is that it must be dried within 24 to 48 hours to avoid mold growth. A shower pan leak wets the wood again every morning, in a closed cavity with no airflow, and nobody knows until the ceiling shows it. By then the question is not whether the wood can dry but how much of it is still wood.
That is also why the fix in four of the six showers included structural work, and why we cut back to sound, dry wood instead of drying in place. In Commerce City and Elizabeth the subfloor was replaced and the joists were sistered or treated; in Arvada and Aurora the plywood and sections of framing were rebuilt. Tim Carter's advice to homeowners is the same as ours: confirm the studs and subfloor are dry and sound before anything is closed back up. Denver is the exception that proves it. The leak was caught after a handful of showers, the rot was minor, and treating the wood was enough. Speed, not the size of the hole, decided the scope.
The other half of the answer is that water does not stay where it enters. It follows the slope of the subfloor, soaks along the bottom plates, and comes out at the lowest point: the ceiling below, or the framing under an adjoining tub deck in Aurora. Opening the shower is how we find the entry point. Opening the ceiling or the adjacent floor is how we find out where it went.
What we do differently on the rebuild
Nothing in the fixes above is exotic. They are the ordinary sequence, done in order, with the two or three details the original installers skipped. Our practice on every shower we build or rebuild is the same:
- A code-listed membrane. Either a PVC liner meeting ASTM D4551 with folded corners, dam corners at the curb and no fasteners near the floor, or a bonded membrane meeting ANSI A118.10 applied to the manufacturer's coverage, over a proper substrate rather than bare plywood.
- A sloped base under the membrane. The pre-slope that Commerce City never had, so water that reaches the liner moves to the weep holes instead of sitting in the bed.
- A flood test before tile. Plugged, filled, held, and checked from below when there is a below. On the Denver job we left the ceiling open for exactly that reason.
- Dry, sound structure first. Wet framing and subfloor come out or dry out before a new pan goes in. The EPA's 24-to-48-hour window has usually passed by the time we arrive, so "out" is more common than "dry."
- The smallest opening that answers the question. Denver and DTC kept most of their wall tile. Commerce City, Elizabeth and Arvada could not. The decision follows the findings, not the other way around; see Shower Repair vs. Complete Rebuild.
Stain on the ceiling under a shower? We find the entry point with a flood test and the smallest opening that tells us what we need, document what we find as each layer comes off, and quote the repair or rebuild that the findings support.
Frequently asked questions
Does every leaking shower need this much demolition?
No. Two of the six, Denver and DTC, were repaired under the existing wall tile with one to four rows removed. What decided it was the condition of the walls above the cut and how far the rot had spread, not the age of the shower. The three full rebuilds all had rotted subfloor and framing damage that could not be reached any other way.
Can the wet wood just dry out once the shower is open?
Sometimes, if the leak is caught early, as in Denver. The EPA's rule for wet materials is drying within 24 to 48 hours. Wood that has been wet for months, which describes Commerce City, Elizabeth, Arvada and Aurora, has usually delaminated, softened or started to rot, and the sound answer is to cut back to dry wood and rebuild.
How can I tell which of these my shower is before anyone opens it?
You cannot fully, and neither can we. A flood test tells us whether the pan holds; spraying the walls, niche and curb separately narrows a wall leak; a look from below, through a basement ceiling or a small access opening, often shows the corner. The findings in this article all came after that diagnosis, not instead of it.
My shower is new and already leaking. Is that normal settling?
No. A new shower that leaks is a shower with an installation defect, like the Denver pan with screws through the liner or the inspected pan with cut corners. Both would have failed a 15-minute flood test before the tile went on. Stop using it, document the ceiling, and get the pan diagnosed before anyone proposes a surface fix.
Sources and notes
- 2021 International Residential Code, Section P2709 Shower Receptors (UpCodes) — lining required; extends 2 inches above the threshold and around the jambs; sloped 1/4 in 12 to the weep holes; not nailed or perforated less than 1 inch above the finished threshold; flanged drain with clamping ring and weep holes; liquid-applied materials must meet ANSI A118.10 and follow the manufacturer's instructions.
- 2021 International Residential Code, Section P2503.6 Shower Liner Test (UpCodes) — drain plugged, filled to at least 2 inches at the threshold, held at least 15 minutes with no evidence of leakage.
- U.S. EPA, Mold Course Chapter 2 — wet materials must be dried within 24 to 48 hours to avoid mold growth.
- Oatey, Shower Installation and Waterproofing: Tips and Common Errors (July 26, 2021) — installers incorrectly cut liner corners instead of folding them; no nails or screws lower than four inches above the flood rim; staples only in the top half inch; many installers skip the pre-slope; excess silicone can block the weep holes; minimum four-hour flood test, local code may differ.
- Oatey, How to Install a Shower Pan Liner (October 17, 2022) — pre-slope poured at 1/4 inch per foot; silicone around the inner flange before the clamping ring; fill to curb height for the test and check the ceiling below on an upper floor.
- Tyler Grace, Fine Homebuilding: The Right Way to Install Shower Pan Liners — a liner that is not pitched to the weep holes leaves water with nowhere to go; a saturated mortar bed weakens and molds; tile and grout are not waterproof.
- Tim Carter, Ask the Builder: Leaking Shower Pan – Membrane Failure — a pan leaks because the membrane has a hole, was installed wrong, or separated from the drain; drywall is not a long-term tile backer; confirm studs and subfloor are dry before closing.
- South Denver Tile Experts: Leaking shower and pan repair, Denver (project record)
- South Denver Tile Experts: DTC shower pan repair (project record)
- South Denver Tile Experts: Commerce City shower pan repair (project record)
- South Denver Tile Experts: Elizabeth shower pan repair (project record)
- South Denver Tile Experts: Arvada shower leak repair and rebuild (project record)
- South Denver Tile Experts: Aurora shower and bathroom leak repair (project record)
- South Denver Tile Experts: Denver shower pan inspection (project record)
Code references are to the model International Residential Code (IRC). Denver, Aurora, Parker and other metro jurisdictions adopt different editions with local amendments, so confirm requirements with your building division before relying on them. Last reviewed October 26, 2026.